

 Split Screen Masking is available in the Creator tier and Pro tier.
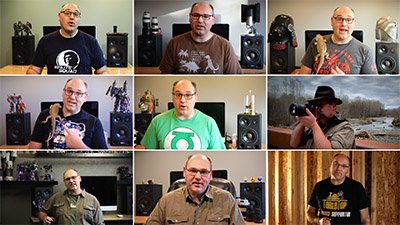
Provides a quick way to set up various split screen layouts. Numerous screen layout presets are included which can then be further customized.

- Preset: More than 25 split screen layouts are provided as presets. Choose any preset from this menu to apply it to your timeline as a starting point, and you can then link your images or videos to each region of the split screen.
Cuts
Cuts are the lines which split your screen into separate regions or images.
- Cut Type: Select how the frame will be divided
- Local: The cut divides the entire frame, passing through the Position point in a straight line.
- Radial: The Position Point is used as a hub, and all cuts radiate outward from that point.
- Number of Cuts: Defines how many cuts are present in the frame. Each cut will have its own controls below to fine tune its exact position.
- View Cut Regions: Enabling this option adjusts the brightness of each region, based on the order they are created in, to make it easier to see each region separately.
- Cut #: A numeric listing will be added for each Cut contained in the effect. For example, if Number of Cuts is set to 3, then there will be three sets of Cut controls, for controlling the positioning of each cut.
- Position: Sets the origin point of the cut. The cut will pass through this line at the angle selected in the Direction property below. If the Cut Type is set to Radial, this property is not displayed.
- Direction: Select an angle at which the cut will pass through the Position point.
Input Layers/Frames
Here is where you select the specific layer or media which will be displayed within each region created by the split screen. A separate set of Input controls will be listed for each region created by the effect, so the total number of inputs will be one greater than the number of cuts.
- Layer: Choose any timeline layer to display its contents within the region.
- Frame Shift: You can adjust the timing of the source layer. At 0, the source frame shown matches the timecode of the split screen layer. Negative values pull the source frame from earlier on the timeline, by the number of frames you choose. Positive values pull the source from later on the timeline, by the number of frames you choose.
- Translate: Shifts the position of the source layer within the region, on the X axis (horizontal) and Y axis (vertical).
- Scale: Adjusts the size of the source image within the region, to control what area of the source is visible.
- Rotation: Spins the source image within the region.
Border
These controls alter the appearance of the lines which divide one region from another.
- Width: Sets the width of the dividing line, in pixels. Set this value to 0.0 to remove the dividing lines entirely.
- Color: Choose a color for the borders. You can use the eyedropper to choose a color from the layer, or click the swatch to open a color picker and choose any color you prefer. You can also manually enter the color values for the red, green, and blue channels.
- Alpha: Defines how opaque the dividing lines are. At 0.00 the waves will be completely transparent, and at 1.00 they will be completely opaque.