
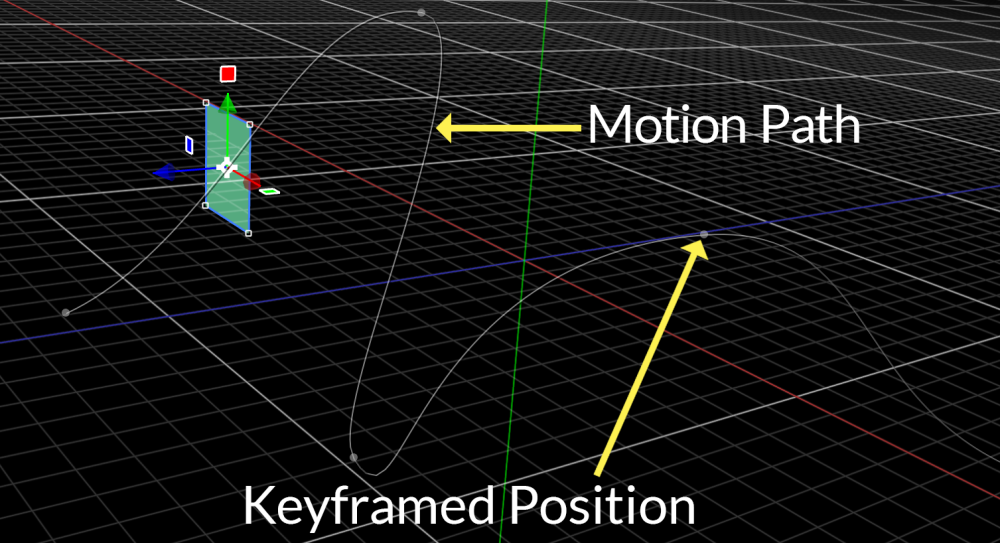
The viewer uses spatial controls to show animation, or the movement of layers over time. The motion path control consists of a gray line approximating the layer or clip’s movement over time. with icons for any keyframed positions.
![]() Show Motion Paths: Motion paths can be toggled on or off in the viewer using the Show Motion Path button.
Show Motion Paths: Motion paths can be toggled on or off in the viewer using the Show Motion Path button.
Layers and clips can have animation as a result of:
- Keyframing the Position property or other Transform controls.
- Applying Behavior Effects.
- Parenting a layer to another layer which contains either or both of the above.
Position Keyframes
As you create keyframes for your animation they will be represented in the Viewer as small gray dots. Selecting a keyframe on the timeline or in the viewer highlights it in blue, and displays any bezier handles attached to that keyframe. Keyframes can be edited directly in the viewer by dragging them to a new position. The curves between keyframes can be edited using the bezier handles attached to each keyframe.
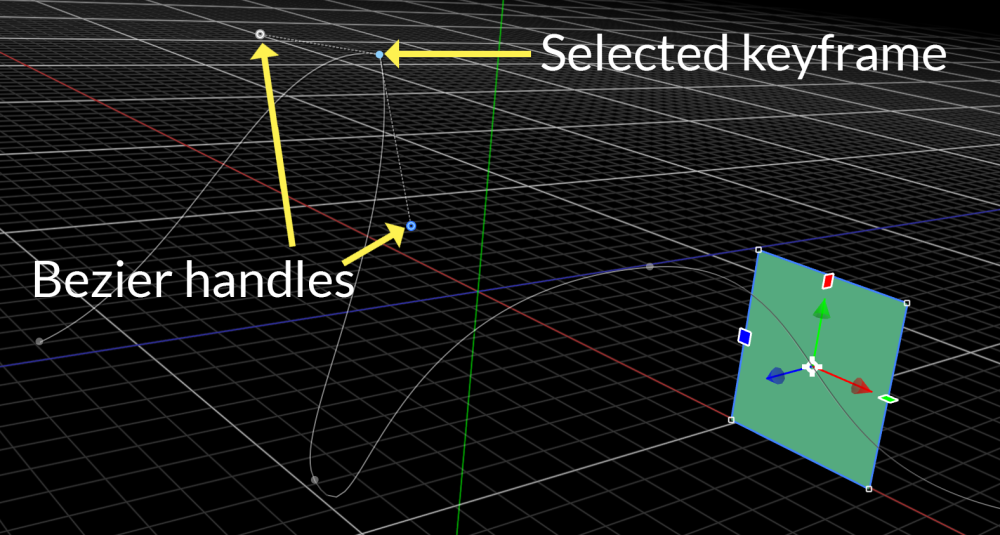
Bezier Handles
Bezier curves provide a simple and efficient way of defining and editing paths. Keyframes serve as control points which define the path. Bezier handles at each keyframe control the angle at which the path intersects that control point, and how far it maintains that angle before beginning to curve toward the next control point.
- Bezier Handle Angle: The position of the bezier handle defines the angle at which the path intersects with the control point. If both bezier handles form a straight line, the path will form a smooth curve through the control point. If the bezier handles form an angle, then there will be a corner in the path at the control point position.
- Bezier Handle Length: The distance between the control point and the bezier handle defines how quickly the path will start curving. Extending the handle will cause the path to continue straight for a greater distance, before the curve toward the next control point begins.
Interpolation
When working with keyframed positioning, HitFilm automatically determines the correct values for all frames between your keyframes. This process is called Interpolation. The interpolation options allow you to decide how the interpolation is handled, for greater control over the results. You can control interpolation over time (temporal) and through space (spatial) independently. Right clicking on a keyframe displays both the temporal and spatial interpolation options. Further information on temporal controls can be found in the chapter Animating with Keyframes.
- Temporal interpolation: Temporal interpolation controls the timing of the motion between keyframes. It does not alter the motion path, only the timing of how the path is followed.
- Linear: Interpolates from one keyframe to the next without any smoothing. The value changes the same amount on each frame.
- Constant: Each keyframe value is held as a constant until the next one is reached. There is no interpolation.
- Smooth: As the keyframe approaches, the size of the value change per frame will get smaller, resulting in a gradual adjustment into and out of the keyframe.
- Smooth In: The smoothing only occurs on the left of the keyframe.
- Smooth Out: The smoothing only occurs on the right of the keyframe.
- Manual Bezier: The keyframe is smoothed, but you retain manual control over the amount of smoothing that is applied.
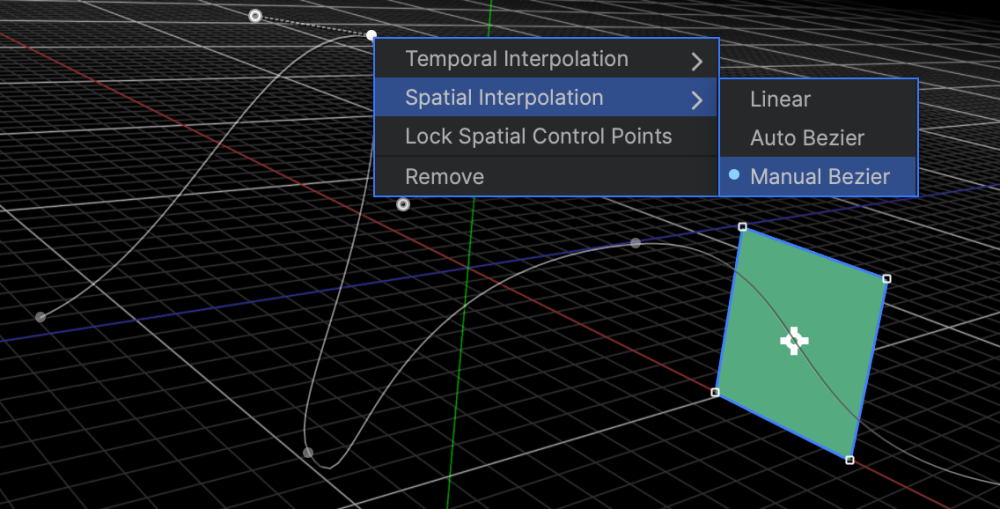
- Spatial Interpolation: Spatial interpolation edits the path shape, to control the smoothness of the movement between keyframes.
- Linear: creates abrupt changes of direction without any curvature. The trajectory between each keyframe will be a straight line, with hard angles at keyframes.
- Auto Bezier: creates a smooth curve automatically at keyframes, so that the trajectory from the previous keyframe blends smoothly into the trajectory to the following keyframe. Bezier control handles are displayed on the keyframe, and adjusting these will automatically switch the interpolation to manual bezier.
- Manual Bezier allows you to define the curve of animation yourself by manipulating the bezier handles. Keyframes have two handles, which can be adjusted to change the angle of curve.
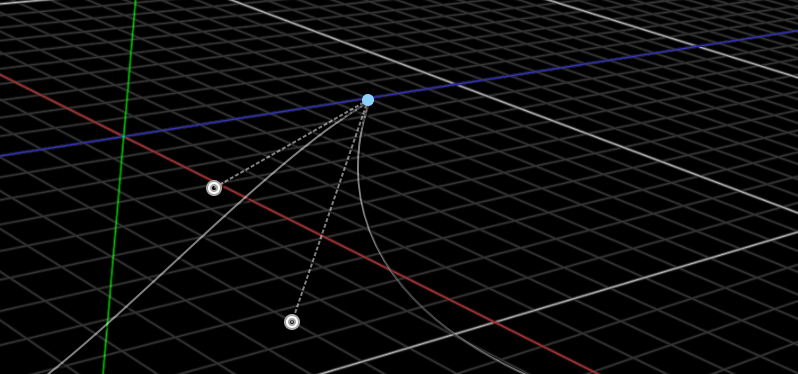
- Lock Spatial Control Points: Controls how the bezier handle angles on opposite sides of a control point interact. In both cases, the steepness of the preceding or ensuing curve can be adjusted separately by stretching the length of each handle.
- Enabled: When Lock Spatial Control Points is enabled, both control points will move at the same time, ensuring that the curve going into the keyframe flows smoothly into the exit curve.
![]()
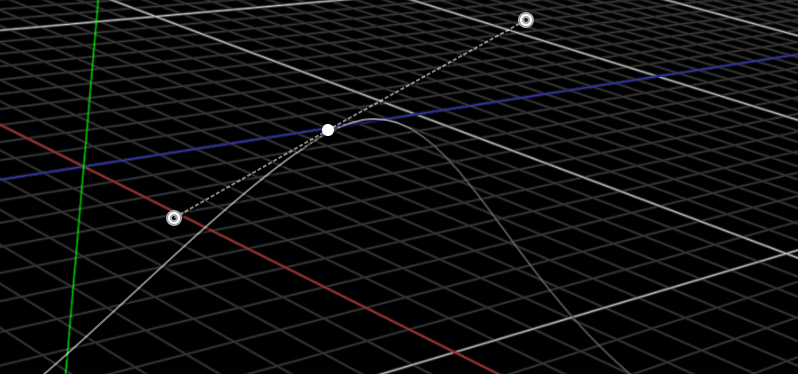
- Disabled: When Lock Spatial Control Points is disabled, you can create fully arbitrary angles and corners in the motion path.
![]()
- Enabled: When Lock Spatial Control Points is enabled, both control points will move at the same time, ensuring that the curve going into the keyframe flows smoothly into the exit curve.
By combining spatial interpolation with the temporal controls detailed in The Value Graph you can create highly detailed animations.
Behavior Effects
Behavior effects alter the movement of clips or layers without keyframes. As a result, sometimes the actual position of the layer will not align with the keyframed motion path. When behavior effects are in use, HitFilm will render the final motion path as a green line, separately from the gray keyframed position path. This path factors in both the keyframed position data and the behavior effect settings.
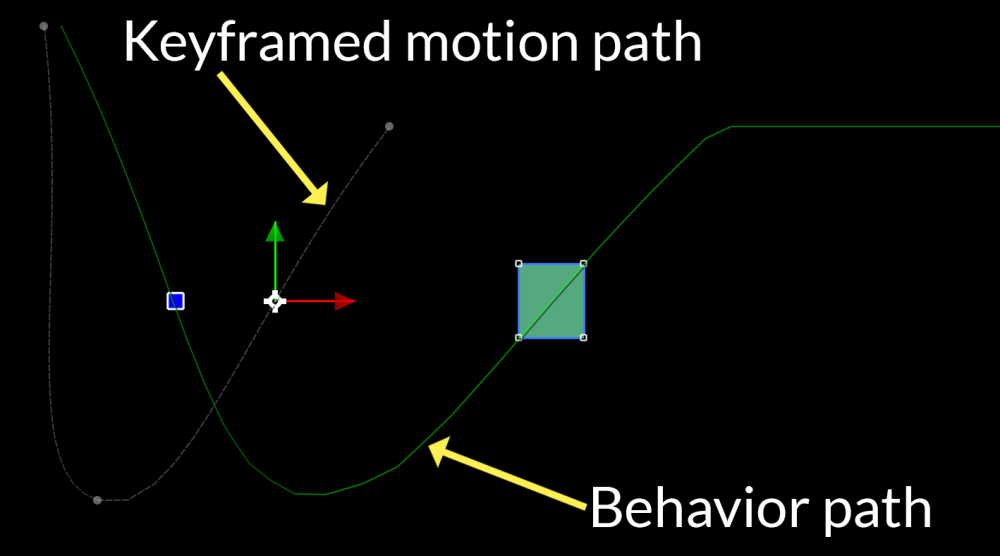
The behavior path is calculated by applying the behavior settings to the keyframed position data. The behavior path cannot be directly edited, but there are a few things to keep in mind when working with behaviors.
- Editing the behavior settings in the control panel will alter the behavior path.
- Editing the keyframe positions will alter the final behavior path.
- The behavior path is for reference and cannot be edited directly.
- The origin control widget follows the keyframe path, not the behavior path. The origin point always indicates the current keyframed position of the clip or layer.