
The Voiceover Recorder in HitFilm allows you to create audio files from directly within the software. This is designed for creating real-time voiceovers while your timeline plays, but can be used for recording whatever you wish.
There are two ways to create voiceovers:
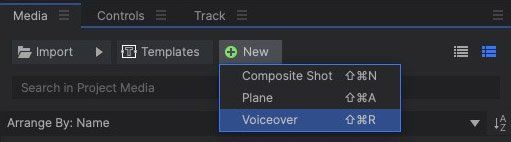
- Media Panel: In the Media panel, open the New menu and select Voiceover. The voiceover dialog will open.
- File Menu: In the File Menu, select Record > Voiceover. The voiceover dialog will open.
All voiceovers you have created will be listed in the Media panel, where they can be accessed exactly like any other audio file. The audio files themselves are saved to your hard drive, in a location you choose through the Voiceover Options panel.
Creating Voiceovers
- In the Media panel, open the New menu and select Voiceover.
- The Record Voiceover dialog will appear.
![]()
Select your desired settings, including Input Device and Sample Rate. - Set the Input Volume as high as you can without the red light illuminating.
- Click the red button to begin recording. A 3 second lead-in will count down, after which the current timeline will begin playing, and recording will begin.
- When you are finished recording, press the red button again to end the recording session. The new Voiceover asset will be added to the media panel, and will appear on the current timeline.
- Close the Record Voiceover dialog to return to the HitFilm interface, or click the button again to record another voiceover starting at the current playhead location.
Voiceover Controls
The controls for creating voiceovers are found in the Record Voiceover dialog, which is accessed through the New > Voiceover menu option in the Media panel.

- Input Device: Select your desired microphone or input device from this menu, which will list all available input devices connected to your computer.
- Sample Rate: Select your desired sample rate. By default the sample rate of the current timeline will be selected. The options which are available in this menu will vary based on the selected input device.
- Input Volume: Adjust the volume at which your voiceover is recorded. You can use the Levels Meter next to the Record button to evaluate the levels prior to recording, and set the volume so that the meter reaches to top of the green, but does not go into the red.
- Mute Playback: Enable this option to mute the playback of all audio currently on the timeline, while the voiceover is recording.
- Record Button: Toggle this button On to begin recording, and toggle it Off to end recording.
- Levels Meter: This meter gives you a quick readout of the levels being received from the current input device. Based on this meter, adjust the Input Volume so that it does not hit the red at the top of the meter.
- Record Time: The duration of your current recording is displayed here, at the bottom of the dialog.
Voiceover File Management
The location to which your created voiceover files will be saved is controlled through the Voiceover Options panel. To edit the location, do the following:
- Go to File > Options, then click the Voiceover tab.
- Click the Select Folder button next to the Voiceover File Path property, and navigate to the folder where you want future voiceovers to be saved.