
 Puppet is available in the Pro tier.
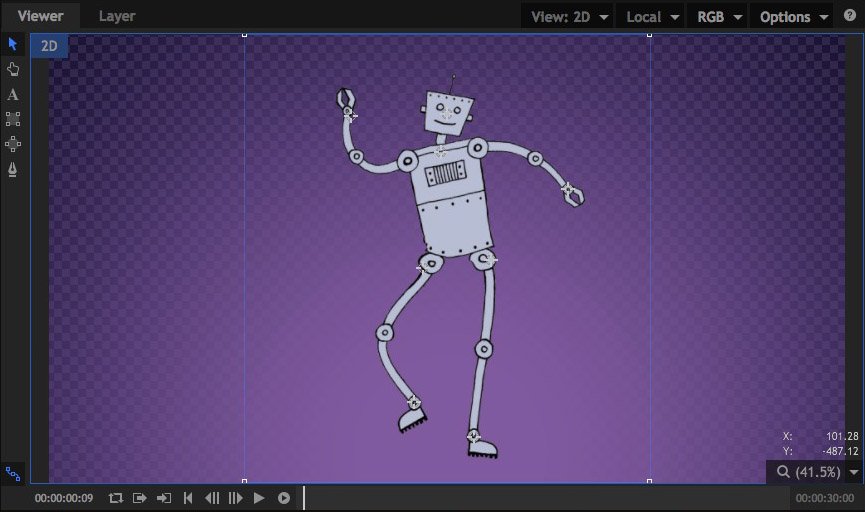
The Puppet tool allows you to set up specific control points within your layer, then animate the position of each point to move or distort the layer’s contents.
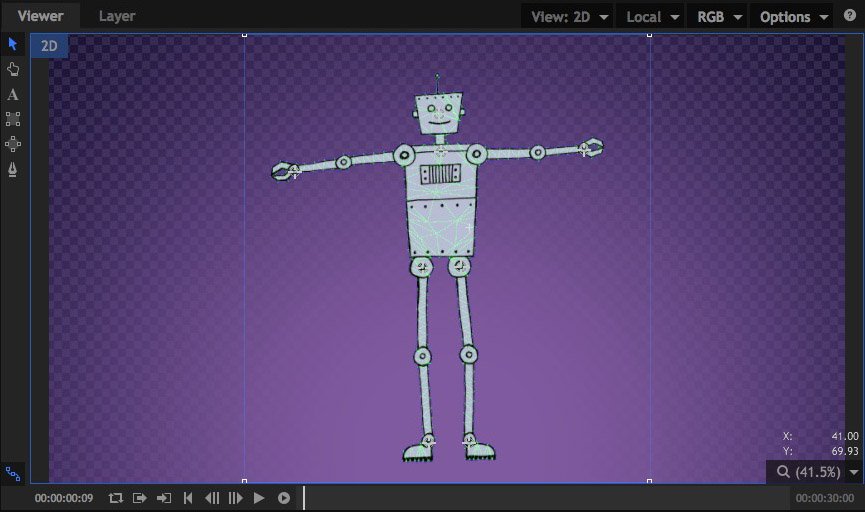
Using the Puppet tool
- Add the puppet effect to your layer.
- Click in the Viewer to add new control points. A new control point will be added at each location you click.
- Drag any existing point to a new location to distort the image beneath it.
- If you wish to reposition a point without distorting the image, hold Shift while you drag the point. While shift is held, the mesh that is used to generate the distortion will be visible, and points can be repositioned without altering the distortion.
Controls
- Mode: The Mode changes automatically as you edit the effect in the Viewer. If you want to manually force a specific mode, you can do so here.
- Animate: In Animate Mode the control points are pined to the layer, and moving any control point will distort the layer accordingly. Note that keyframing must still be enabled for individual control point properties in order to change the values over time.
- Edit: In Edit mode you can add points and change the position of existing points without affecting the source layer. The mesh is overlaid onto your image when Edit mode is active.
When Edit mode is selected, some additional controls appear, which allow you to fine tune the mesh used to distort the image.
- Expansion: Expands the boundaries of the mesh beyond the borders of the layer. If you get unwanted creasing along the edges of your layer when it is distorted, try increasing the expansion to smooth out the edges.
- Tessellation: Controls the size of the triangles that make up the mesh. Increasing tessellation creates more faces, for smoother curves in the distortion. Increased tessellation may also increase processing time.
- Rigidity Map: You can use a map to add rigidity to certain areas of the layer, and further control how it is distorted.
Control Points
You can create as many control points as necessary within the Puppet tool. Control points are numbered in the order in which they are created, and each control point will have two controls:
- Position: Identifies the exact position of the control point at the current frame, on the X and Y axes.
- Z-Order: Controls the depth order of the points. If your points are moved so that parts of the layer overlap, the Z order determines which point is in front. In overlapping areas, point with higher Z-order values will be rendered in front of points with lower values.