
Preset Browser Tab
The Preset Browser is where you can browser the library of the installed flare presets, and select a preset for use or for further editing. There are over 60 presets you can choose from.

On the left, the Preview pane displays your currently selected preset, including any customizations you have made. On the right, you can scroll through the library of presets to make a selection. If you know the name of the preset you want, you can use the search box to locate it.
- Apply: Click the Apply button at the bottom right to apply your changes to the Custom Light Flares effect, close the Preset Browser window and return to the HitFilm interface
- Cancel: Click the Cancel button at the bottom left of the window to discard your changes and return to the HitFilm Interface.
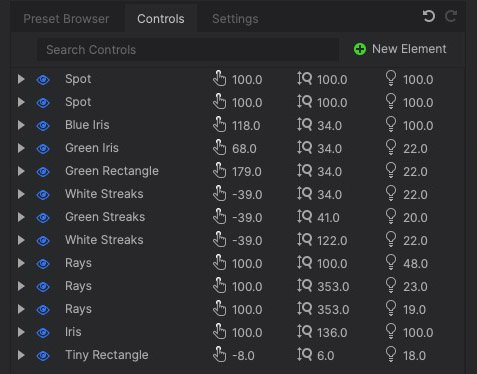
Controls Tab
The Controls tab provides access to a deeper level of control, allowing you to modify each individual element of the lens flare effect. Each element is listed here, with top-level controls to alter its basic appearance. Each element can also be opened to access the root-level controls, for full customization.
![]() New Element: Click the New Element button to add another element to the flare. This opens a menu with four options:
New Element: Click the New Element button to add another element to the flare. This opens a menu with four options:
- Spot: A Spot element is a bright point within your flare effect. Spots are most commonly used in the hot spot of the flare.
- Rays: A Rays element adds radial lines which emanate outward from the hot spot. The size, number, and appearance of the rays can be edited.
- Iris: An Iris element replicates the appearance of the flare reflecting off of an internal lens component, in the shape of the camera’s iris. At its most basic, it is a geometric shape, but in practical application this is usually asymmetrically distorted.
- Element Preset…: This option opens a menu of preconfigured elements. It can save time to select an element preset that is close to what you want, rather than starting from scratch every time.
Individual Element Controls
Each element in the list has controls for quickly modifying its appearance.
![]() Visibility: Click the eye to toggle visibility for any element.
Visibility: Click the eye to toggle visibility for any element.
- Double-click this toggle for any element to toggle all elements at once.
- Click-drag across multiple visibility toggles to show or hide multiple elements.
![]() Position: This value adjusts the position of the element along the center line of the flare, essentially moving it forward or backward in the preview.
Position: This value adjusts the position of the element along the center line of the flare, essentially moving it forward or backward in the preview.![]() Scale: This value alters the size of the selected element.
Scale: This value alters the size of the selected element.![]() Brightness: This value adjusts the brightness of the selected element.
Brightness: This value adjusts the brightness of the selected element.
Root Level Controls For Each Element
In addition to the individual element controls shown in the Controls tab, each element can be opened to reveal its root controls. These controls vary based on the type of element being edited.
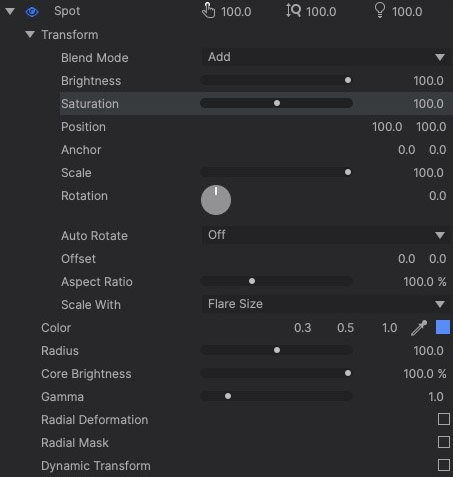
- Spot
![]()
- *See the Spot Elements page for full details on the root level controls for spot elements.
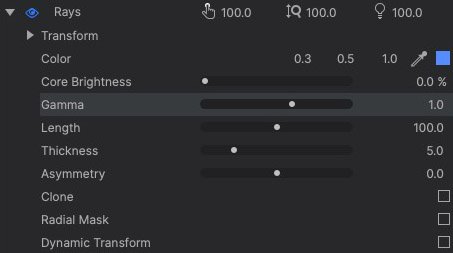
- Rays
![]()
- *See the Rays Elements page for full details on the root level controls for rays elements.
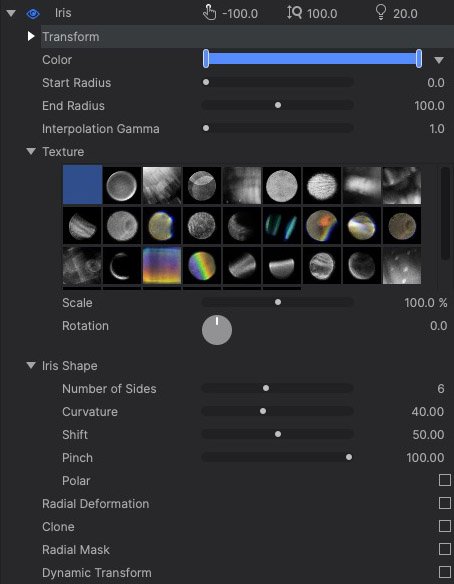
- Iris
![]()
- *See the Iris Elements page for full details on the root level controls for iris elements.
Settings Tab
The Settings tab contains controls used to adjust the appearance of the effect preview, as shown in the preview pane of the preset browser.
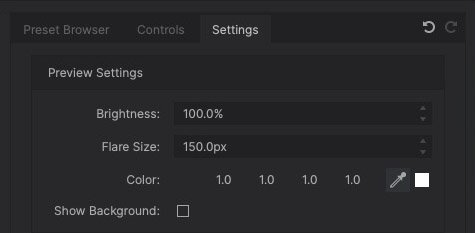
- Brightness: Changes the brightness of the flare in the preview image. This does not alter the appearance of the flare on your timeline.
- Flare Size: Changes the size of the flare in the preview image. This does not alter the appearance of the flare on your timeline.
- Color: Alters the color of the preview image by blending it with the hue of your choice.
- Show Background: Enable this option to render the contents of your timeline in the preview window, if you wish to preview your flare in a more accurate representation of your final shot.