
Although you’ll do most of your sophisticated visual effects work in composite shots, you can still do basic effects work in the editor.
The Effects Library
The Effects Menu, the Effects Panel, and the Insert menu each list the entire library of effects built into HitFilm. The HitFilm Pro tier also supports third-party OpenFX plugins, and if you have any OpenFX plugins installed, they will be listed along with the built-in effects. Transitions and presets are found only in the Effects Panel. For additional information on specific effects, see the Visual Effects chapter.
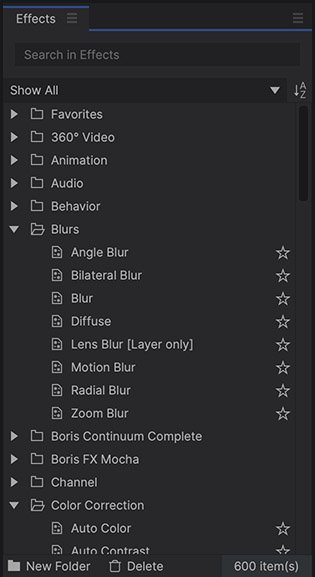
The effects in HitFilm are organized topically into folders. The Effects panel also lists built-in and user-created presets, which can include multiple effects. See the Presets chapter for more information.
Adding Effects
Most effects are used by adding them to a clip on the timeline. There are multiple ways to do this:
- Drag and Drop: Drag an effect from the Effects panel onto a clip, and drop it.
- Double-click: Double-click an effect in the Effects panel to add it to the currently selected clip.
- Effects Menu: Open the Effects menu on the top menubar and select any effect to add it to the currently selected clip.
- Insert Menu: In the Controls panel, click the green plus icon next to Effects to open an Insert menu where you can select effects for use.
- Search: The dynamic search box at the top of the insert menu will automatically update the list as you type, so you can quickly locate the effect you need.
- Pin: At the top right of the insert menu is a pin, which pins the menu open. This allows you to select multiple effects, and apply them all to your layer at once.
Effects Types
There are different kinds of effects available in HitFilm, each of which uses a different icon. The kind of layer or clip to which effects can be applied will depend on the kind of effect being used.
![]() 2D Effects: These effects can be applied to any visual clip, on either the Editor or composite shot timelines.
2D Effects: These effects can be applied to any visual clip, on either the Editor or composite shot timelines.![]() 3D Effects: These effects create their own clip, and cannot be applied to existing clips.
3D Effects: These effects create their own clip, and cannot be applied to existing clips.![]() AE Plugins: Any After Effects plugins you install will use this icon. AE plugins are only supported by the HitFilm Pro tier and must be purchased separately.
AE Plugins: Any After Effects plugins you install will use this icon. AE plugins are only supported by the HitFilm Pro tier and must be purchased separately.![]() Audio Effects: These use the same icon as 2D effects, but can only be applied to clips containing audio.
Audio Effects: These use the same icon as 2D effects, but can only be applied to clips containing audio.![]() Behavior Effects: Behavior effects can be applied to composite shot layers to control their movement.
Behavior Effects: Behavior effects can be applied to composite shot layers to control their movement.![]() Geometry Effects: Geometry effects can be applied to text layers in composite shots, to convert the text to 3D objects.
Geometry Effects: Geometry effects can be applied to text layers in composite shots, to convert the text to 3D objects.![]() OFX Plugins: Third-party OFX plugins installed into HitFilm will use this icon. OFX plugins are only supported in the HitFilm Pro tier and must be purchased separately.
OFX Plugins: Third-party OFX plugins installed into HitFilm will use this icon. OFX plugins are only supported in the HitFilm Pro tier and must be purchased separately.
 2D Effects: These effects can be applied to any visual clip, on either the Editor or composite shot timelines.
 3D Effects: These effects create their own clip, and cannot be applied to existing clips.
 AE Plugins: Any After Effects plugins you install will use this icon. AE plugins are only supported by the HitFilm Pro tier and must be purchased separately.
 Audio Effects: These use the same icon as 2D effects, but can only be applied to clips containing audio.
 Behavior Effects: Behavior effects can be applied to composite shot layers to control their movement.
 Geometry Effects: Geometry effects can be applied to text layers in composite shots, to convert the text to 3D objects.
 OFX Plugins: Third-party OFX plugins installed into HitFilm will use this icon. OFX plugins are only supported in the HitFilm Pro tier and must be purchased separately.
Searching for Effects ![]()

You can search for effects using the Search bar. As you type the list will be instantly updated to display relevant results. You don’t need to get the name exactly right – for example, searching for ‘lens’ will find the ‘light flares’ effect.
You can also filter the list to show specific types of effects using the Show All menu.
Favorite Effects
You can Favorite certain effects that you use frequently, and they will be added to the Favorites folder. Your favorites are managed in the Effects panel.
To add an effect to your favorites:
- Locate the effect in the Effects panel.
- Click the star icon to the right of the effect’s name.
- All effects with a slid star next to them will be included in your favorites, and automatically added to a new Favorites folder.
The favorites folder can then be found in these locations:
- Effects Panel: The Favorites folder will appear at the very top of the folder list in the Effects panel.
- Effects Menu: The Favorites folder will appear above the list of category folders in the Effects menu.
Editing Effects
You can customize the settings contained in an effect in the Controls panel, or on the timeline.
To make changes to an effect, select the relevant clip on the timeline. Its properties will be displayed in the Controls panel, with all applied effects listed in the effects section. You can expand the effects section, and individual effects, to reveal more controls and details.
Clicking once on a property lets you type in a new value. Dragging on a value increases or decreases it. For full details on adjusting properties, see Introducing the Controls Panel.
Transitions
The Effects library also contains transitions that can be used on the Editor timeline. Transitions provide interesting ways to blend from one clip into the next and can only be used on the editor timeline.
You can drag transitions from the Effects panel onto the timeline. Transitions need to be applied to the start or end of a clip, or between two adjacent clips. A green indicator will show where the transition will be placed.
Once you have applied a transition, it can then be selected on the timeline. The transition’s properties can be adjusted in the Controls panel, and its duration can be edited by trimming the transition on the timeline.
Click here for detailed information on the different transitions.