
Conditional statements allow K-Touch to decide to execute a series of actions based on the current state of the control system. When used properly, conditionals are very powerful.
K-Touch supports the following conditional logic statements:
- If
- Else If
- Else
- And
- Or
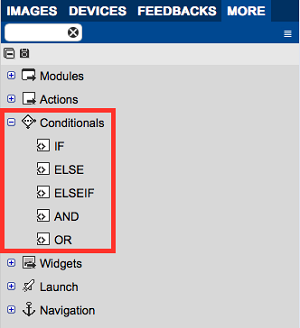
- Locate Conditionals in Builder.
- Under the More tab, find Conditionals. Expand conditionals to expose all the relevant options.
![]()
- Using Conditionals.
All conditionals must start with an IF statement. All other options are add-ons to IF.
IF statements can be dragged to buttons, labels, feedbacks, entrances, and more.
In this example, we drag an IF Statement to a button. Viewing the button macro we see the IF statement.
![]()

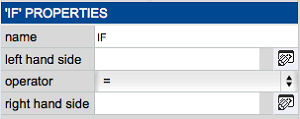
- IF Properties.
- Click on the IF statement to reveal its properties. Fill out the properties to design the IF.
![]()
Name: Name the IF statement
Left-Hand Side: Variable or constant value that indicates the left-hand side of the comparison
Operator: Defines how the left and right side of the operation are compared.
= : equal
!= : not equal
< : less than
<= : less than or equal to
> : greater than
>= : greater than or equal to
Right-Hand Side: Variable or constant value that indicates the right-hand side of the comparison
- Adding Actions to IF.
- For the IF statement to be functional, it must contain actions. To add functionality, drag any command or action to the IF header.
![]()
- After dragging, you see the action added.
![]()

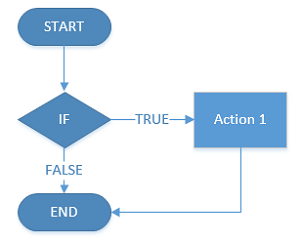
- Understanding IF.
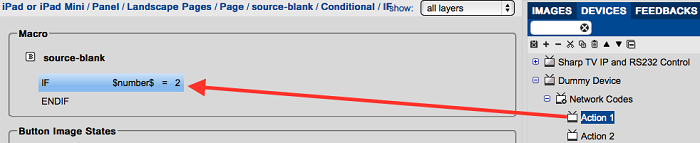
How does this IF statement work? IF the equation is TRUE, the indented action executes. IF the equation is FALSE, the indented action does not execute and the macro continues.
In this example, IF the value of the variable $number$ is equal to 2, then action 1 executes. IF $number$ does not equal 2, action 1 does not execute.
![]()
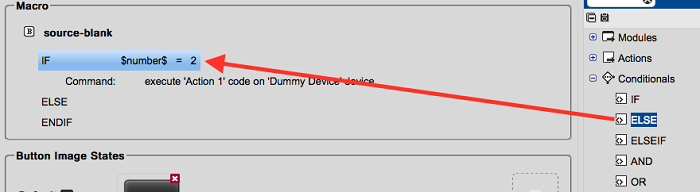
- Adding an ELSE Statement.
- You can add an ELSE statement to this IF. To add this, drag the ELSE action to the IF header.
![]()
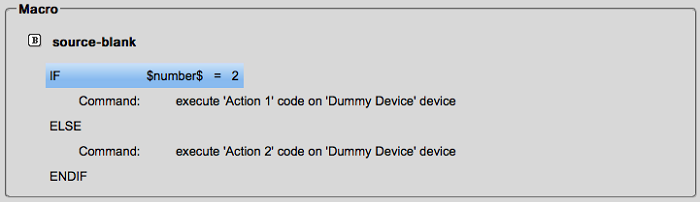
- As with the IF statement, add an action to the ELSE by dragging the action to the ELSE.
![]()
- Understanding ELSE.
The ELSE Statement adds an action (or group of actions) executed when the IF Statement is False.
In this example, IF $number$ equals 2, action 1 is executed and the IF finishes. IF $number$ does not equal 2, the ELSE statement is activated and action 2 is executed.
There is no case where action 1 and action 2 are both executed.
![]()
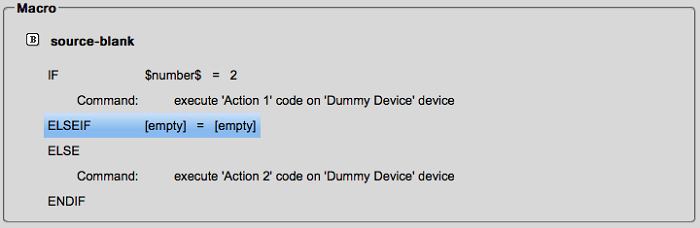
- Adding ELSE IF.
You can add an ELSE IF statement to this conditional. An ELSE IF provides your conditional with another equation to evaluate.
- To add an ELSE IF to your conditional, drag the ELSE IF to the main IF statement.
![]()
Like IF, ELSE IF also contains an equation to be evaluated. This equation has no relation to the main IF statement, however, the equation of ELSE IF is only evaluated if the main IF is FALSE. - Enter an equation and drag an action to the ELSE IF.
![]()
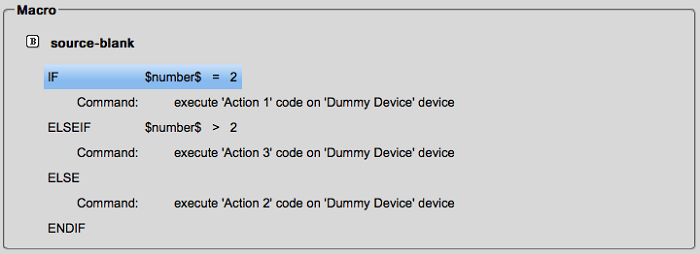
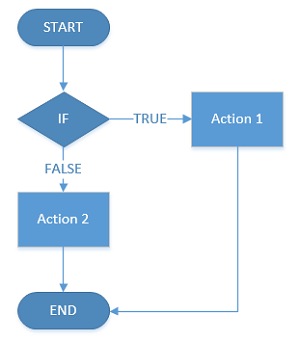
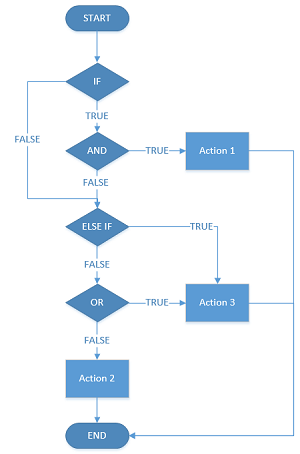
- Understanding ELSE IF.
The following flowchart explains the use of ELSE IF:
![]()
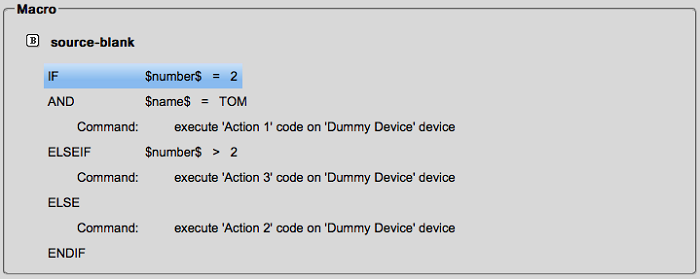
- Adding AND.
An AND statement can be added to any IF or ELSE IF to add an additional equation that must be true for its action to execute.
- To add an AND statement, drag AND to any IF or ELSE IF Statement. You must also add a new equation.
![]()
For action 1 to execute, BOTH the IF equation and the AND equation must be true.
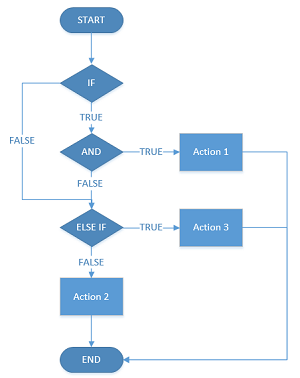
- Understanding AND.
The following flowchart explains the use of AND:
![]()
- Adding OR.
An OR Statement can be added to any IF or ELSE.
- To add an OR statement, drag it to any IF or ELSE IF statement. You must also add a new equation.
![]()
For action 3 to execute, EITHER the ELSE IF equation OR the OR equation must be true. If they are both true, action 3 also executes.

- Understanding OR.
The following flowchart explains the use of OR:
![]()
Copyright © 2025 Kramer
—
Powered by 