
This article will detail how to control Kramer’s VIA Collaboration products from Kramer’s K-Touch control system. This is just an exercise but will show you the core concepts involved in integrating VIA into your custom control system.
- Starting point
![]()
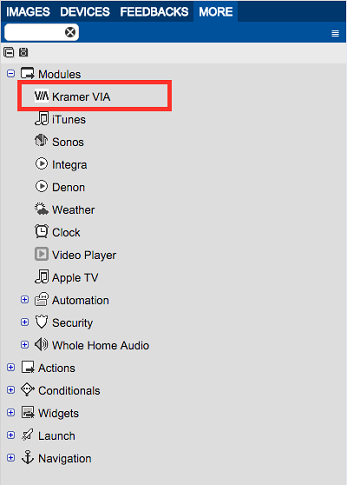
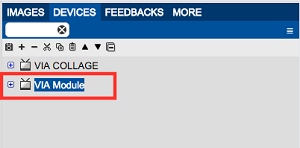
- Find the VIA module
- In the K-Touch builder, under the more tab, open modules and you will find Kramer VIA
![]()
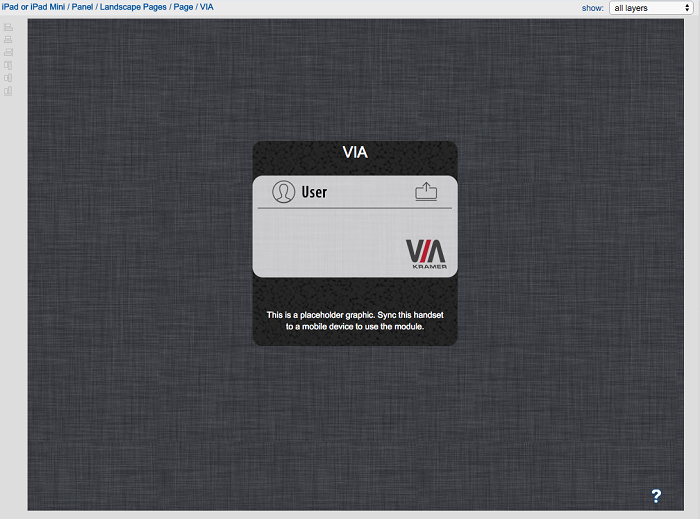
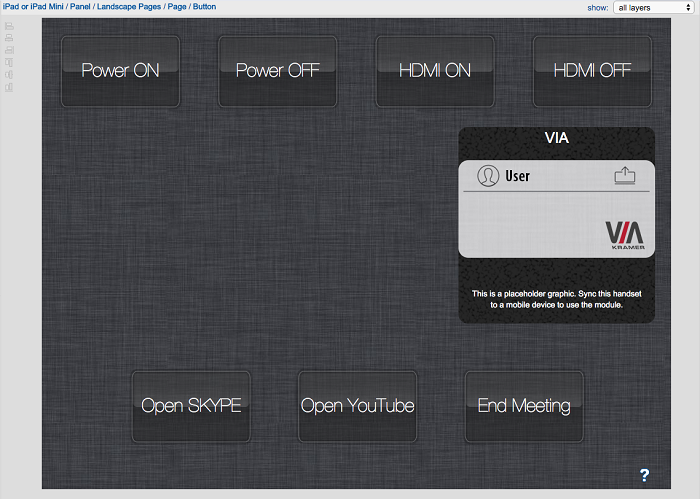
- Add VIA module to the project
- Drag the VIA module to your control GUI
![]()
- Modify VIA module properties
![]()
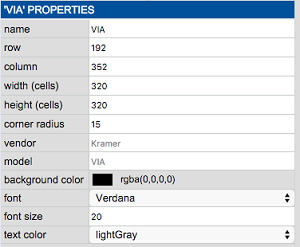
Name: User name for the VIA module.
Row: Vertical location of the module.
Column: Horizontal location of the module
Width: Horizontal size of the module
Height: Vertical size of the module
Corner Radius: Radius of the corners of the module
Background Color: Color of the module’s background
Font: Select the font of the module text.
Font Size: Select the size of the text.
Text Color: Select the color of the text.
Background Color

Note: “A” is transparancy. With transparancy set to 0, you will have no background, no matter what the settings your choose.
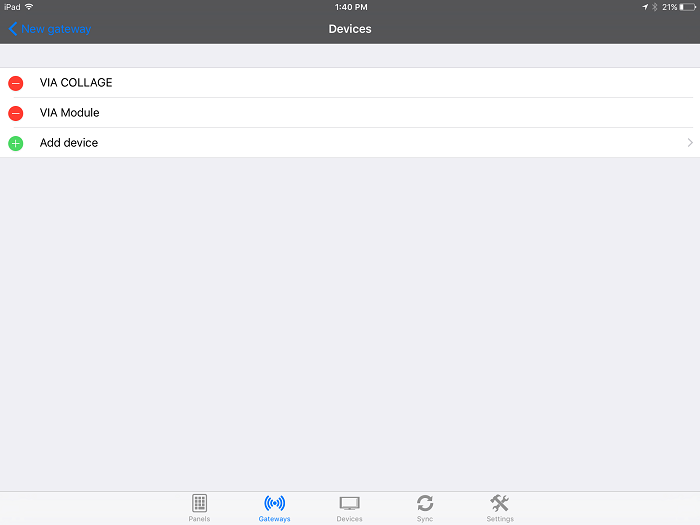
- VIA module device is automatically added to devices
- If you notice, a device called “VIA Module” was automatically added to your device list
![]()
- Create buttons for other commands
- Drag other buttons onto the screen
![]()
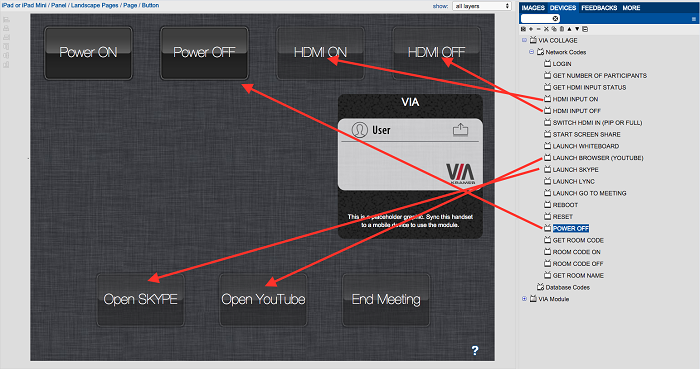
- Add commands to these buttons
- The VIA device containing commands can be found by browsing the device library.
- Drag these commands to the correct buttons
![]()
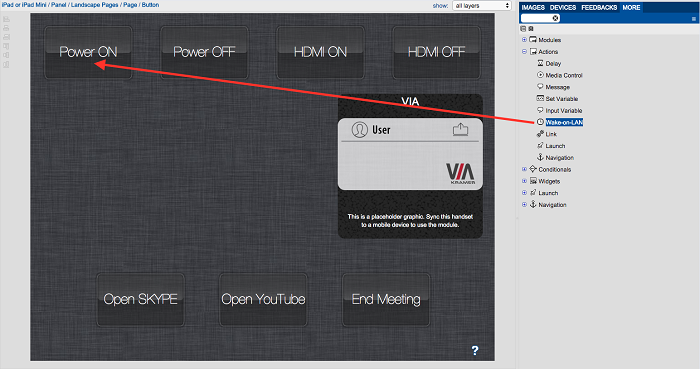
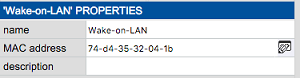
- Use wake on lan for power on
![]()
![]()
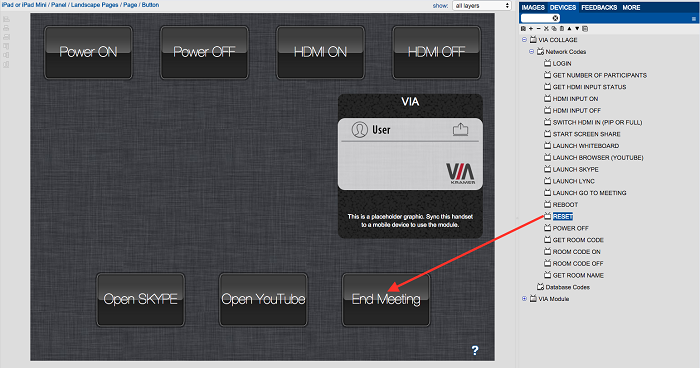
- Use ‘reset’ for end meeting
![]()
- Incorporate status feedback
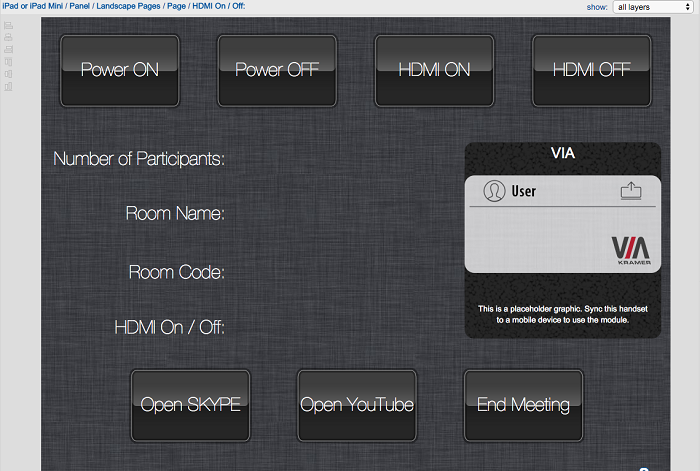
- Add text labels tell the user what you are showing
![]()
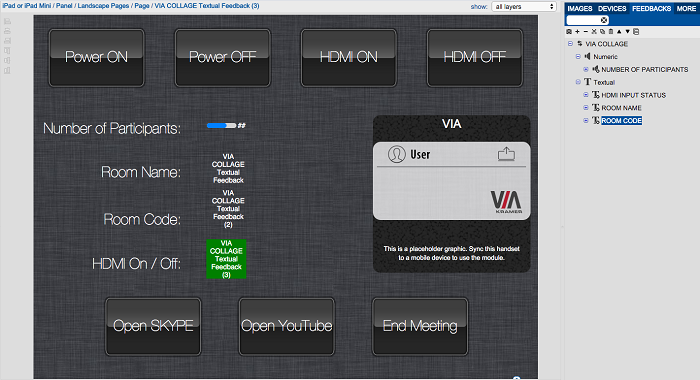
- In the feedbacks tab drag the feedbacks you want to use onto the screen. (VIA feedback can be found by browsing the feedback libraries)
![]()
- Format and rename feedbacks
![]()
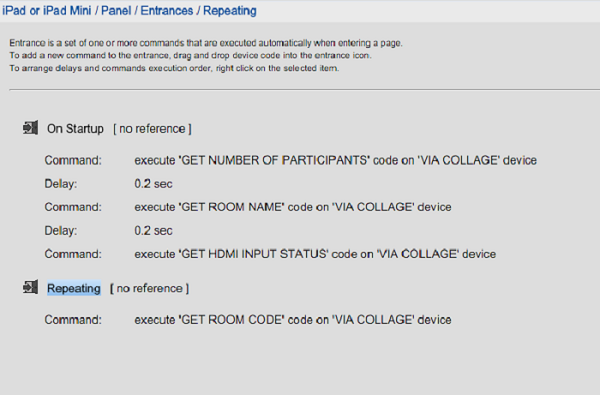
- Set up queries
- Some feedbacks are not sent automatically and require you to ask the device a question to get an answer
- Set up two entrances, one that repeats and one that only asks when you enter the panel
- Drag the proper commands to each entrance
![]()
- Save and sync your project
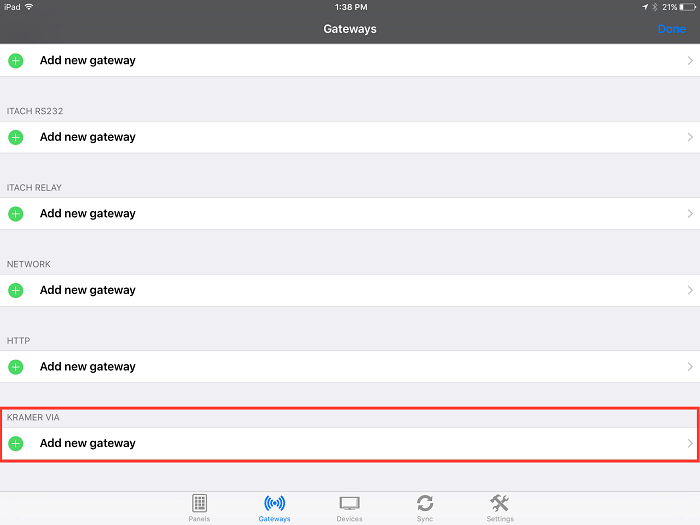
- Create a VIA Gateway
![]()
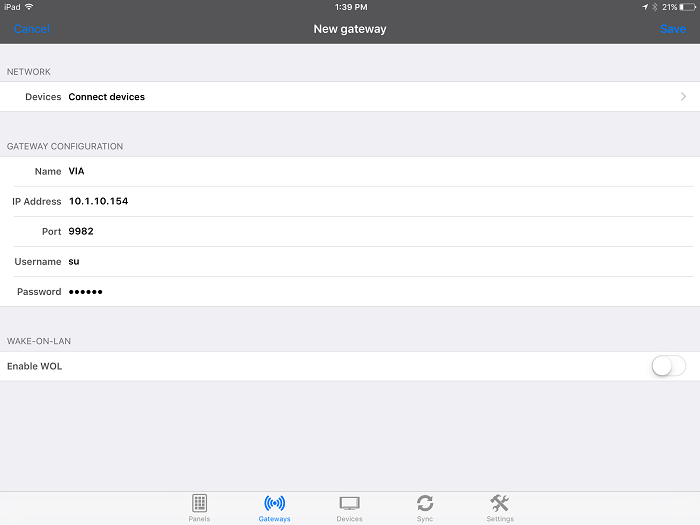
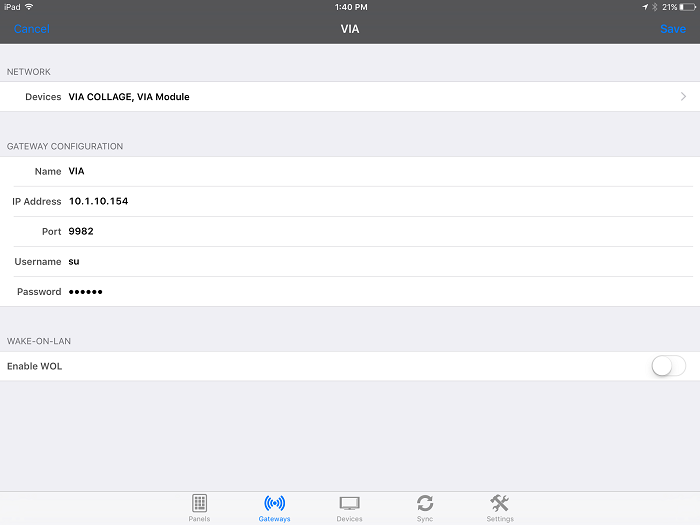
- Configure the gateway (use username and password for admin user)
![]()
- Add devices to the gateway
![]()
- Save the gateway
![]()
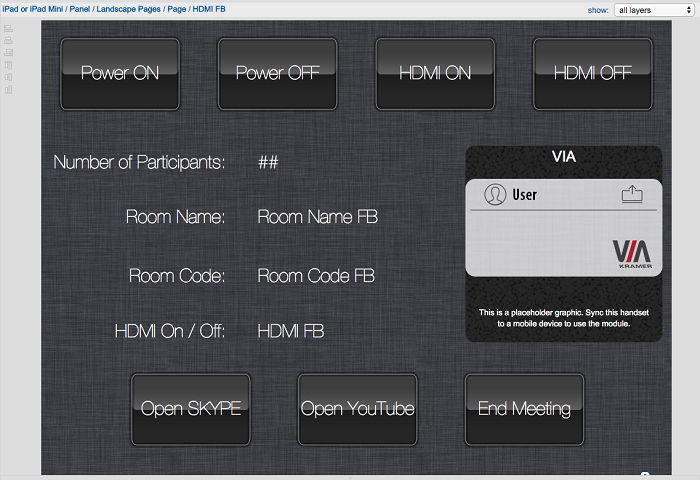
- Finished
- This is how the project will look when it is finished
- Download the attached IRL upload it to your builder (iPad only)
![]()
