
Now that the fields to be mapped have been acquired and defined, all that remains is to tell Channel how each item in the fields should be mapped. For instance, should they be mapped to something with the same name or to a different name.
In turn, select each field to be mapped and click the Edit button. The Mapping Field window is displayed.
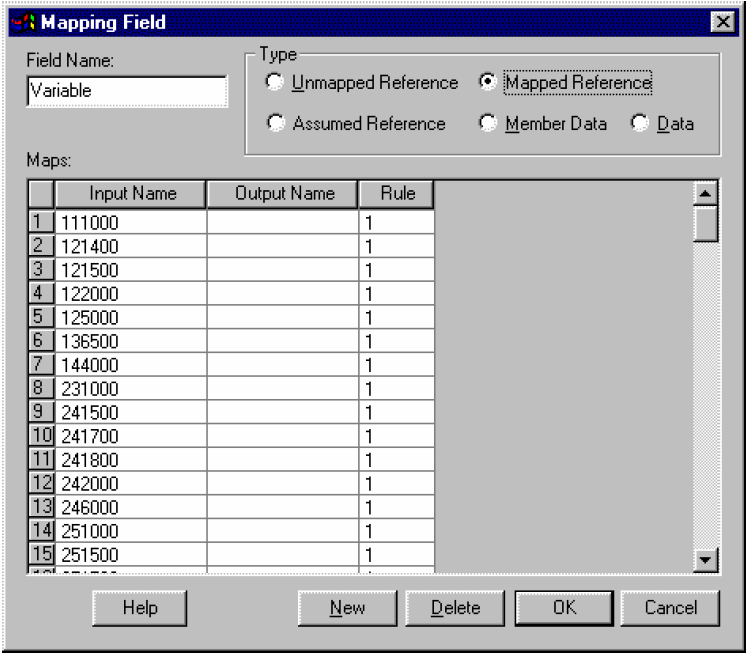
If the acquire function has been used, or if you have already manually entered some mapping details, this window will already be partially populated and any text type fields will be marked as Mapped.
All of the unique names found during the acquire are in the Input Name field and the Rule column is set at a default value of 1.
To complete the mapping, Output Names need to be entered against every Input Name. This can be done manually by entering the required name against the appropriate Input Name, or the full list can be copied and pasted into Excel using Ctrl-C and Ctrl-V, to be completed and then copied and pasted back into the Mapping Table..
The Rule value allows member values to be converted during the mapping process. The rule works by multiplying the data specified by the line’s input name by the value specified in Rule. For example if you wanted to reverse the sign of all values from a certain Input Name, you would set the Rule to -1.
This process should be repeated for all reference fields in the Mapping Field list. Data fields do not need to be mapped.
Post your comment on this topic.