
The header consists of two sections: an upper and a lower section.

Upper section
The upper section contains information about the user who reported the ticket, which company he/she works for and the ticket id. To the right, you will find the Recipients, Copy ticket, Create change, Assign ticket to me, Print ticket, Template and Save buttons.

Recipients
Click the  button to add more recipients to the case. Any email entered here will automatically be added to the CC field of any New message
NB! When a user is added to Recipients, the template Send E-mail On Ticket Solved To End User and Ticket Recipients (CC) is used instead when the ticket is solved.
Copy ticket
Click the  to create a copy of the currently open ticket. You can change any information regarding the case before the copy is saved as a new ticket.
Create change
Click the  button to create a new change based on the currently open ticket.
Assign ticket to me
Click the  button to assign the ticket to yourself.
Click the  button to open the print menu.
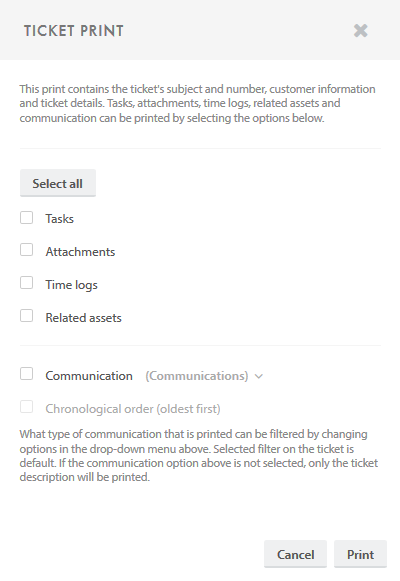
Here you select what will be included in the print: Tasks, Attachments, Time logs, Related assets and/or Communication.
If Communication selected, you can further specify what type of communication will be included using the dropdown menu: All, Communications, Communications (without internal notes), Solutions, Description or History. You may also choose whether the communication should be shown in chronological order (oldest first).
When the selection is done, you finish by clicking “Print” and choosing which printer you want to use.
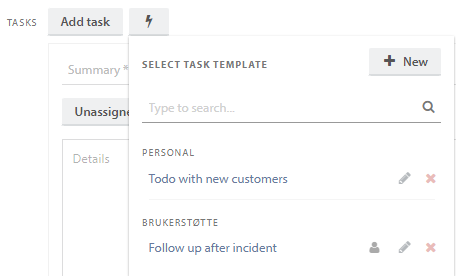
Template
Press  to open the template menu.
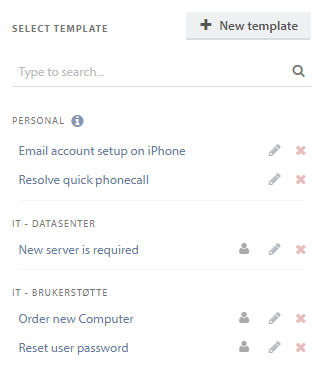
You can choose to either create a new template, or use/edit an existing one. Using a template will overwrite the ticket you are working on. If you cannot remember which fields are included in a template, simply hover over it.

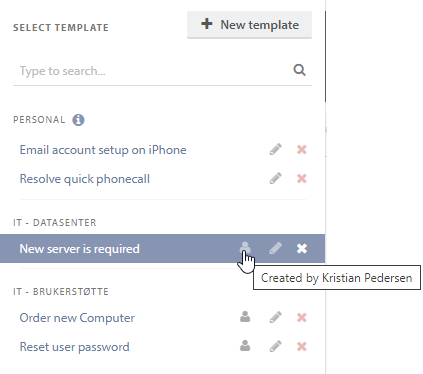
If you need to know who created the template, hover over the the  icon.
icon.
If you want to delete a ticket template, simply press  .
.
If you want to edit an existing template, use the  button.
Create new template
In order to create a new template, you have to give it a name, decide what department it should be attached to and its availability. It can either be a personal template that only you can use, or you can make it available to a specific team in the selected department.
You then fill out the fields for the template. These are the values that will automatically be filled out in the ticket when the template is used. if the status is set to a _Resolved _ or _Closed _ status, an additional field will come up to fill in a solution.
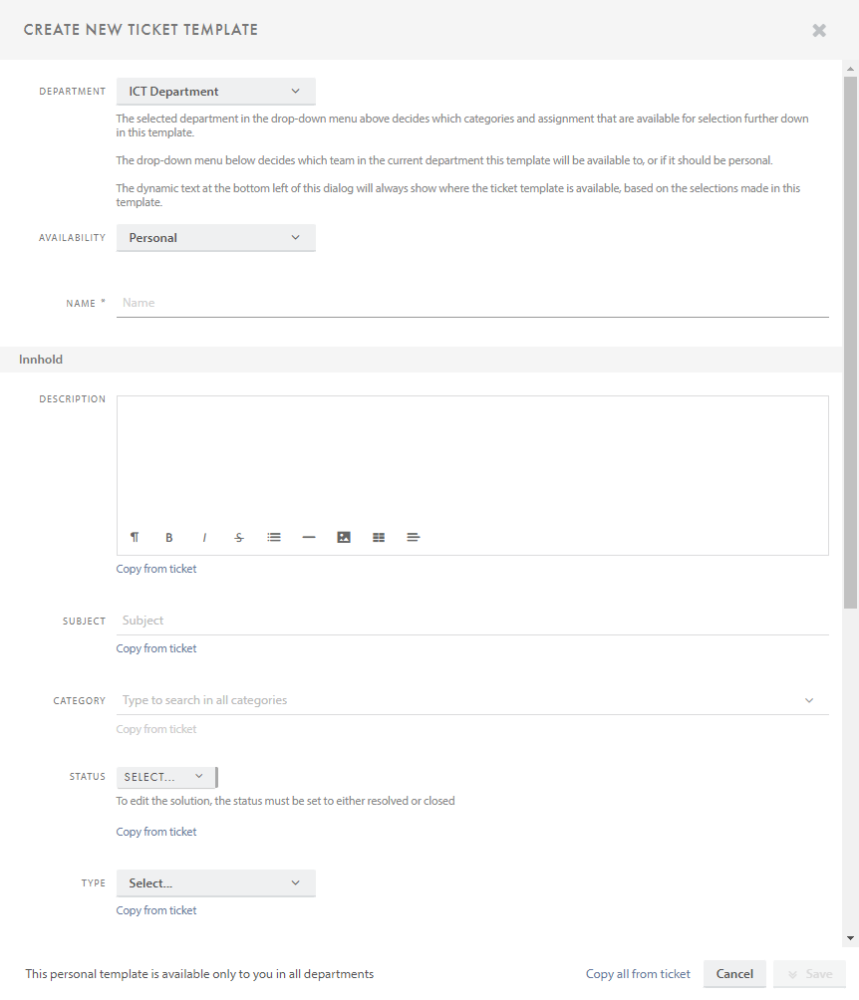
When creating a template you can add tasks that will automatically be added to the ticket. If the template is created from an existing ticket, you can copy all tasks from this ticket into the template.
You can also use Task templates to add a number of already prepared tasks to the ticket template
Save (and close)
When you make changes to a tickets, the save button is enabled 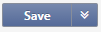 . Press
  to save the changes. To save and close the ticket tab, press
  .
.
Lower section

The lower section contains the name of the user who reported the ticket, the ticket subject, the status, and which agent and/or team the ticket is assigned to.
Ticket reporter
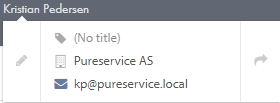
If you click on the name of the user who reported the ticket, a small window with his/her contact information appears.
It is possible to switch ticket reporter. Simply do so by clicking on the pencil  .
.
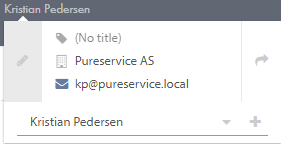
You can search for a user, find a user in the drop-down list or create a new user.
To open the users’ profile page and make changes to his/her contact information, click on the arrow ![]() . You can read more about the user profile page in the next chapter: Contacts: User profile page.
. You can read more about the user profile page in the next chapter: Contacts: User profile page.
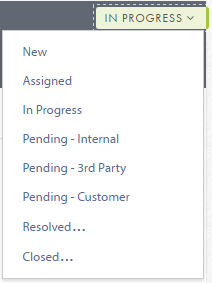
Status
It is easy to change the status on a ticket. Simply click on the status field in the top-right corner, and a drop-down menu with available options will appear. Some of the options require a certain action before you can save. The status “Resolved…”, for example, requires that you enter a solution before saving.
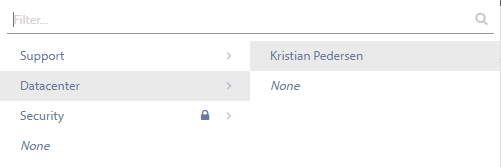
Assigned agent/team
The field in the bottom-right corner shows which agent/team the ticket is assigned to. Clicking on this field opens a drop-down menu with a list of teams and agents that the ticket can be assigned to, depending on the assigned department. You can assign a ticket to a team or an agent by typing the name or by navigating through the menu. If an agent is set to unavailable this will show.
The padlock icon indicates that the team is set to private. You can assign a ticket to this team, but you will lose access to the ticket unless you are a member.
Need more help with this?
Ta kontakt med oss for videre spørsmål her!