
Building a custom workflow
You can build your own workflow by using the workflow builder we’ve introduced to the application.
To create a new workflow, start with giving it a name you can easily recognize. You can chose whether to enable the rule immediately, or at a later time.
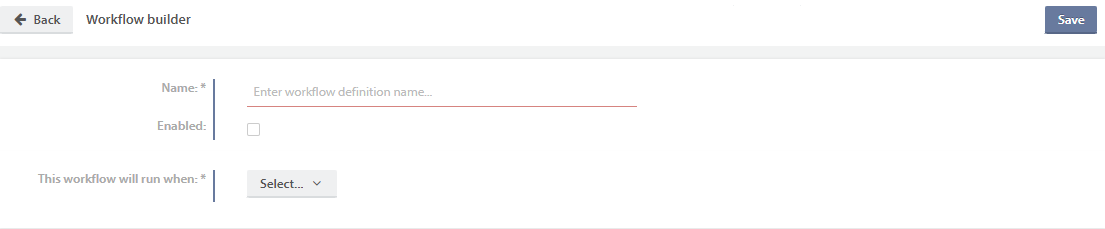
The following steps are basic “If-this-then-that” logic and consists of chosing when the workflow should run, which conditions it should have and what it should do when those conditions are met.
Standard workflows will not send emails to end users when the case “Enduser visibility” is “Not visible”. For custom workflows, you need to set this as a criteria (“Enduser visibility” “Is not” “Not visible”).
The example below shows a workflow that will send an email to a specific email address when a new Ticket is registered with Priority above Normal, and it is using a custom email template called “Notification Team New Ticket”
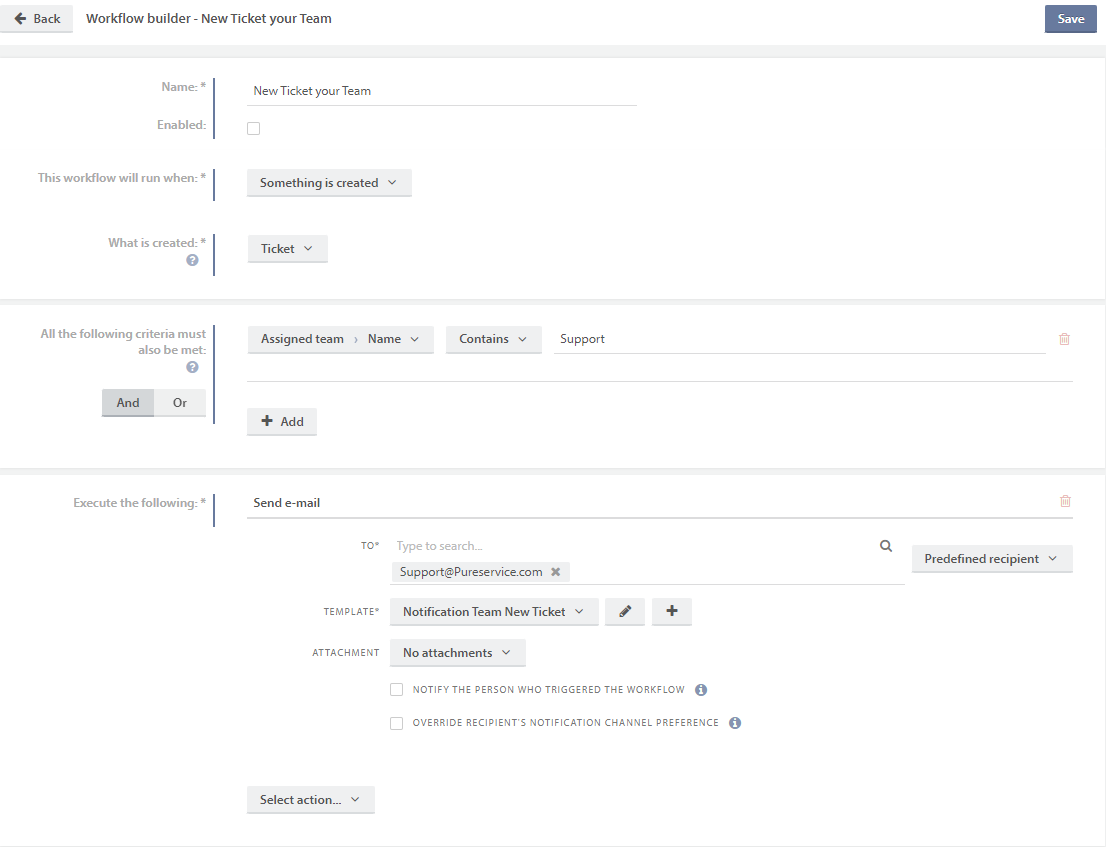
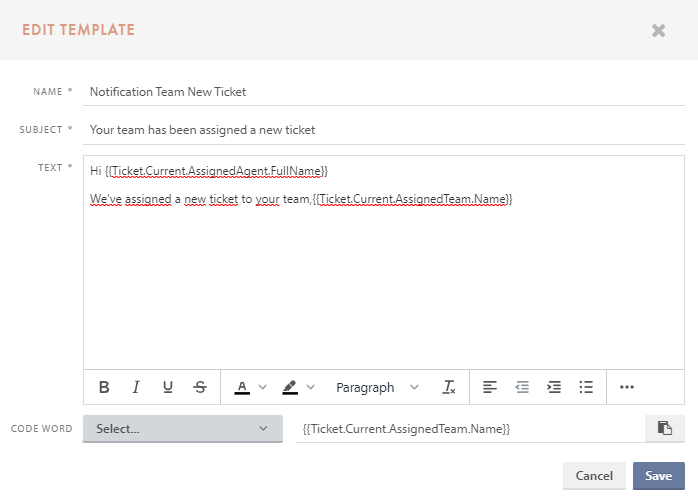
You can create new templates for your workflows by clicking “New Template” and filling in the mandatory fields. We’ve also included a small tool to help you pick the right code words for your templates.
Currently, the workflow builder can send emails, send SMS, send notifications, add internal note, do HTTP POST and HTTP PUT requests (which allows it to integrate with other services), set status, set priority, set type, set assignment, set categories and set visibility.
Need more help with this?
Ta kontakt med oss for videre spørsmål her!