
Overview
In order to control your Philips HUE device, there are some initial steps that need to be taken outside of the Kramer Control builder to properly implement control. Follow the steps below to control your Philips HUE lights.
Process
In order for commands and states to be updated, we need to identify the Username of the Philips HUE. Philips HUE themselves have created a step-by-step thread to identify the username of the installed HUE bridge. Follow this link for those steps
Once you have identified the username like what is shown in the image below, you will need to copy the content between the “‘s after the username in the command response field

The next steps necessary are:
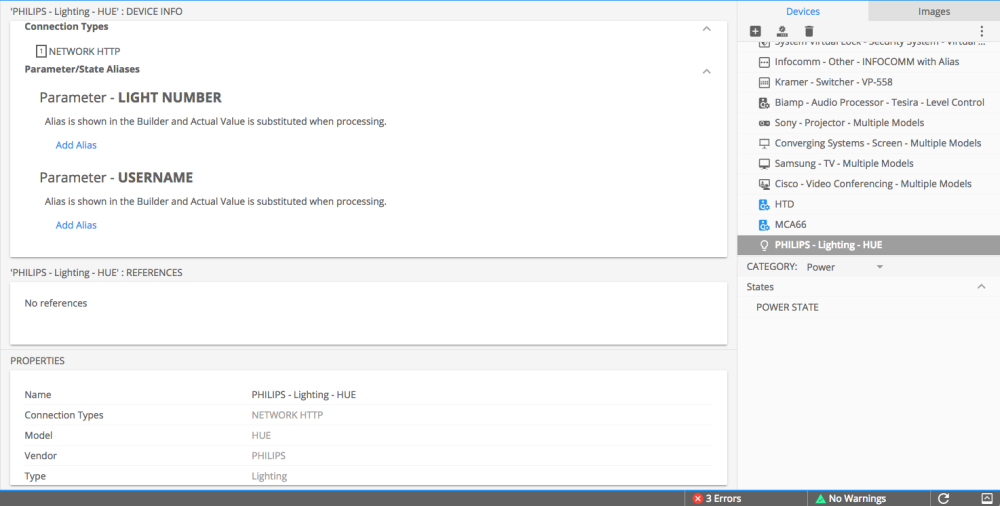
Once you have imported the Philips HUE device, the Device Information screen will appear within your center pane. If this does not happen double click on the Device in the device section of the builder.
Next you will create your Alias for the Username. The Alias section is a general name and within the Actual Value section you will Paste the content that was identified in the earlier step
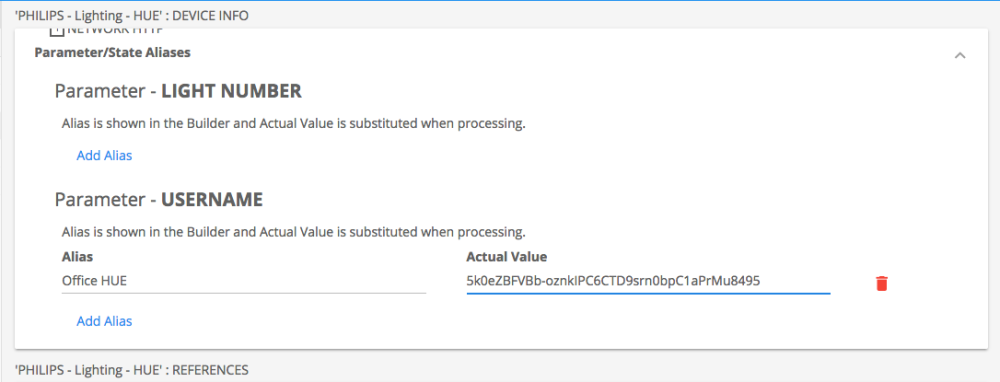
At this point, you will want to Save the steps you have completed so far.
Identifying light Numbers
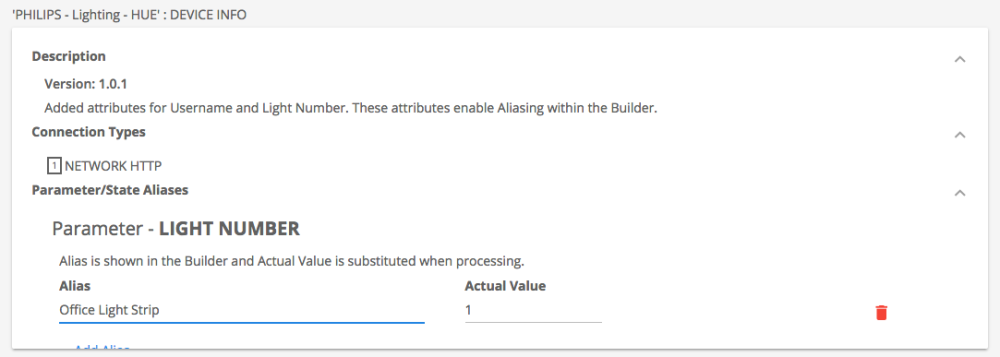
In the earlier steps we provided a link to a step-by-step created by Philips to identify the Username of the HUE. Also found in that article is a GET command to identify the lights that have been paired to the HUE Bridge. We will use that step below to identify which lights we are controlling within Kramer Control.
By entering this /api//lights into the URL of your Browser, you will see json content of each light currently paired to this HUE Bridge. Screenshot below shows a single light paired to our HUE Bridge. (Replace with the numerical address of your Philips HUE, and replace the with the previously identified username)

In the json content you will see a number at the start of a new section, in the above image the number is 1. Create Aliases in the Kramer Control builder around these numbers. Using the Light Number Alias, create a generic name for the light and input the Actual Value based on the json content that was previously identified.
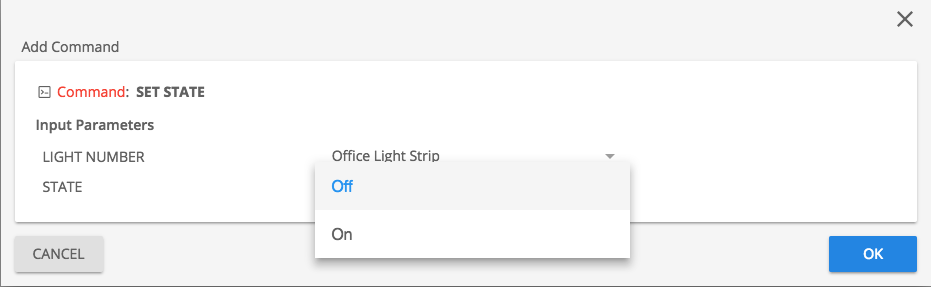
Once the Aliasing for the lights has been finished, you can add commands to the User Interface
Gateway Setup
Once the User Interface has been finished, you will need to setup the Hardware Gateway within the Builder
Create a Network gateway with the name of your Device

Enter the IP address of the HUE Bridge on your Network

Drag device to Drop Compatible Device Here section of center pane. A HTTP gateway with port 80 will be created.

Publish
Once the device has been assigned to a gateway, Publish the setup and test using your Interface
Post your comment on this topic.