
Overview
With the release of v2.5.0 Kramer Control has added the capability to integrate with a Zoom Room configuration. Kramer Control now offers a pre built widget that can be added to a Space for integration with your Zoom Room Controller. This allows you to have Zoom Room control along with all other room control.
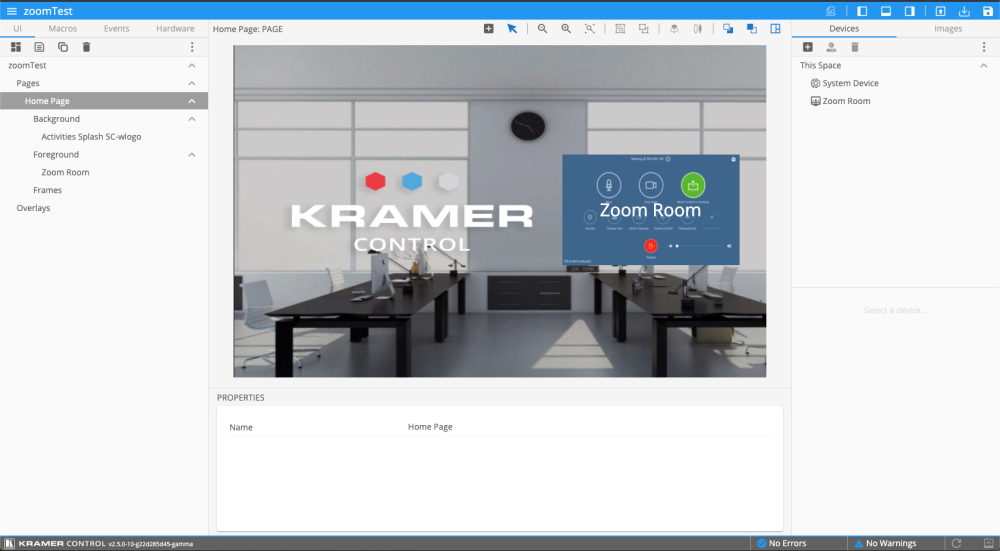
Here is what the control panel for Zoom Rooms looks like inside the Web UI for Kramer Control

Follow the steps below to setup your Zoom Rooms control with Kramer Control
Zoom Room Pre-requisites
The setup requirements listed below need to be configured within the Zoom Room account configuration pages
- Room Profile settings
- Control system API
- Enable Control System API – enabled
- Allow SSH connections – enabled
- Passcode – must be set (this will be used in the hardware gateway within Builder)
- Control system API
- Meetings Settings
- Waiting Room – disabled
- This is required for version 1 of the Kramer Control Zoom Rooms
- You will also need to allow the Zoom Room device to automatically accept call and far end control
- This means that when someone uses the ‘Meet Now’ and selects the Zoom Room from the Contact list this room will automatically answer the call and join the meeting
- This is required for version 1 of the Kramer Control Zoom Room widget
- In Meeting
- Chat – Disabled
- Private Chat – Disabled
- Waiting Room – disabled
Process
- Select Space
- Launch Builder
- Add new device
- Choose the option to Add Zoom Room Device

In the second step of the wizard you will enter the IP address of the Zoom Room host machine. This could be a PC, NUC, or other hardware that is hosting Zoom Room. Once you have added the IP address click Add to close the wizard.

Once the wizard is closed the programmer will be redirected to the gateway that has been created for the Zoom Room device. Once this screen appears the programmer will need to enter the password we required above to finish the gateway setup.
- Click on the name of the device inside the center pane
- Scroll to bottom of properties window
- Enter passcode that was created earlier in this article
- The testing equipment we are using we have configured a password of KramerControl. This is an easy to remember password and can be used in other setups as well.

The last step inside the builder is to add the widget to the UI. The easiest way is to grab the device from the devices tab and drag to the UI page or overlay.
- Note – if the module needs to be resized this will have to be done by changing width dimensions inside the properties window. The height dimension is relative to the width in order to keep the best appearance. Minimum size is 640×400.
- The widget can also be created by clicking the ‘+’ icon at the top of the center pane in the Builder and select ‘Create Zoom Room’ this will allow the programmer to draw the widget. *Note – If the widget is drawn instead then the programmer will also need to Drag & Drop the Zoom Room driver onto the widget. To make sure that the driver is properly associated, click on the widget and scroll to the bottom of the Properties to make sure that the driver is assigned.
Once the widget has been added, publish or provision to test the widget inside the client applications!
Known Issues
- Meet Now
- The online status of the contacts may not always be displayed properly – however they can still be called by selecting the name and pressing ‘Meet Now’
Post your comment on this topic.