
Question Banks allow you to create a “bank” of questions that can be randomly assigned to tiles within a game. You can create a bank with up to 300 questions organized into 30 categories. When you create a Question Bank, you can assign a picture or image to help identify it easily. Plus, you can include descriptors like topic and level to organize your questions.
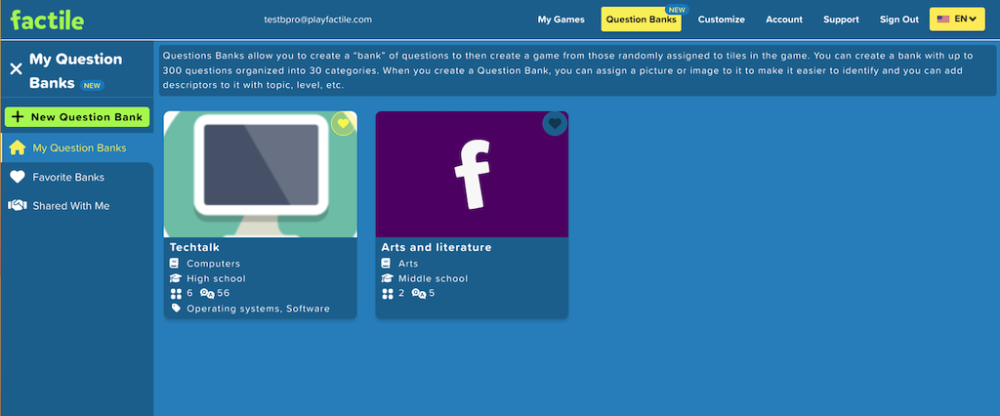
The Question Banks page is your hub for creating, organizing and managing your question banks.
- My Question Banks tab shows all the question banks you have created, including those you have marked as favorites.
- Favorite Banks tab shows all the question banks you have marked as favorites. You’ll notice your favorites with the yellow heart activated.
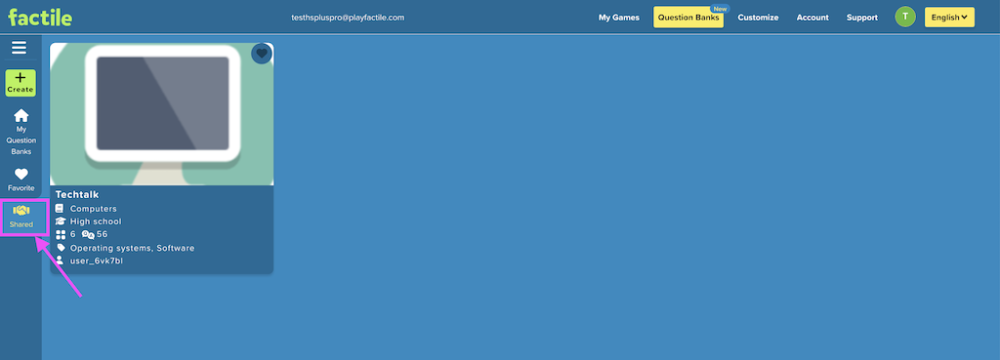
- Shared With Me tab shows all the question banks that have been shared with you.
Creating a Question Bank
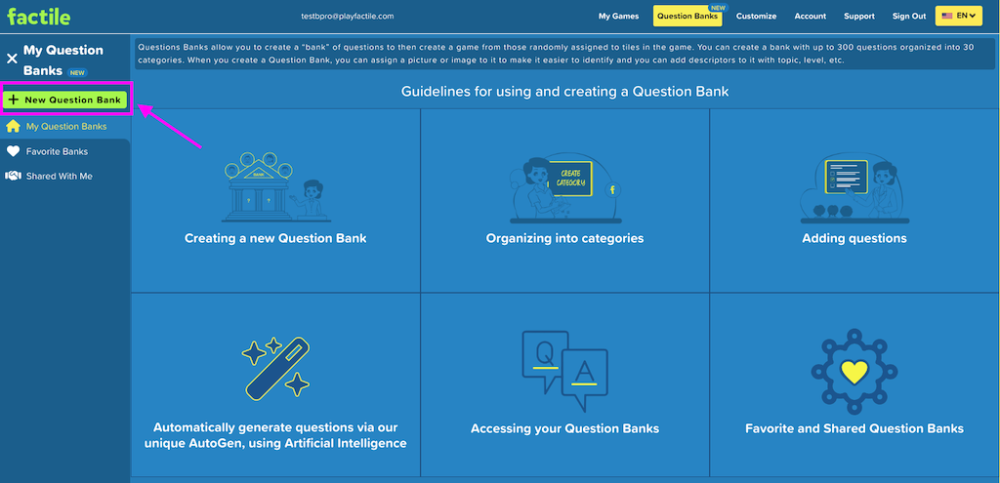
1. Select the Question Bank option from the menu. This will take you to the My Question Bank page where you can create, edit, and organize your question banks.

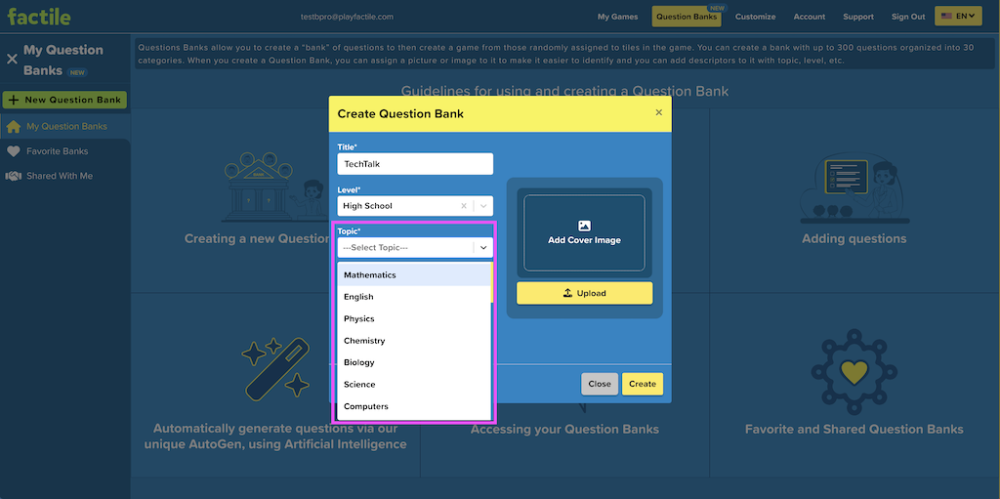
2. Click the New Question Bank button to begin creating a new question bank. This action will prompt a window to appear, allowing you to input details like the title, level, topic, image, and more for your question bank.
Keep in mind that the Title, Level, and Topic fields are mandatory; they cannot be left blank.
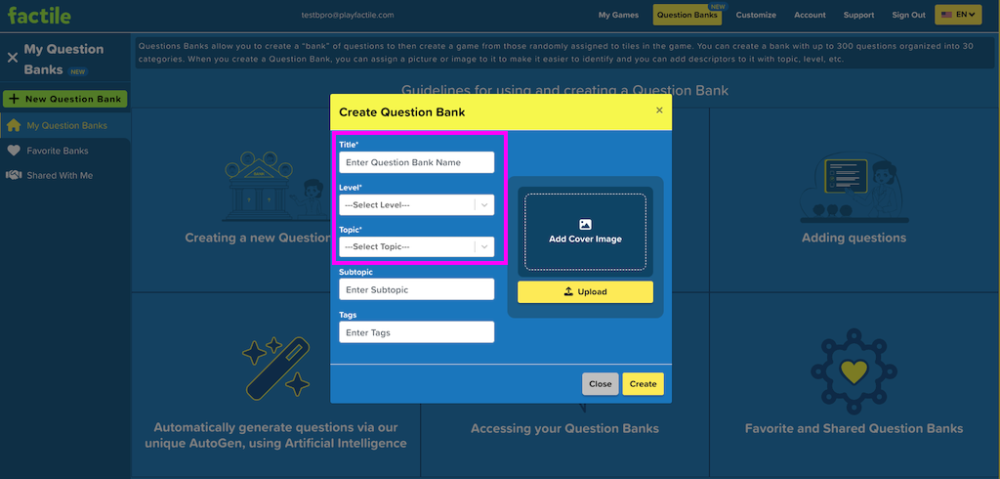
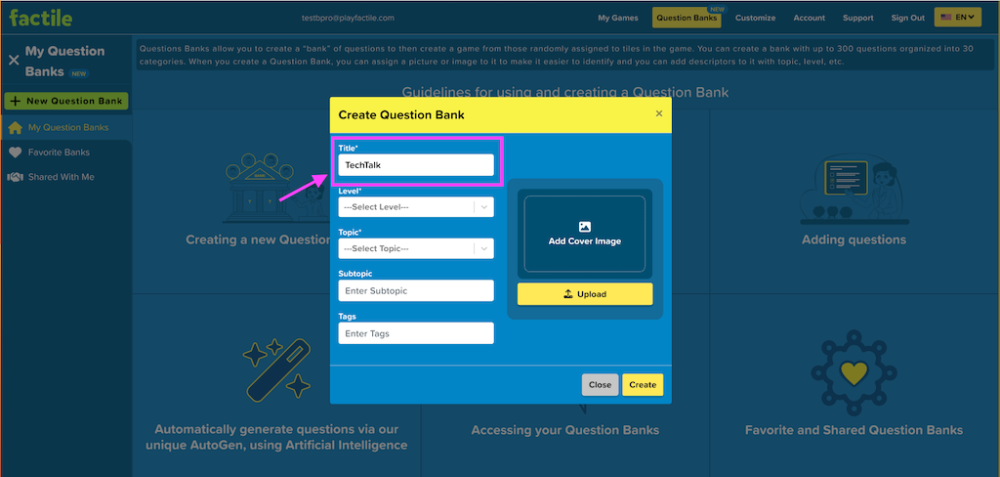
3. Enter the title for your question bank. The title should be unique and will assist you in promptly identifying your question bank among others.
4. Pick the Level for your question bank. This tells you how hard the questions are. You can choose from options like Elementary School, Middle School, High School, University, and Others.

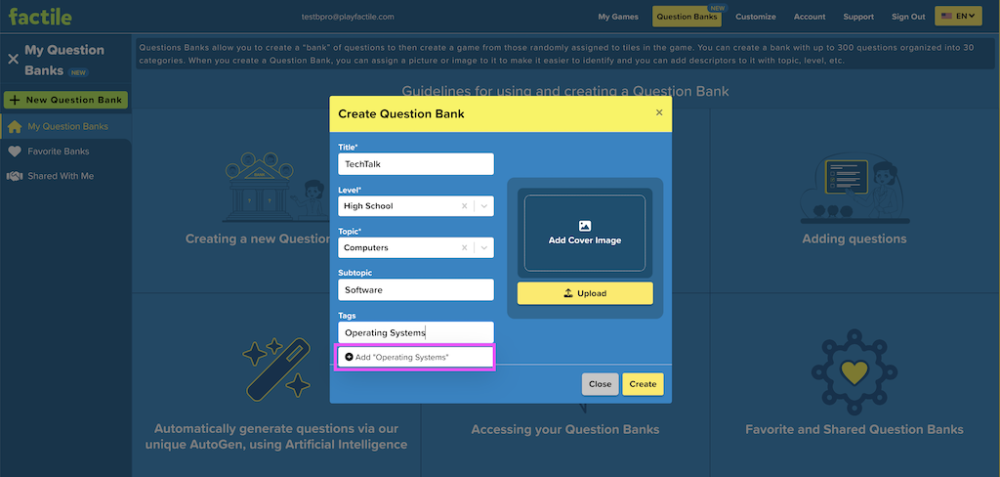
5. Pick a Topic for your question bank. You can choose from subjects like Mathematics, English, Physics, Chemistry, Biology, and more. You can also add subtopics to your question bank to further refine the selection of questions.
6. You can also tag your question bank to organize and categorize them efficiently. Simply type the tag for your question bank, then click the “+” or press Enter to add it to the system. Once added, you can select this tag from the options.
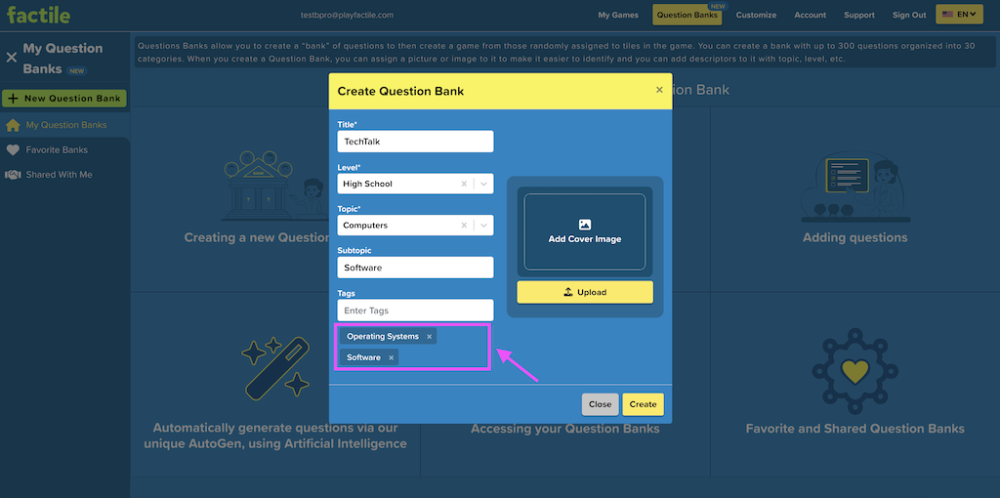
After adding the tags, you’ll find them listed under the tags field. You’re free to add as many tags as you’d like. Should you want to remove a tag, just click the x button next to it.
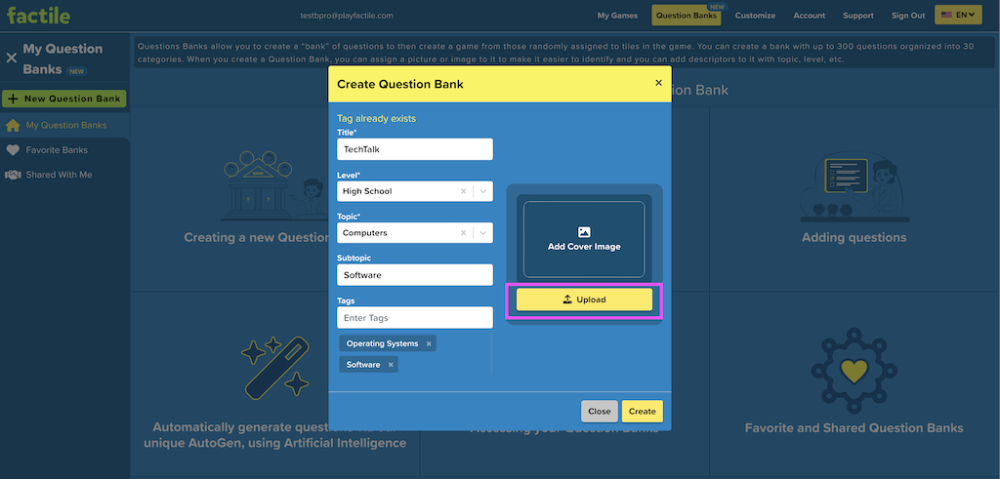
7. You can also add a cover image to your question bank to easily identify it. To do this, click the Upload button and select the image file from your device.
PlayFactile allows you to adjust the position of your cover image when you upload a new picture. After selecting a new photo, you’ll be prompted to crop it. You can drag the photo within the cropping frame to center it as desired.
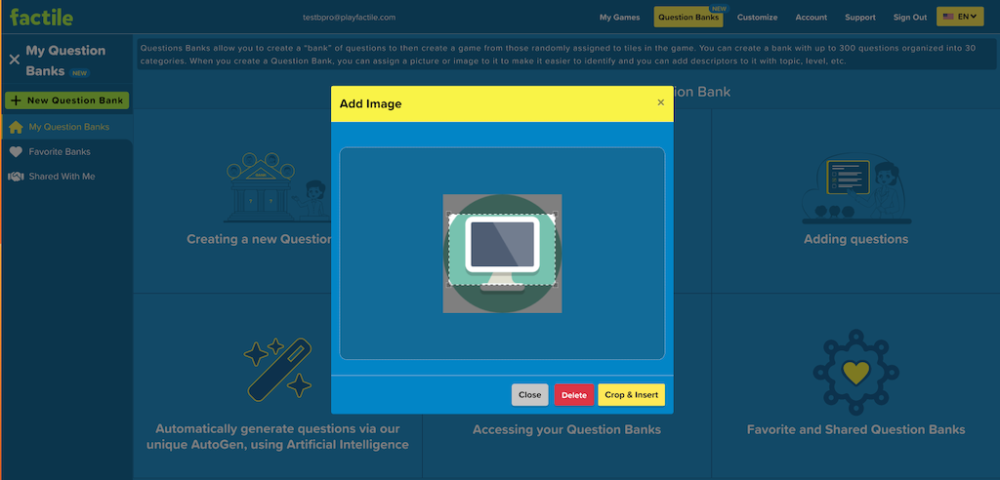
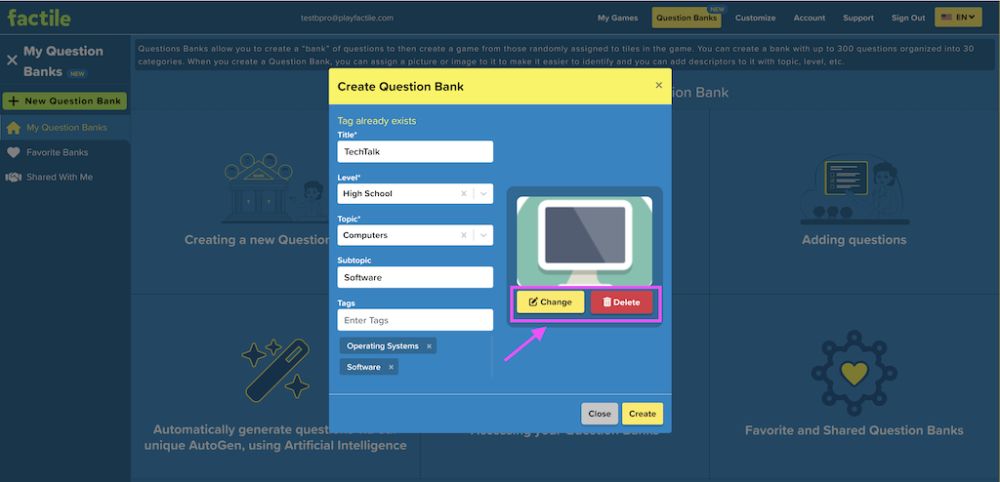
7. After you’ve finished cropping the image, simply click the Crop & Insert button to complete the upload. If you want to make changes to your cover image later, you can use the Change button, or you can remove it using the Delete button.
8. Click Create to finalize your question bank.
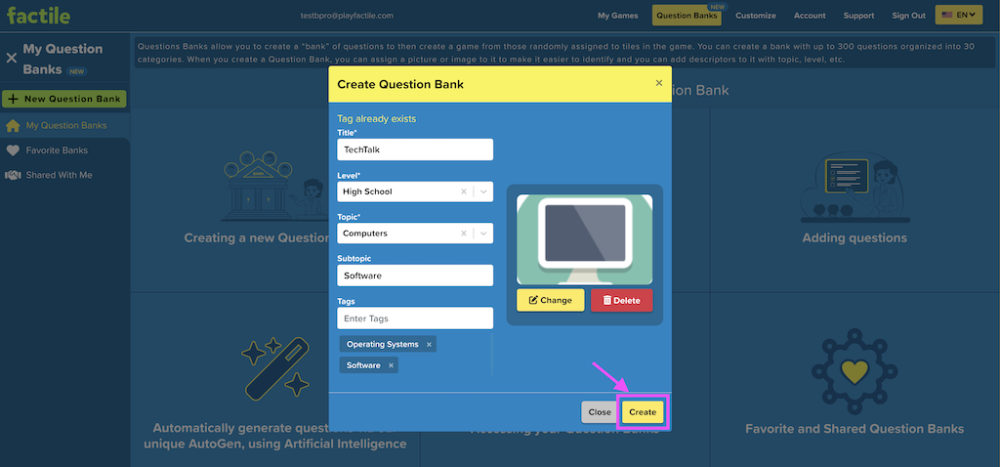
Once you’ve created your question bank, you’ll be taken to the dashboard, where you can add categories, import questions, play, or share your question bank.
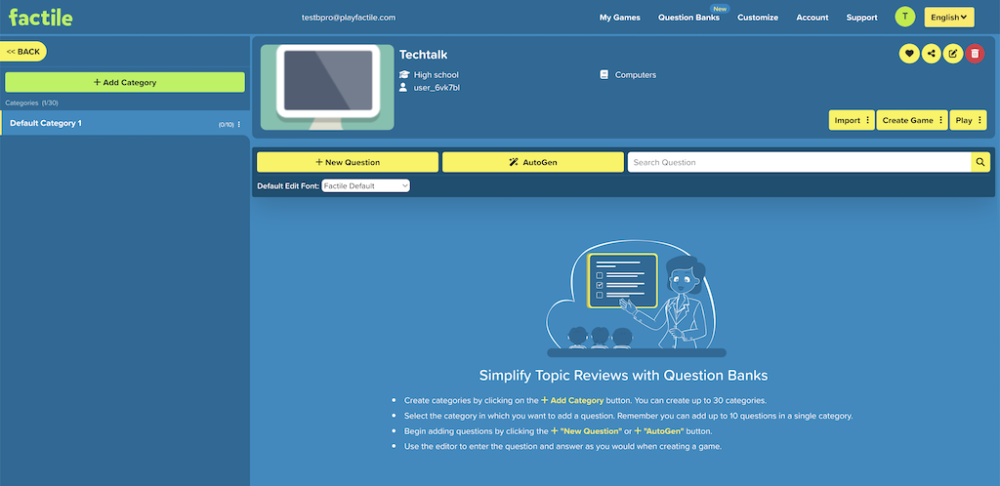
The next section will guide you through creating categories for your question bank and adding questions.
Adding categories
Before adding questions to your Question Bank, it’s a good idea to set up categories. You can create up to 30 categories per Question Bank, which are essential for organizing and managing your questions. Plus, you can reuse these categories across different games.
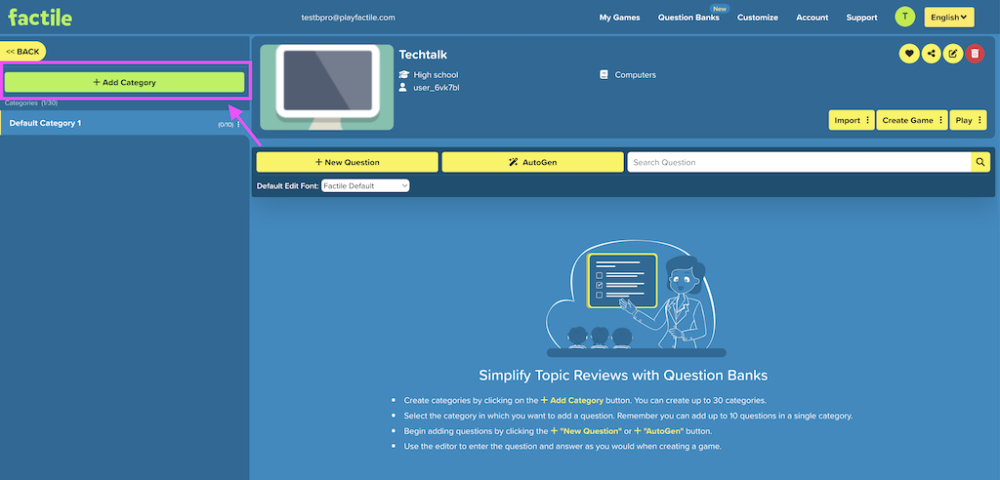
Here’s how you can create categories for your Question Bank:
1. Click on “Add Category” to create a new category.
2. Enter the name of the category.
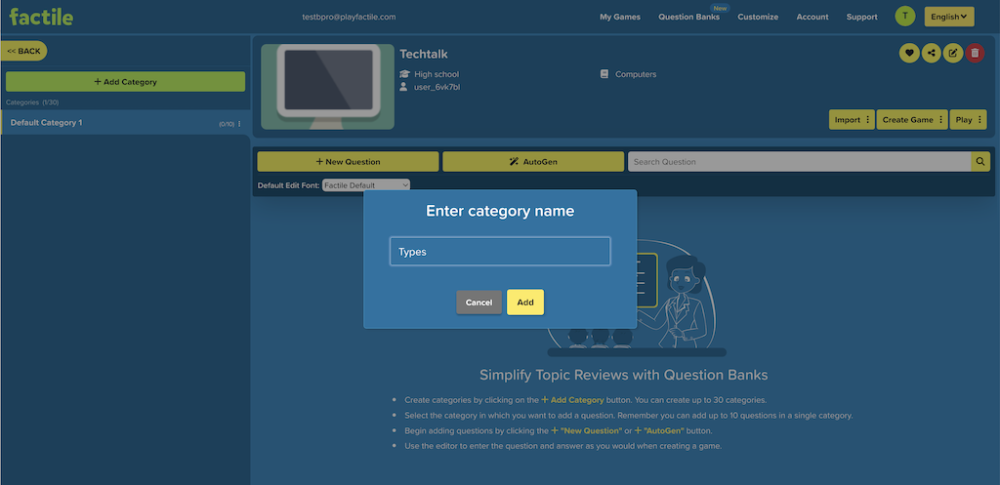
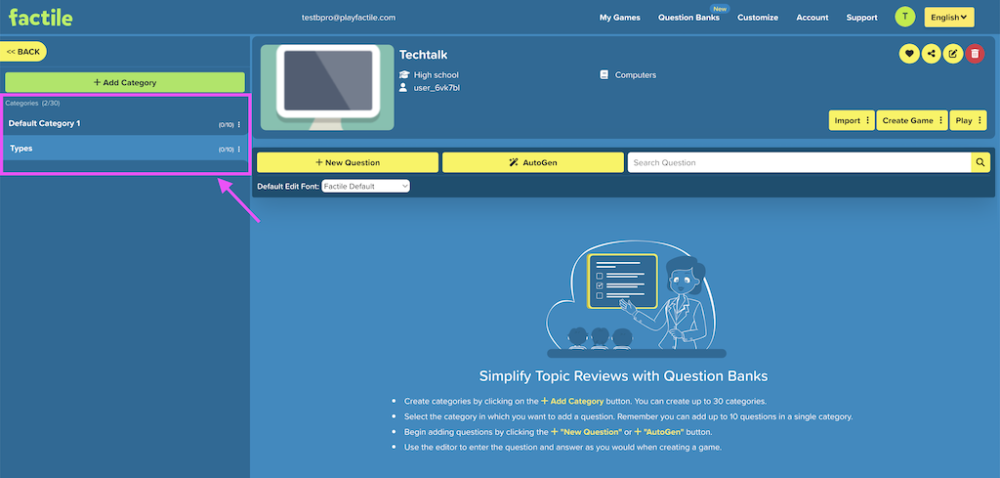
3. Click Add to create and save the new category. You’ll then see your new category listed on the left-hand side of the Question Bank dashboard.
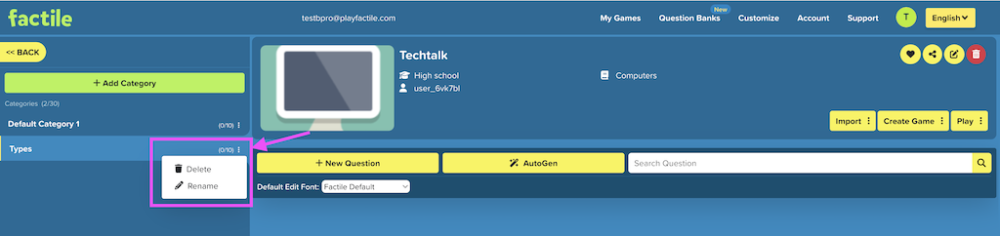
If you wish to remove or rename the selected category, simply click on the ![]() icon next to the category.
icon next to the category.
Adding questions
Now that you’ve added your categories, you can start creating questions within each category. Note that each category can contain up to 10 questions.
Here are the different ways to add questions to your Question Bank:
- Create Questions Manually: Add questions individually to your selected categories.
- Use the AutoGen Feature: Automatically generate questions for your categories.
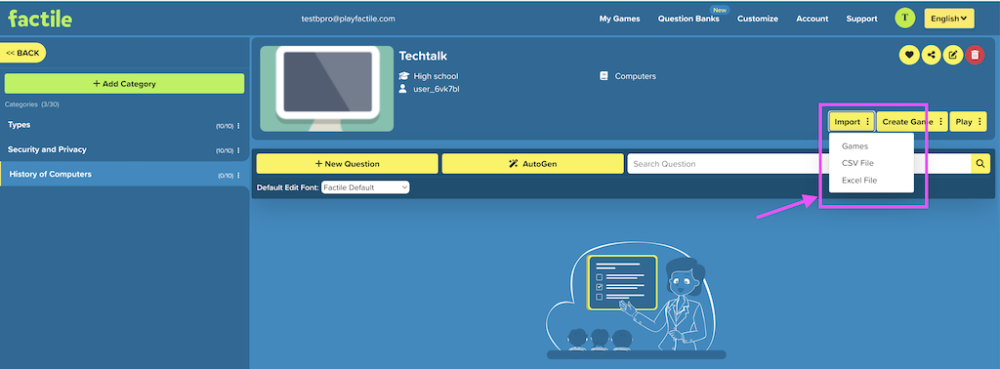
- Import Questions: Upload questions from a game, CSV, or Excel file.
This section will guide you through the different methods for creating questions.
How to create questions manually
Follow these steps to manually add questions to your Question Bank:
1. Choose a category from your list. The selected category will be highlighted, and any new questions you create will be added to it.

2. Click the New Question button to create a new question.

3. Enter your question and answer in the corresponding fields. You can also add more answer options if you wish to play in Choice mode. You can learn more about creating questions here.

4. Click Save to complete and save the question. You will then see your newly created question listed in the questions list under the selected category.
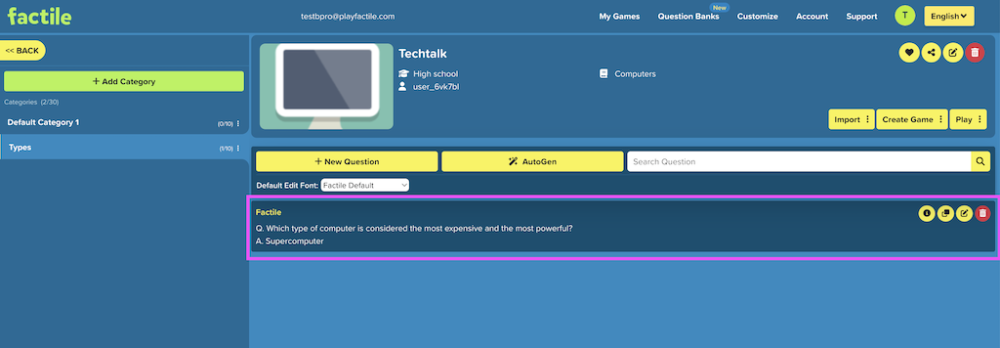
Question settings
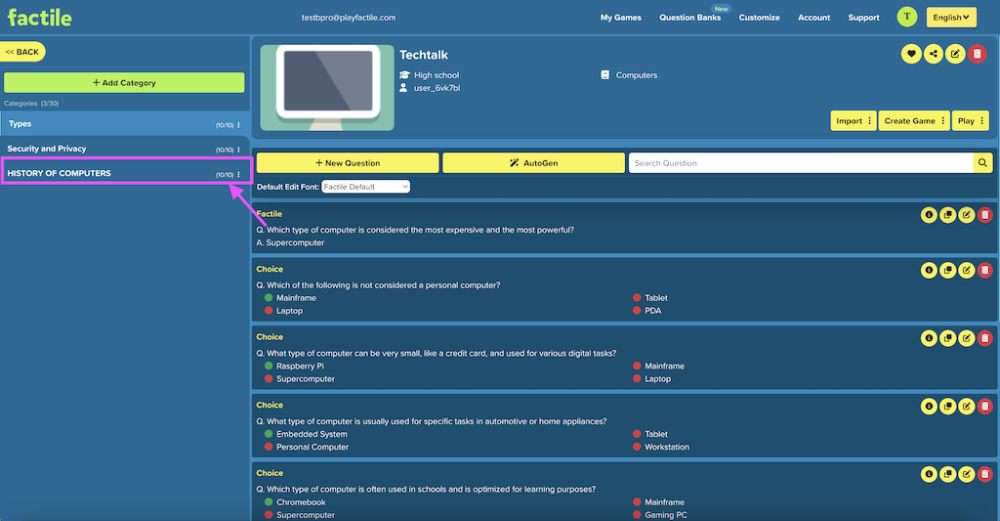
In the screenshot below, you’ll find the list of questions for the selected category. Here, you can see two question types displayed: a Factile question and a Choice question. For the Choice question, the correct answer is highlighted with a green dot, while incorrect options are marked with red dots.
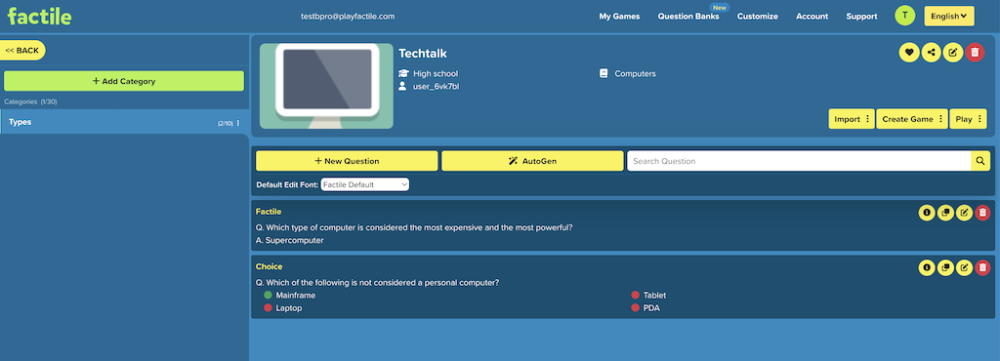
You’ll also notice various settings and actions available for each question.
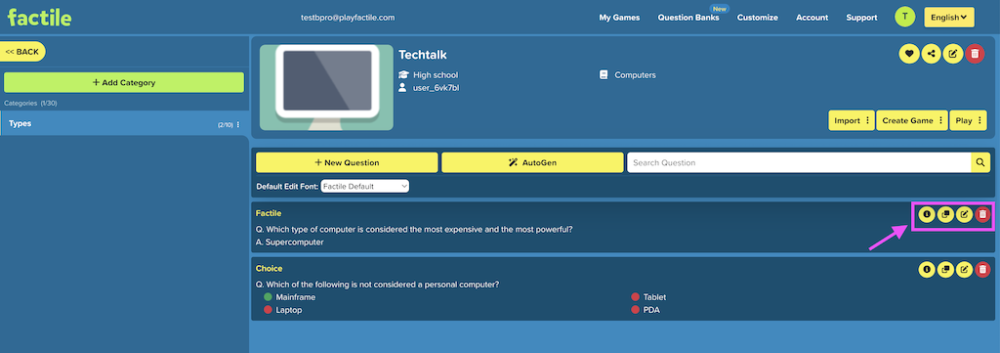
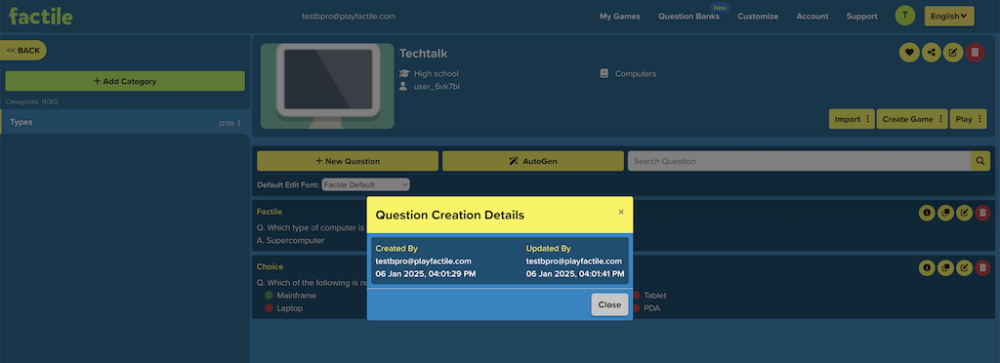
1. View creation details: Click the ![]() icon to view the creation details of each question, including the date it was created or last updated, as well as the account responsible for these actions.
icon to view the creation details of each question, including the date it was created or last updated, as well as the account responsible for these actions.
2. Duplicate: Click the ![]() icon to automatically duplicate the question. The duplicate question will be added to the selected category.
icon to automatically duplicate the question. The duplicate question will be added to the selected category.
3. Edit: Click the ![]() icon to edit the question. This action will redirect you to a page where you can modify both the question and its answers. Make sure to click the Save button to save the changes.
icon to edit the question. This action will redirect you to a page where you can modify both the question and its answers. Make sure to click the Save button to save the changes.
4. Delete: Click the ![]() icon to remove the question from the list. A prompt will appear to confirm the action. Click “Yes, Delete it!” if you wish to proceed with the action, otherwise click “Cancel”.
icon to remove the question from the list. A prompt will appear to confirm the action. Click “Yes, Delete it!” if you wish to proceed with the action, otherwise click “Cancel”.
How to generate questions using the AutoGen feature
Simplify your game creation process with the AutoGen feature. Powered by advanced generative Artificial Intelligence, this tool enables you to automatically generate questions and answers based on topics and subtopics you provide.
To use AutoGen, you purchase “tokens” based on the number and complexity of the questions generated. AutoGen uses the generative AI from OpenAI and the tokens pay for that service.
Here’s how you can generate new questions using the AutoGen feature:
1. Select a category from your dashboard.
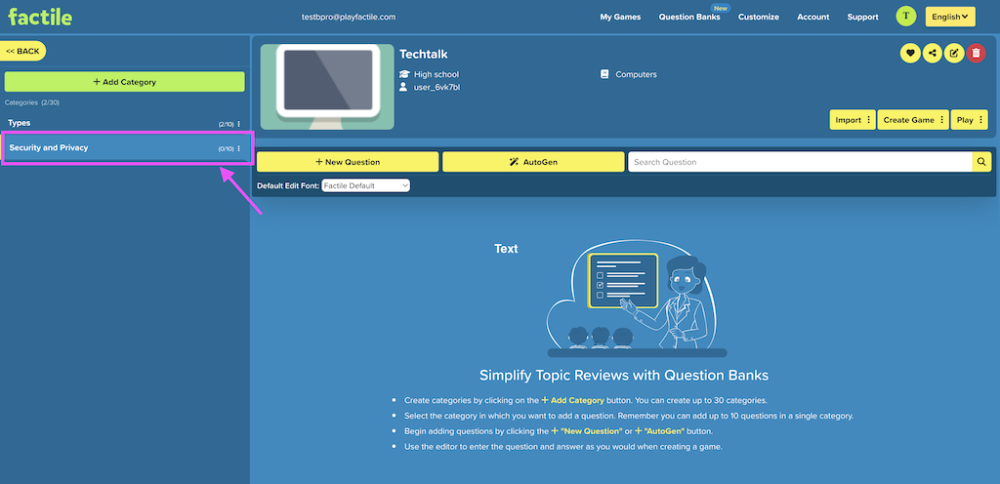
2. Click the AutoGen button to start generating new questions.
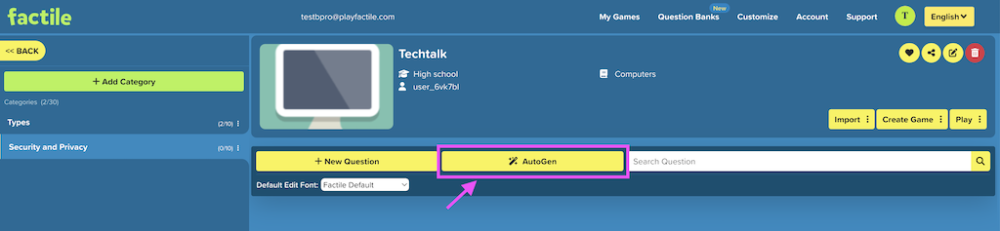
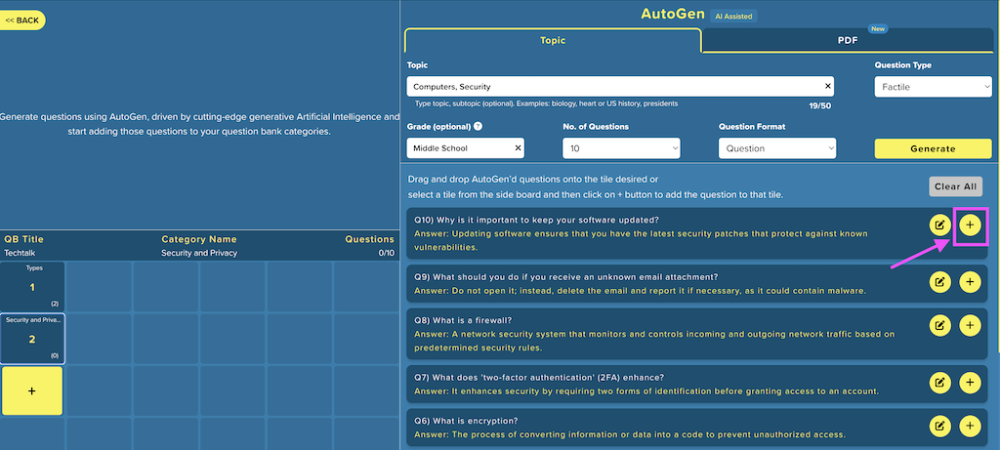
This will open the AutoGen dashboard where you can start generating new questions.
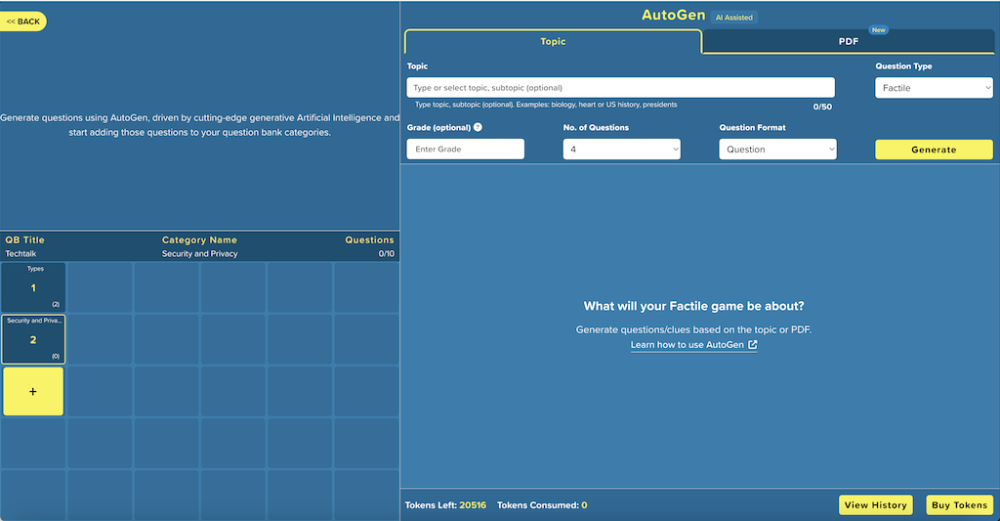
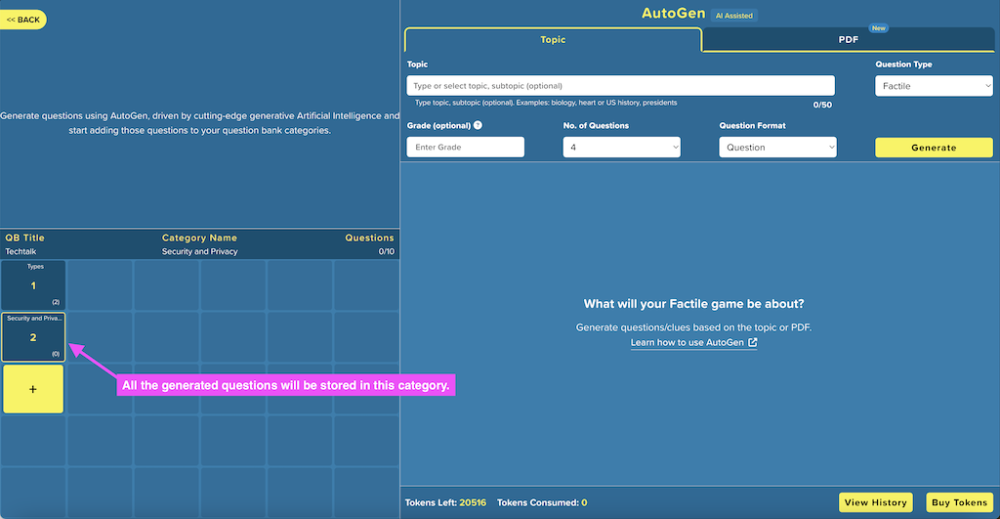
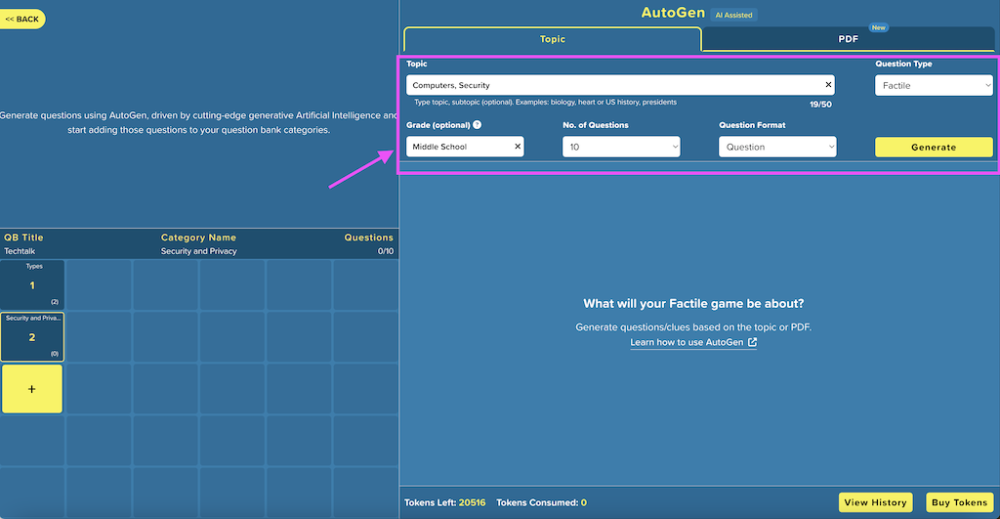
3. On the left side of the dashboard, choose the category where you’d like to add the new questions. Once you choose a category, it will be highlighted and details such as the category name and the number of questions created for that category will be displayed, as shown below.
4. On the right side of the dashboard, you can configure the options to generate your new questions. These options include the topic, question type, grade level, and the number of questions you wish to generate. For example, the topic ‘Computers’ and the grade level were pre-selected based on the settings of your question bank. Regarding the question type, you can choose either ‘Factile’ or ‘Choice’. Additionally, you can specify the number of questions you want to generate.
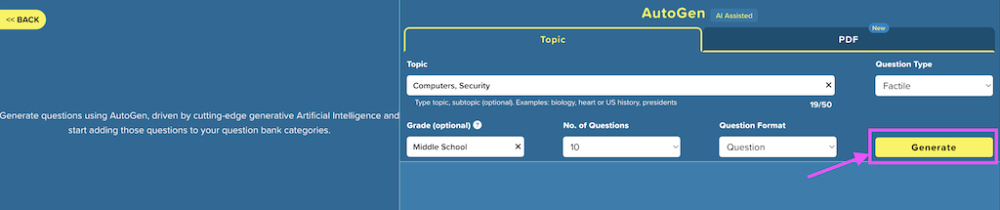
5. Once you have configured the options, click the Generate button to create new questions.
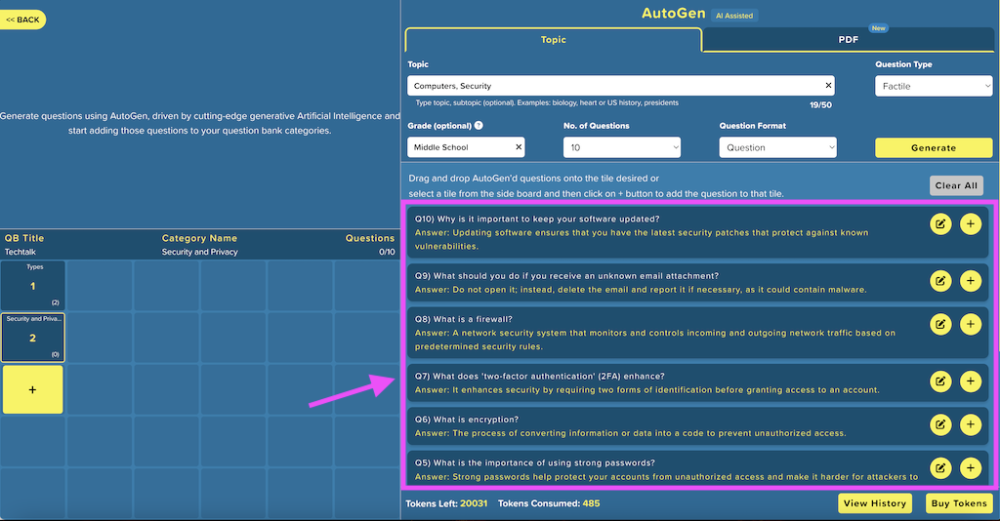
The auto-generated questions and their corresponding answers will be displayed.
How to add and edit auto-generated questions
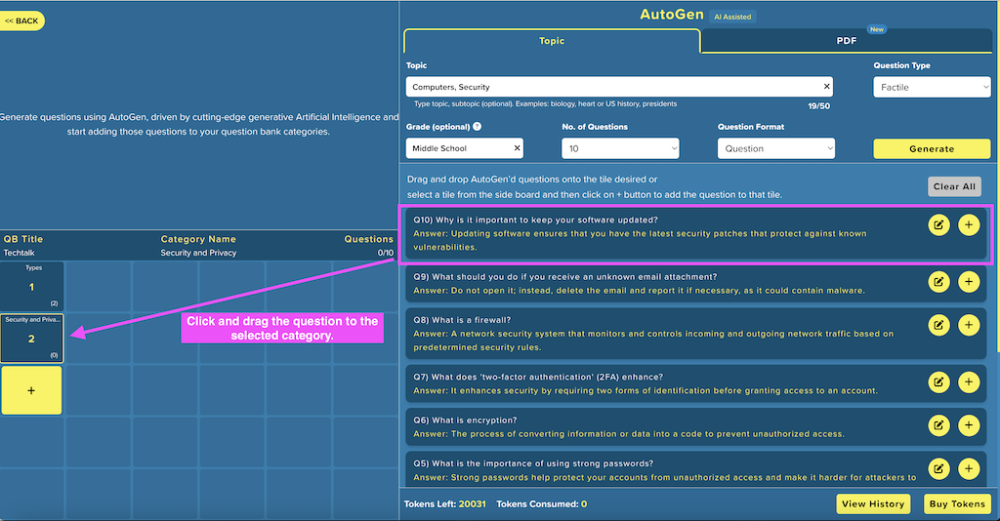
You have two options when adding auto-generated questions to your Question Bank category. First, you can simply click and drag the auto-generated questions into the desired category to add them.
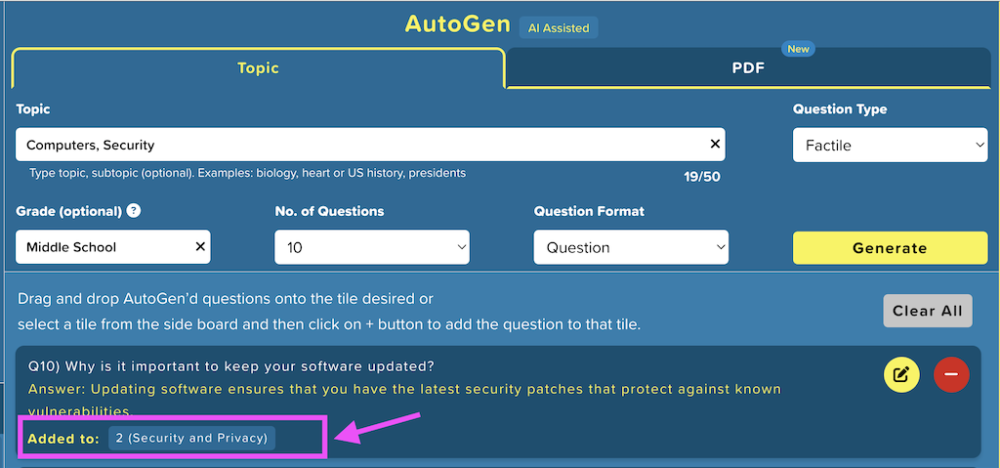
Another way is to select a category tile on the left sidebar and then click the ![]() button next to the question you want to add.
button next to the question you want to add.
After adding the question to a category, you’ll see it displayed on the question tile, indicating where the question was added.
You can also edit the questions before adding them. Click the ![]() button and the editor will be activated. Note that the last line is reserved for the correct answer to the question. You’ll notice that this line is colored yellow, indicating it as the correct answer.
button and the editor will be activated. Note that the last line is reserved for the correct answer to the question. You’ll notice that this line is colored yellow, indicating it as the correct answer.
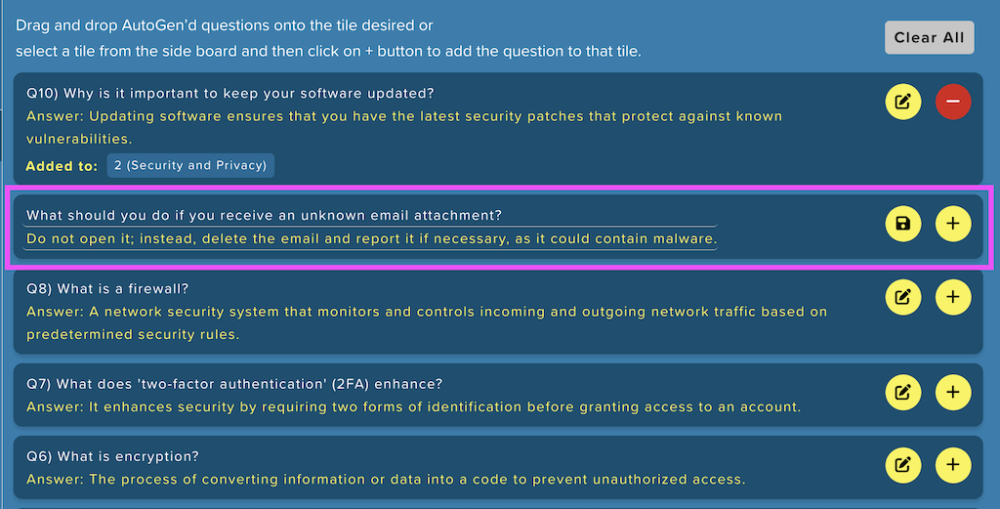
Click the ![]() icon to save the changes you’ve made.
icon to save the changes you’ve made.
How to import questions into your Question Bank
If you have pre-existing questions, you can quickly add them to your question bank through the import feature. These questions can come from an existing game or a prepared comma-separated values (CSV) and Excel files.
Importing questions from a game
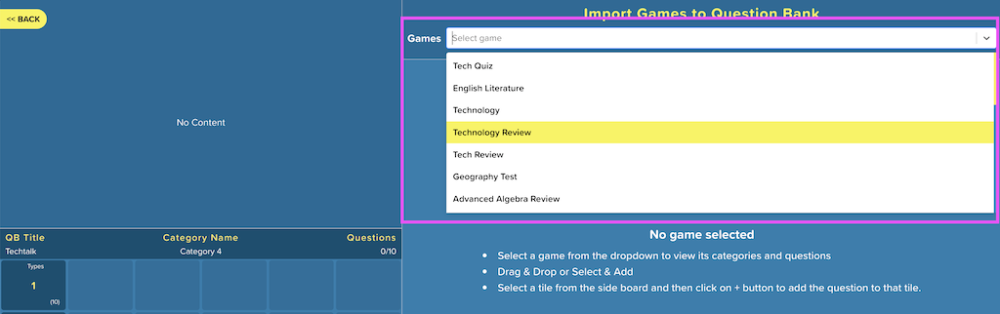
To import questions from a game, click the Import button and select Games from the options.
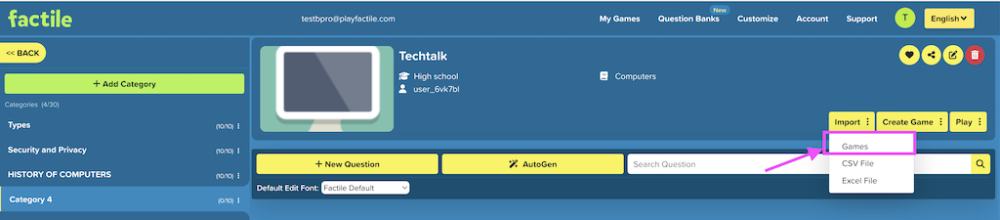
Next, select a game from the dropdown to view its categories and questions.
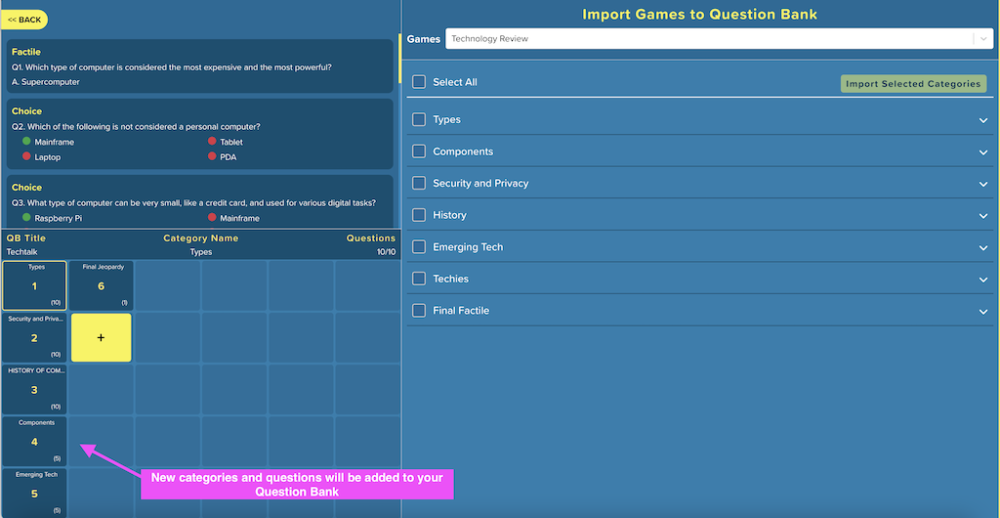
Select the categories you want to import into the Question Bank by ticking the corresponding boxes, then click Import Selected Categories.
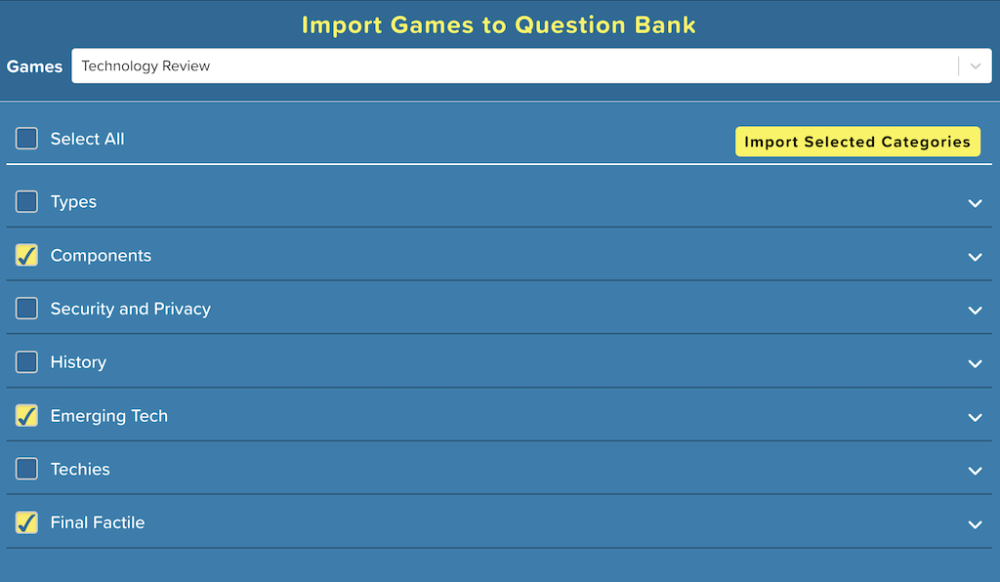
This will automatically add all questions under the selected categories to your Question Bank.
Importing questions from a CSV or Excel file
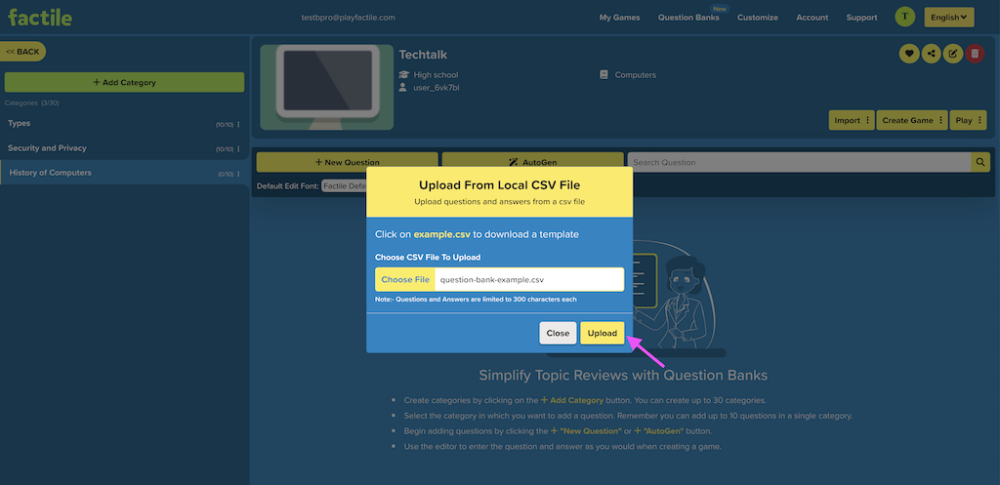
Another way to build your Question Bank is by preparing your questions in a CSV or Excel file. To make this process easier, you can download a template that provides the correct formatting. You can click the provided link to download the template.
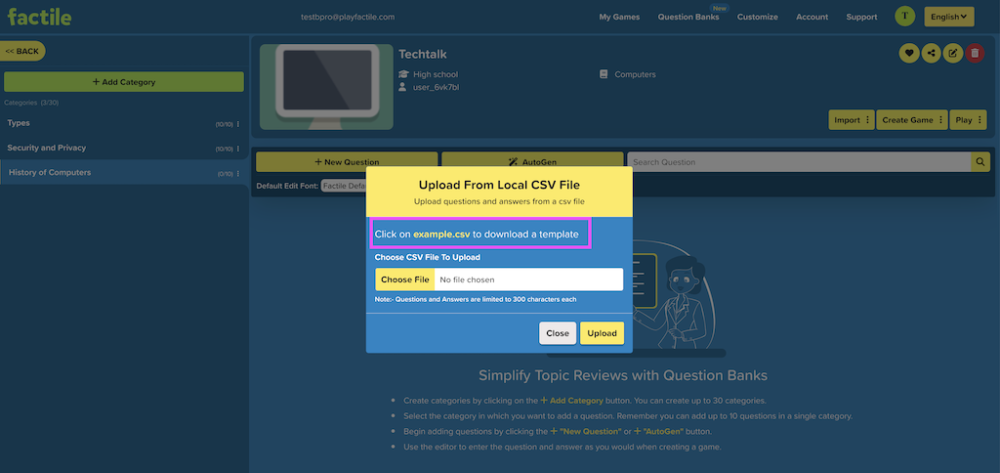
After preparing your file, click the Import button and select the appropriate file format (CSV or Excel) to upload your questions.
Choose the file from your device and click the Upload button.
You will then be prompted to select the categories from the imported list that you want to include in your Question Bank.
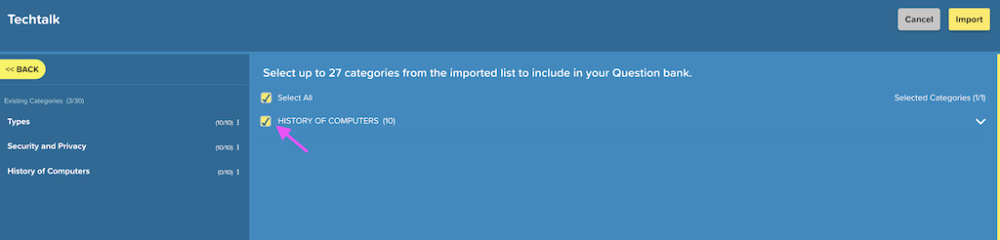
After making your selections, click the Import button to proceed. Your imported questions will then be added to the selected category.
Creating a game using your Question Bank
Using Question Banks makes creating games easier. They store questions in one place, sorted by topic or difficulty. This helps you quickly choose questions, manage them better, and reuse them in different games. It also lets educators work together, making game creation more efficient and fun.
Here’s how you can create a game using a Question Bank.
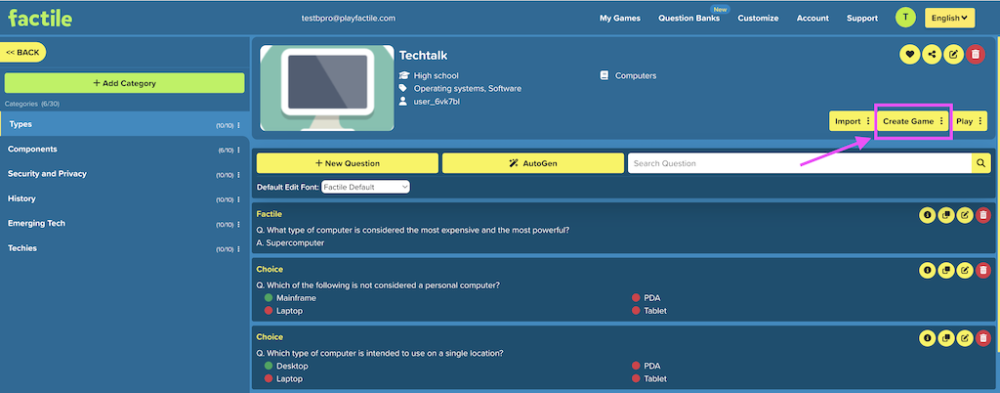
1. From a Question Bank dashboard, click Create Game.
2. Choose a mode to create your game: “Automatic Mode” or “Manual Mode”. The “Automatic Mode” allows you to create a game with categories and questions automatically assigned to each category. When you select “Automatic Mode,” you’ll be redirected to the “My Games” page, and your game will be ready with categories and questions pre-assigned.
In “Manual Mode,” you can select the categories and questions you want to include in the game.
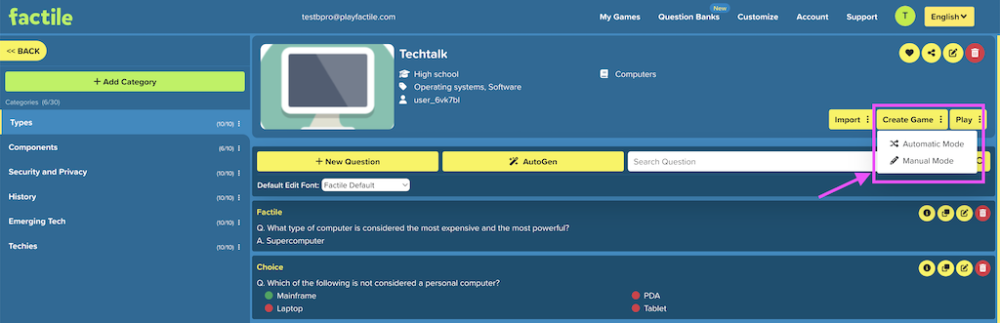
For this guide, we are going to select “Manual Mode”.
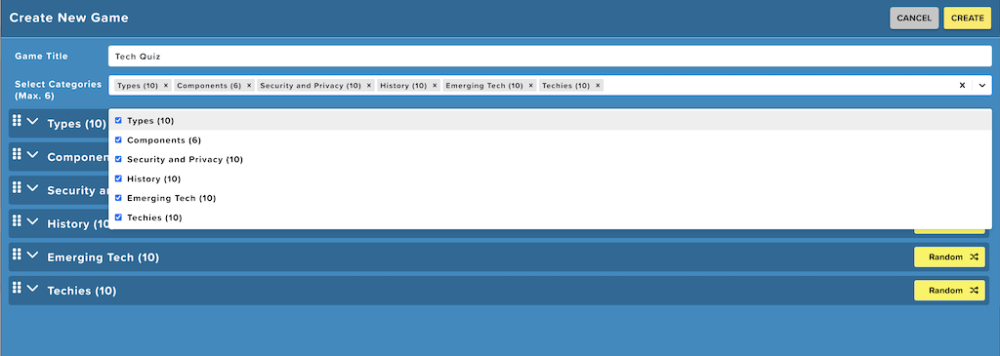
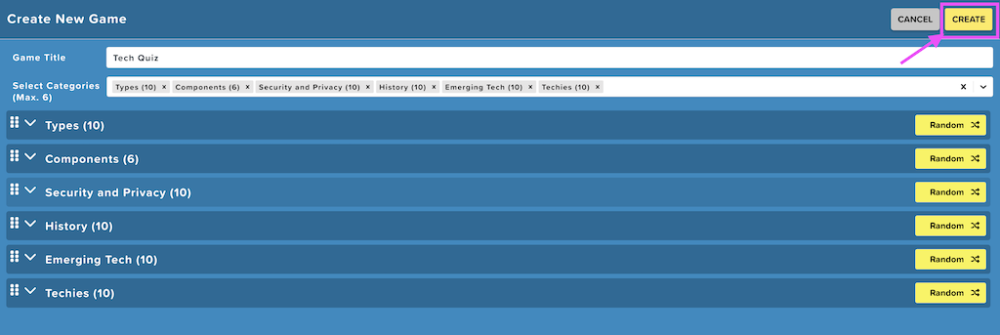
3. Enter the name of your game and choose the categories for your game. You can select up to a maximum of six (6) categories per game.
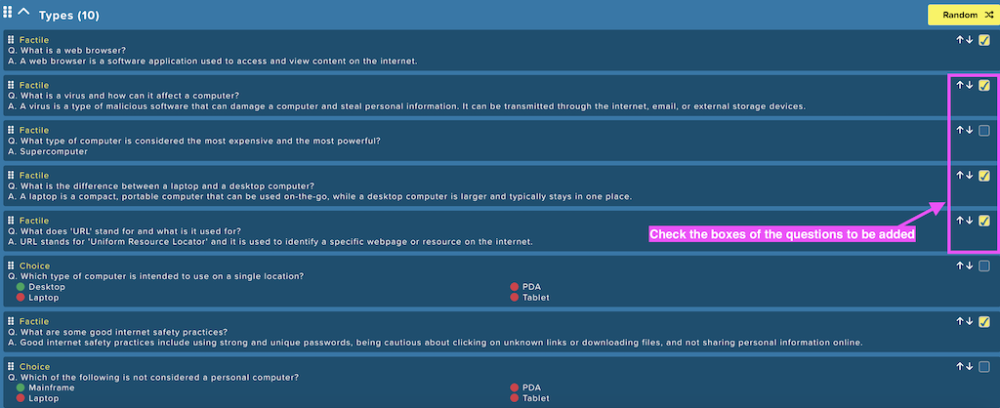
4. When adding questions to each category, you have the option to let the system randomly assign questions from your question bank. If you prefer to select questions manually, simply click on the “Random” button to view the available questions for each category.
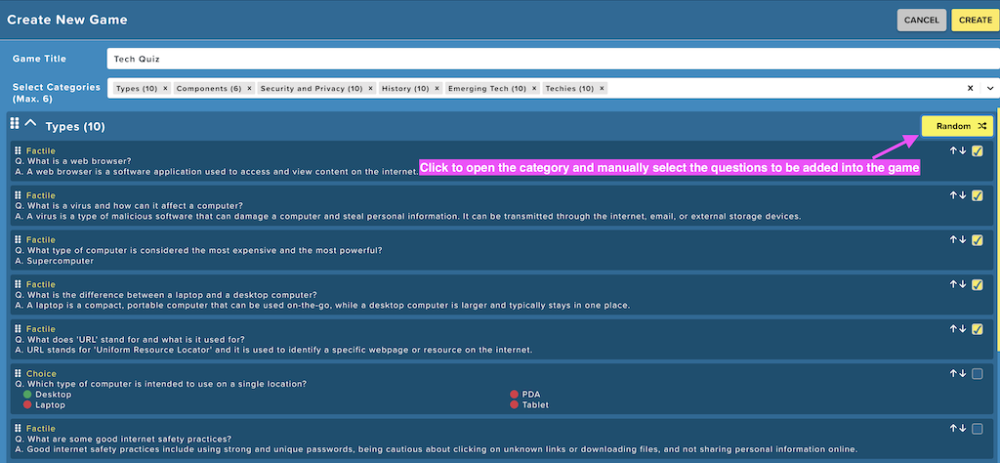
Choose the questions by checking the box next to each question. Keep in mind that you can only select up to five (5) questions to fill the tiles in each category.
5. Once you’ve selected questions for all categories, click “Create” to generate the game.
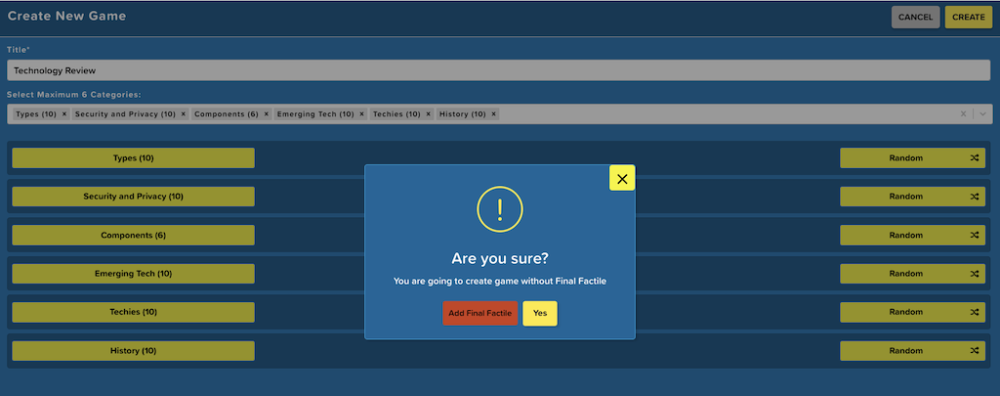
6. A popup will appear asking if you want to create the game without the Final Factile question. Click the “Add Final Factile” button to include it. Alternatively, click cancel.
7. When adding a Final Factile question, you can choose a category from those in your Question Bank. You can select any of the remaining questions to serve as your final Factile question by ticking the circle next to the question.
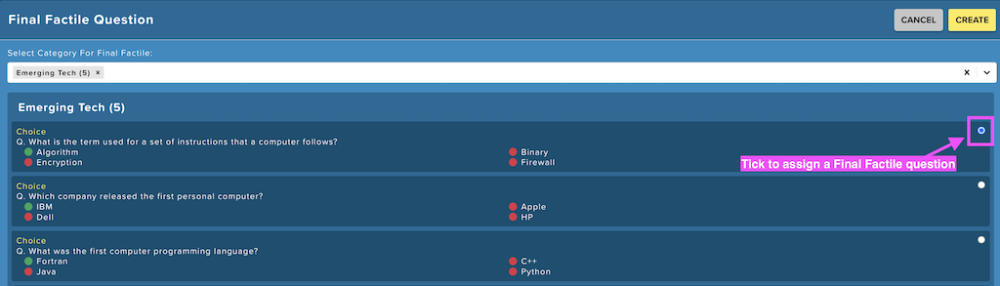
8. Click “Create” to complete the game generation process. You will then be redirected to the “My Games” page, where you can find your newly generated game.
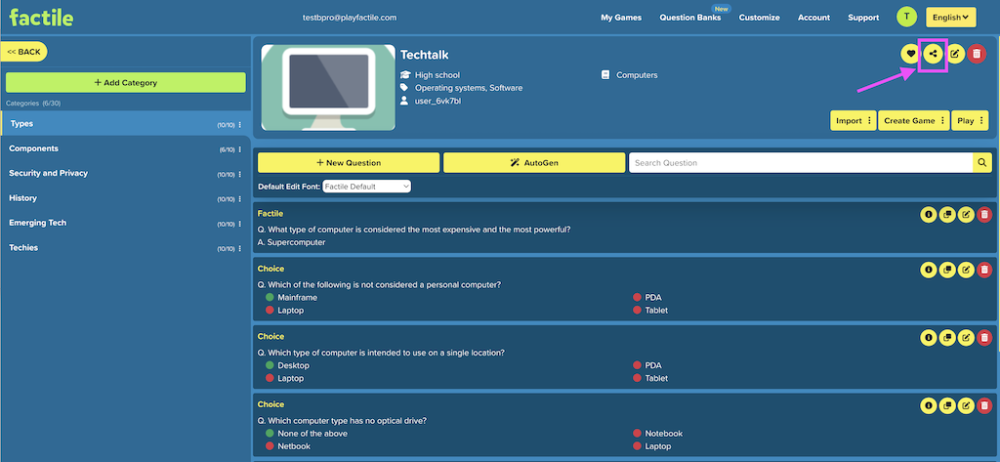
Sharing Your Question Banks
Now, you can share your question banks easily. You can do this to collaborate with your colleagues, friends or anyone you would like to build your question banks and use them as a shared resource for creating games.
To begin sharing your question banks, navigate to the Question Banks and choose the one you want to share. This action will open the specific question bank window, where you can then click the ![]() button.
button.
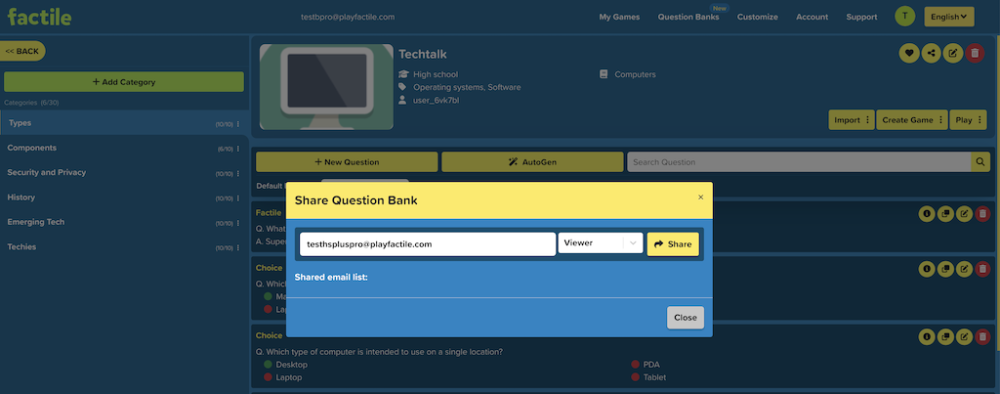
Enter the email address or username of the recipient. Note that you can only share question banks with Home/School Plus or Business users.
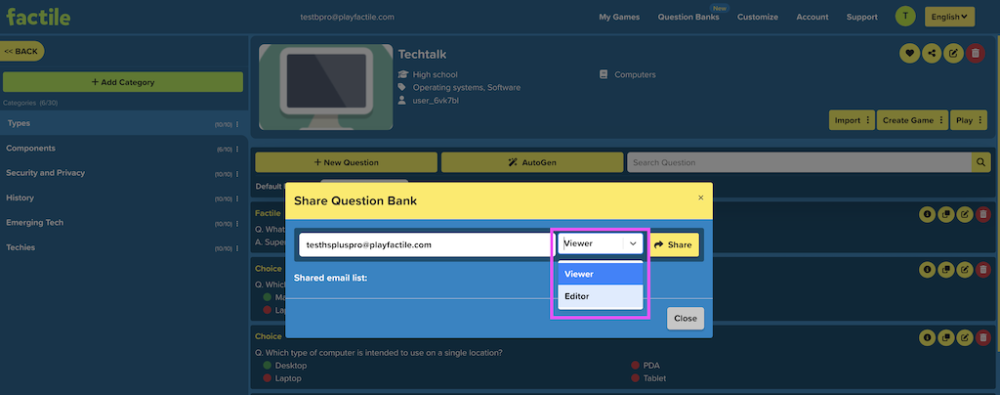
When sharing your Question Banks, you can specify the level of access you grant. With the “Viewer” setting, the other account can only view the question bank and its contents, without the ability to make any modifications. On the other hand, the “Editor” setting grants viewing and editing capabilities, allowing them to make changes to categories, questions, and answers as needed.
After entering the recipient’s details and access level, you’ll see the “Shared email list” updated. Here, you can view the email addresses of those you’ve shared your question bank with, along with their respective access levels. You can also use this section to edit their access level or remove them from the share list by clicking the ![]() button.
button.
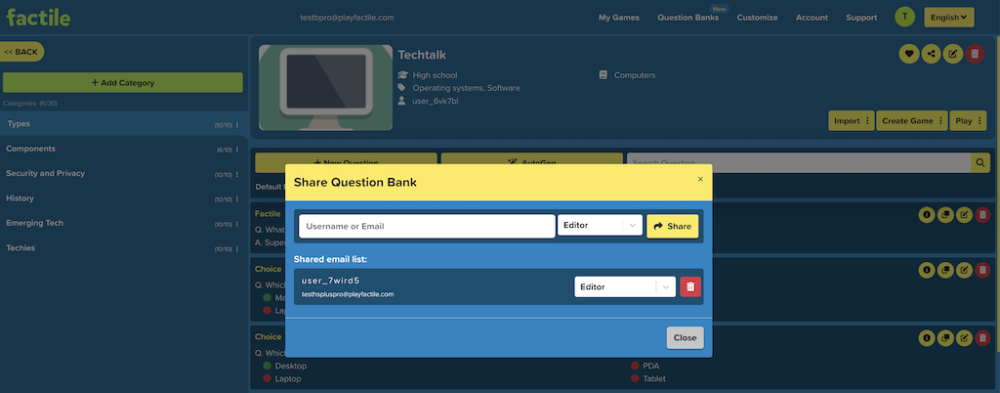
Once the sharing is successful, the recipient can access the Question Bank from their “Shared With Me” page.
Uploading from a Question Bank
You can also upload your questions directly from your Question Bank. To learn more about Question Banks, click here.
To upload from your Question Bank, click Upload From Question Bank on your game board.
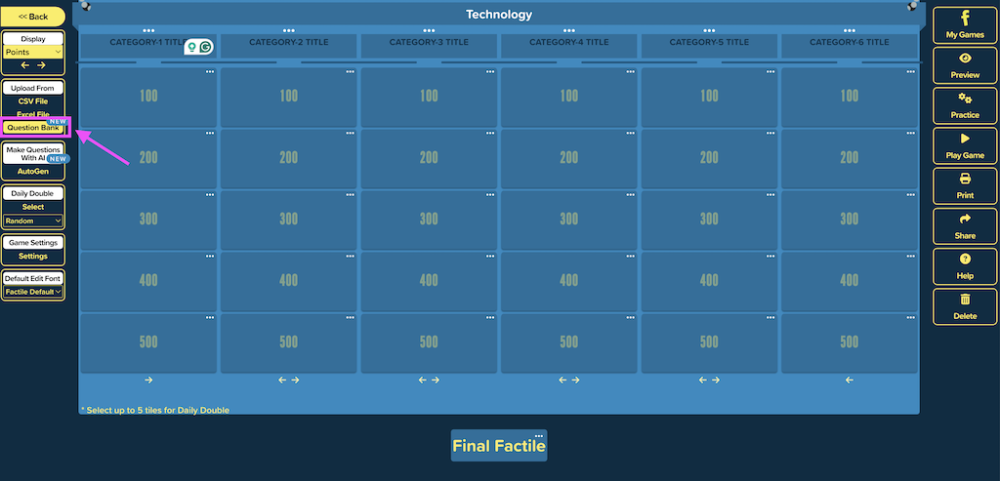
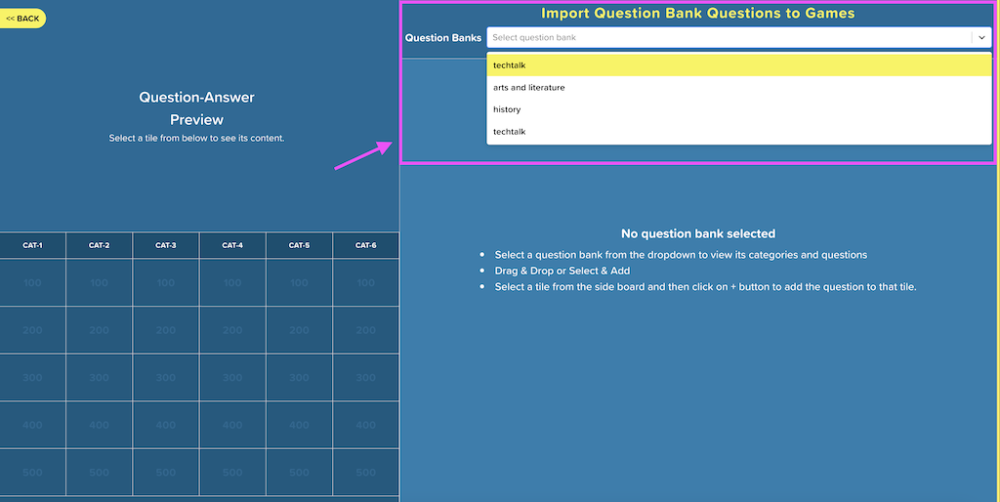
Select a question bank from the dropdown to view its categories and questions.
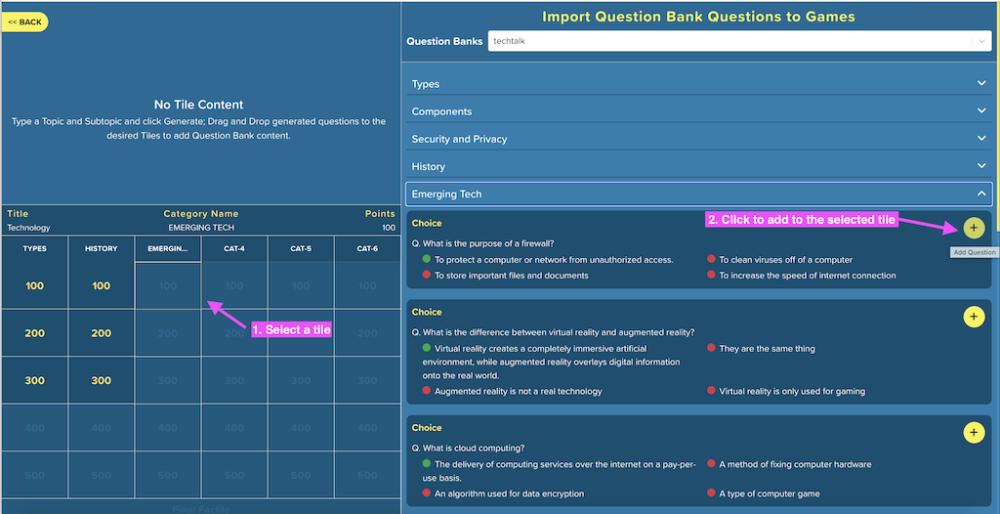
There are two ways to add questions to your game from a question bank:
- Click and drag the question to the corresponding tile.
- Select a tile from the game board and click the
![]() next to the question you want to add.
next to the question you want to add.
Note that you can add questions from multiple Question Banks that you have created.