
Drop In & Class Cards
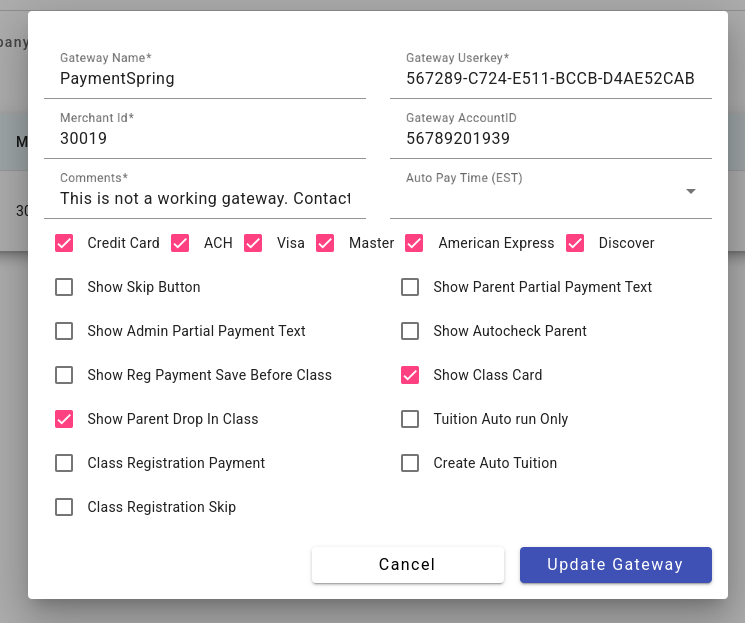
Turn on feature in Gateway.
Admin – Gateway – check the boxes next to “Show Class Cards” & “Show Parent Drop-In Class”
First, choose the drop-in classes.
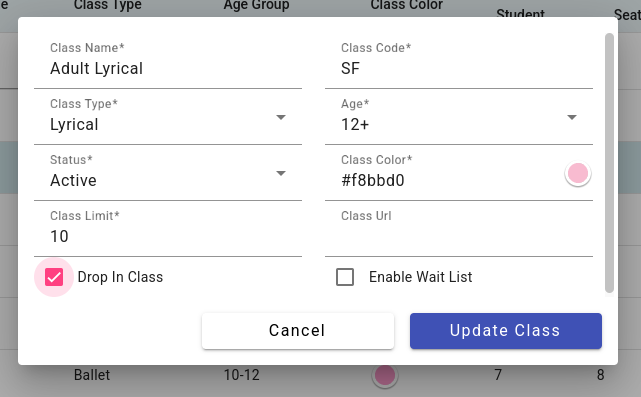
If you are creating a new class make sure to check the box next to where it says Drop-In Class.
If the classes have already been scheduled you can just click edit next to the class and check off the box that says Drop-In Class and click update.
After you have made your classes drop-in’s you can create your class card.
Click on Admin
To the left click on Billing Setting and then Class Card Setting
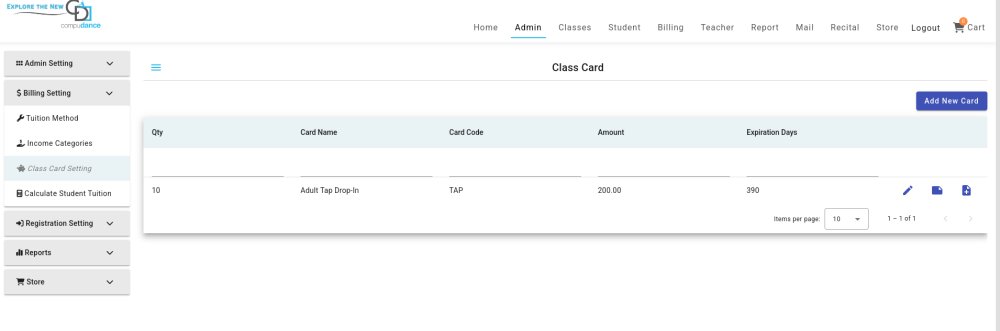
Click Add New Card.
Where it says Card Name you can name your card (ex. 15 Class Card)
Where it says Card Code you can put the number of classes on the card or whatever information you would like.
Amount will be how much the card is. (ex. 15 classes at $18 would be a total of $270) so you would put 270 in that box.
Expiration Days This is how long the card will be available for. All the numbers in the drop-down are the number of days. So if you click 90 that would be 90 days/3 months. This is when the card will expire.
Click Create Card. You can choose to add a picture of your card or leave it blank.
Once the card is created you have to link the class/es to the card.
Click the Page Icon next to the card name.
All classes that have been made “drop in” will show up here.
Check the boxes next to the class/es you want to link to the card.
Click Enroll
Click on the Card Classes tab and you will see the class/es linked to the card.

When someone purchases a class card from their parent portal – it automatically creates a deposit on their account. If the studio is recording that purchase of class card – it is done under Family account – Class Card. Once attendance is taken in these classes, anyone who was signed up for the drop in class will be automatically invoiced for that one class and the $18 will be deducted from their class card deposit.
If someone would like to purchase a class card they can do this through the parent portal or in person.
In Person.
Click on student.
Search by last name.
Click on their family name/number.

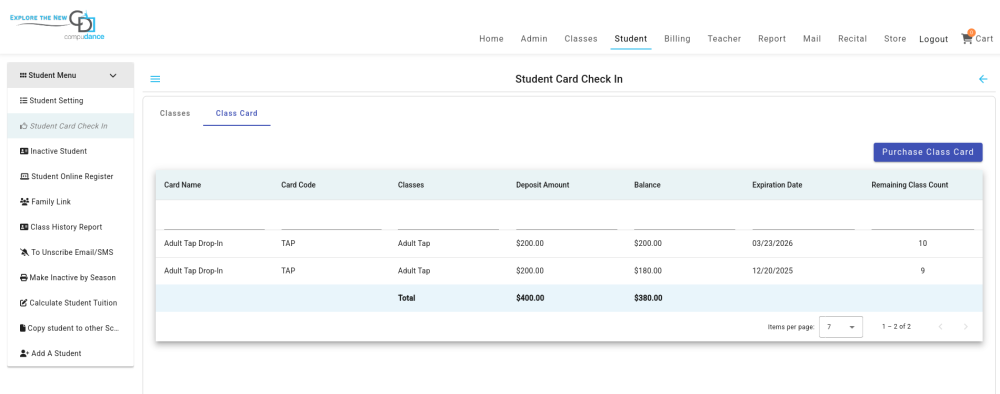
Click the Class Card tab
Click “Purchase Class Card”
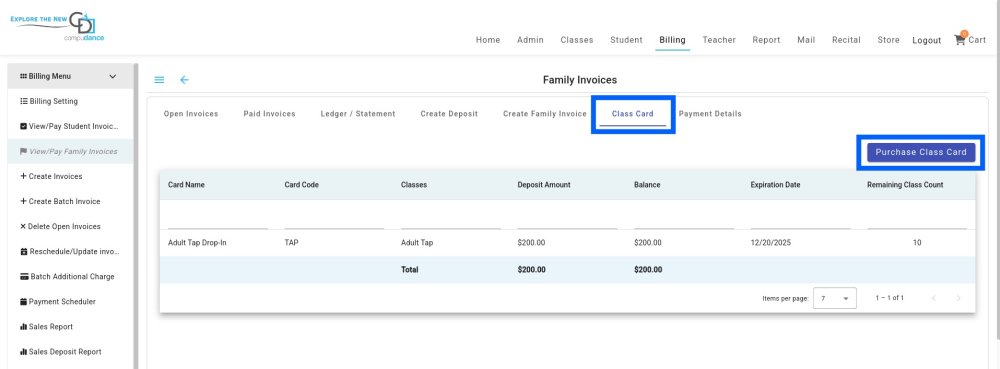
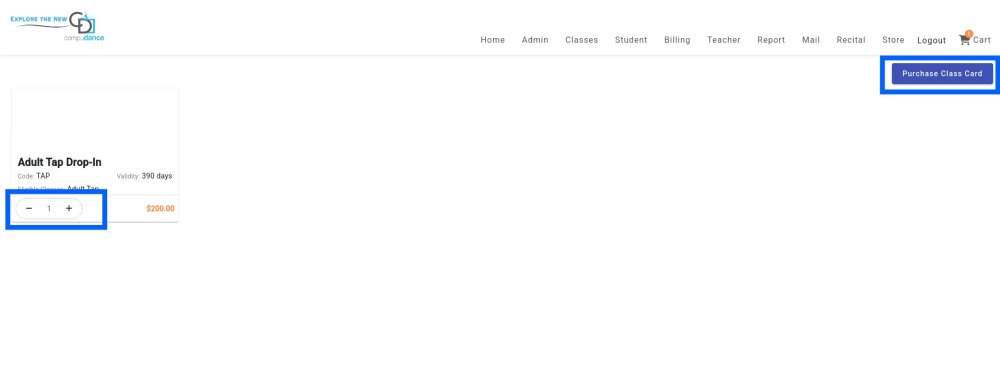
Select the card and quantity the “Purchase Class Card”
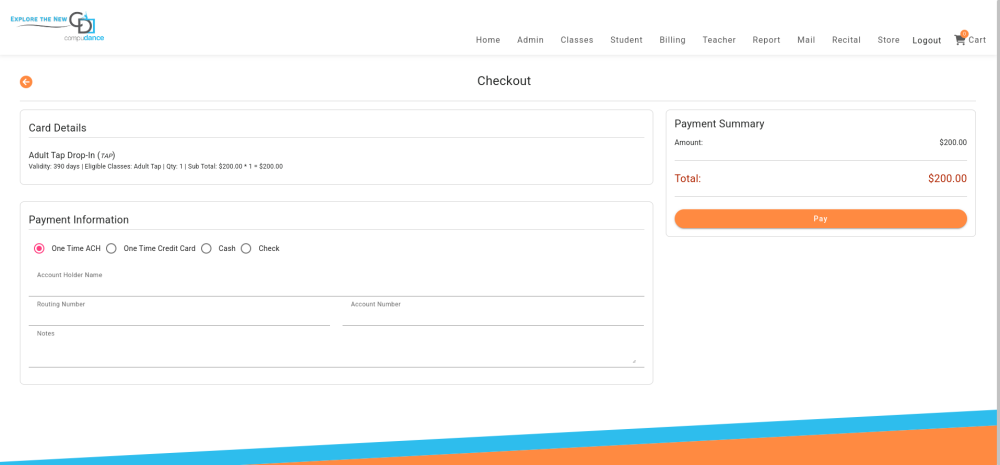
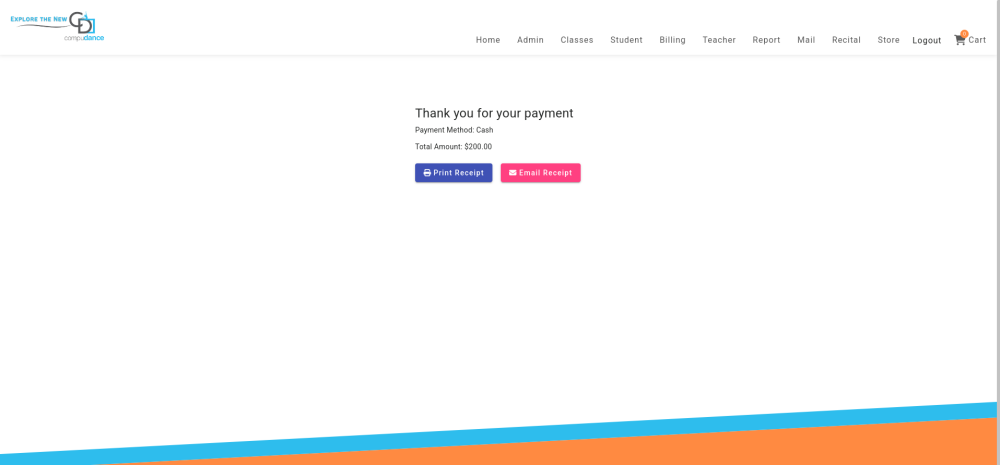
Enter Payment type and click “Pay”
Once you add the class card to the student’s account, you can add the class/es.
Click on Student
Search by the last name.
Click the Arrow Icon.
Drop in Classes are Visible in the “Drop In Class Section”
To Enroll Click “Enroll Drop In Class”
Check the boxes next to the date/s the student will attend and click Enroll
From the Parent Portal.
Use these steps to help guide your parents.
Click on Purchase Class Card.
Check the box next to the class card you would like to purchase.
Choose how you would like to pay, enter the information and click pay.
Next, click on Drop-In Class (to the left). This will bring up any of the drop-in classes available. You can check the boxes next to the day/s you would like to come to that class and click SignIn.
Now when you click on Student at the top that class/es you signed up for will show there.
Student Check In
Click on Student at the top and to the left click on Student Check In.
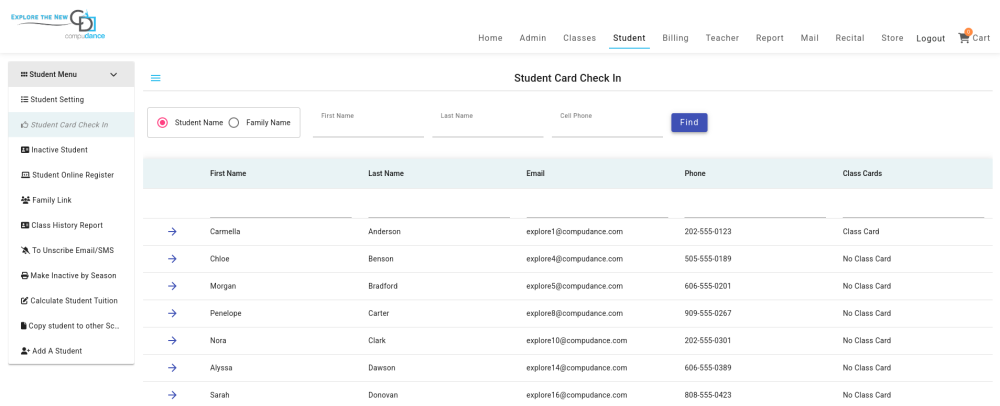
Search for the student by first name, last name or phone number and click Find (you do not need to enter a name, click find to view all students, those with class Cards will show class card on the right).
Once you find the student click on the Arrow button next to their name.
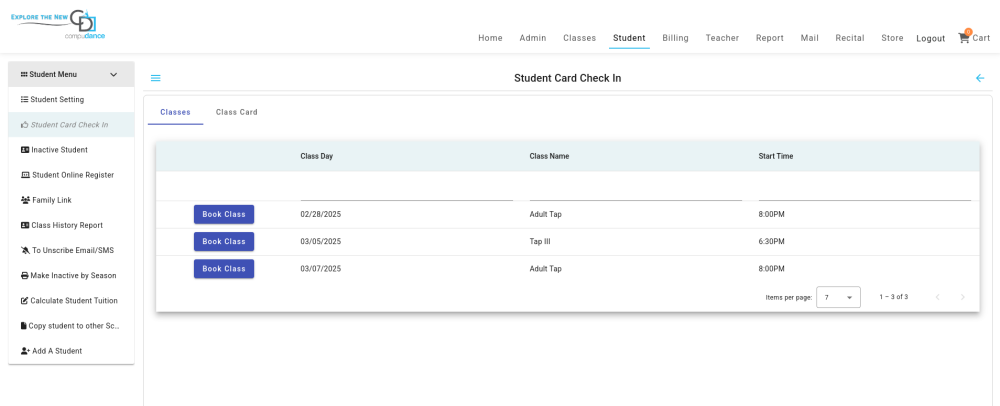
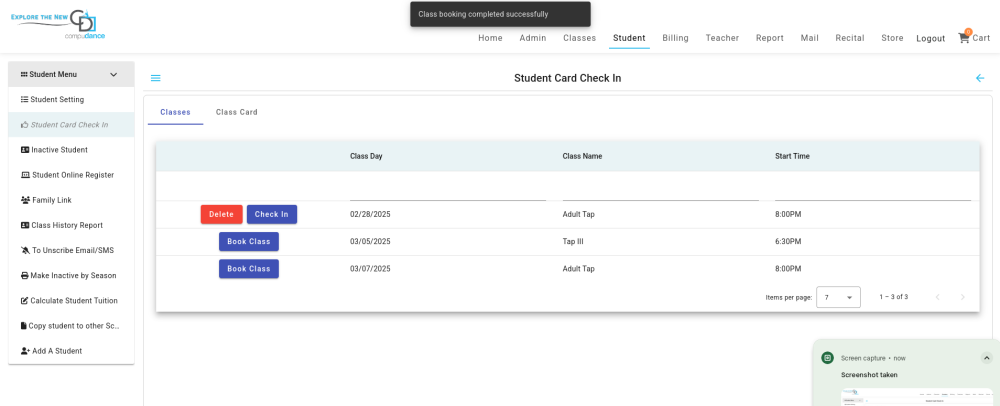
A list of your class will show, find the class that you are checking the student into and click Book Class.
You will see two options, Delete (in red) or Check in (in Blue). Click back arrow at the top right to go back.
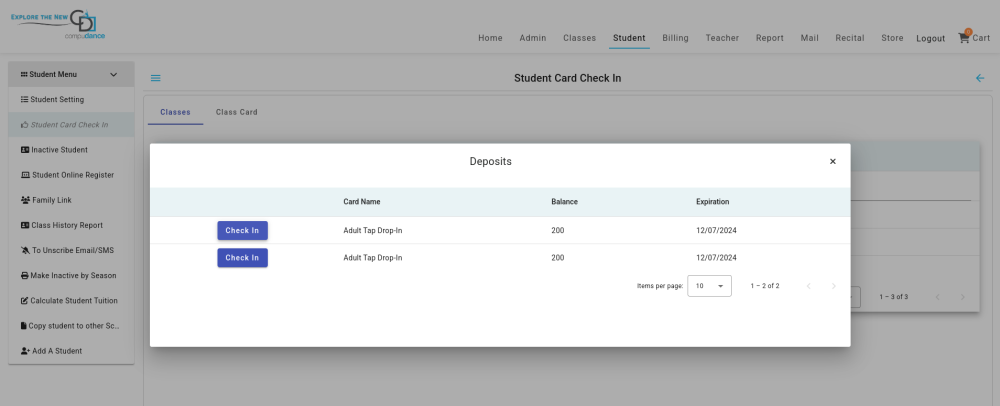
Click on the Check in button and below you will view a Deposit box.
Go to the Class Card tab to view the card information and bance. You can also purchase a new card by clicking Purchase Class Card.
When a family has a class card, you can click checkin and the class will be subtracted from their class card.
Need more help with this?
Please complete our support form if you need assistance.
Powered by