
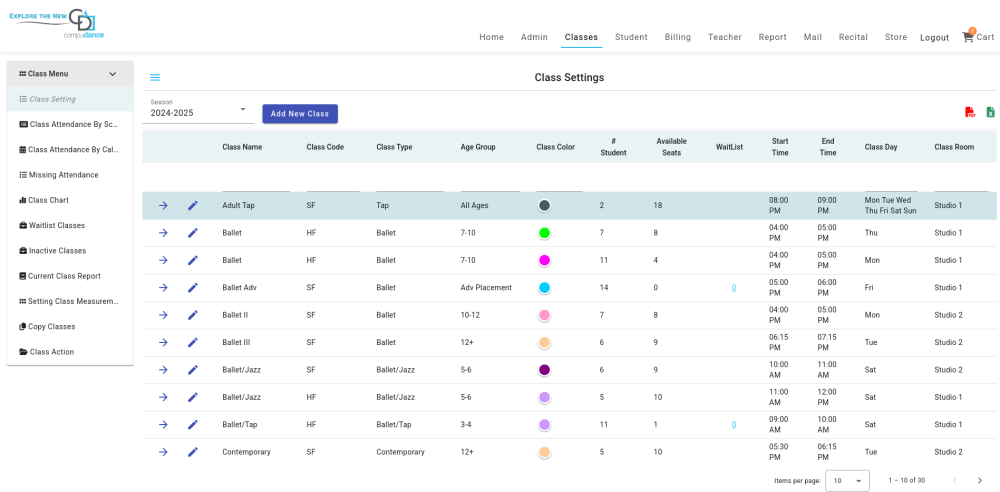
Click the ADD NEW CLASS button next to the Season Dropdown
You will begin by completing the class name and description. All fields with a * are mandatory.
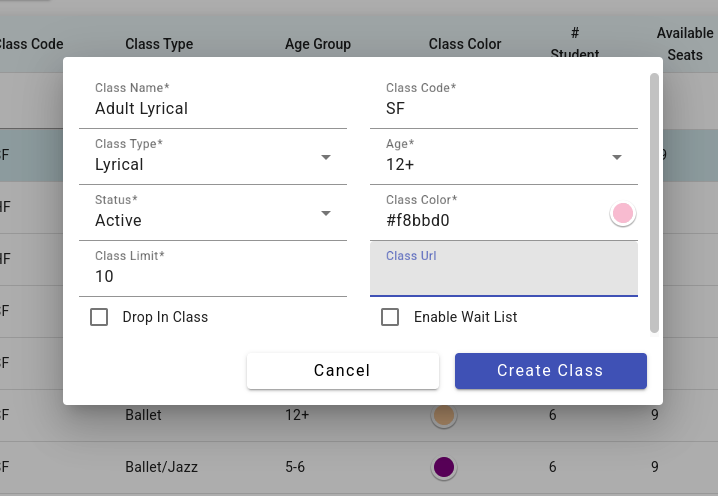
Name – can be whatever you like
Class Code – is a further description of the class – can be the level, day it meets, etc
Class Type – this is the class genre. Select the type from the drop down menu (customized by studio). To set the categories for your school go to Admin->School Setting Types->Class Types
Age – This is the Age range the class is designed for. To set the categories for your school go to Admin->School Setting Types->Age Groups.
Color – the color assigned to a class, appears on the homepage calendar. It can be used to designate a teacher, classroom, etc. If the preference is to not assign a color, select white.
Class Limit – The Class Limit is the max # of students that can be enrolled in the class. When using Online Registration if the class reaches the max the class will no longer show on a students onilne registration.
Drop in Class:https://www.manula.com/manuals/compudance/compudance/1/en/topic/drop-in-classes – check this box to accept drop in enrollment by the day.
Wait List – This will enable the Waitlist feature, Once a class has reached it’s Class Limit the students will be moved into the waitlist for this class. Then you can either create a new class and/or increase the class limit to add them.
Status – ACTIVE is a live class, INACTIVE is a class that is not currently active, and DO NOT SHOW is an Active class but prevents the class from appearing to a parent login in online registration or in the portal.
Class_url – This is a new feature added to help studios deal with Covid-19. This is where you would paste the Zoom link to this class. Once you paste the zoom link parents can view this in the parent portal and enter the zoom class from their parent portal.
*
Once all the data is entered, “Create Class” to save. You will then be presented with the following screen:
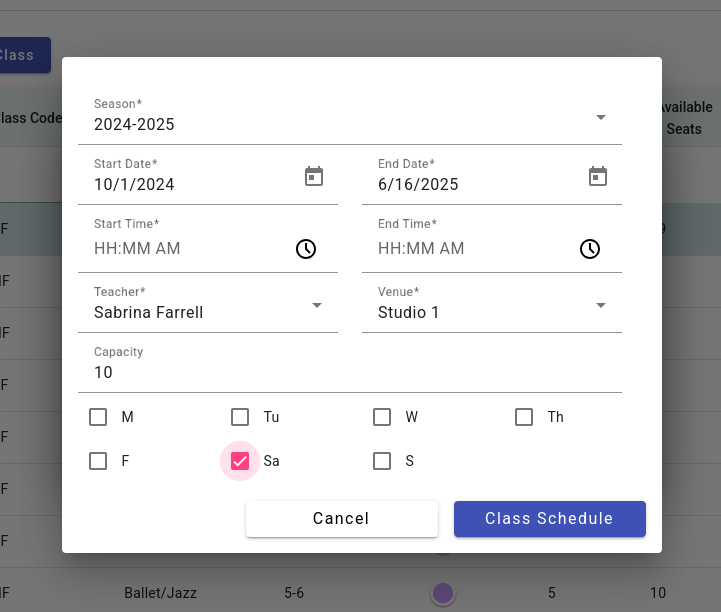
Season – defaults to the current season/session but can be overridden to another season
Start and End Dates – The dates define the time period of the class. They are defaulted based on the season but can be overridden.
Start Time and End Time – Determines the class length
Venue – The classroom/studio where the class meets
Teacher – This is the main teacher assigned to the class. Select one from the drop down menu. Additional teachers can be added from the teacher tab.
Day of the Week – a class can meet 1 or more times a week. Select the appropriate day(s)
Capacity – this is not a mandatory field, it is the max number of students allowed in the class
Lastly, click Schedule Class to save class and auto-schedule onto the calendar. You will receive a confirmation pop up “Class Scheduled Successfully.”
Need more help with this?
Please complete our support form if you need assistance.
Powered by