
Guide to Setting Up and Managing Your Online Dancewear Store
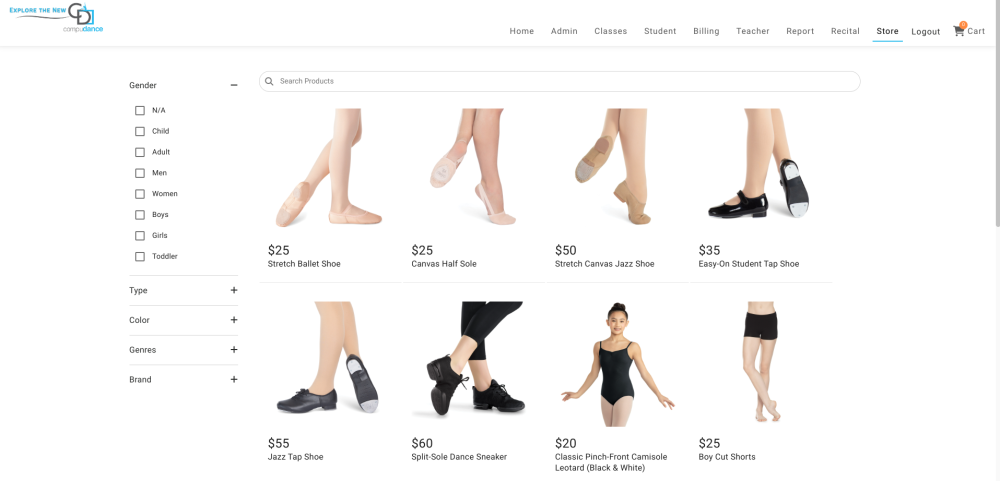
This guide will walk you through setting up an online store to sell dancewear, shoes, costumes, tickets, and more, and managing inventory and orders.
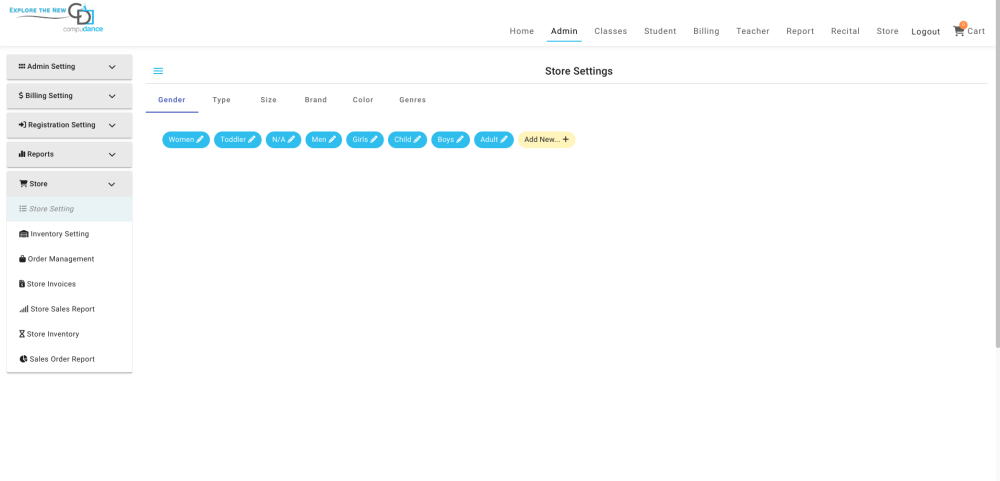
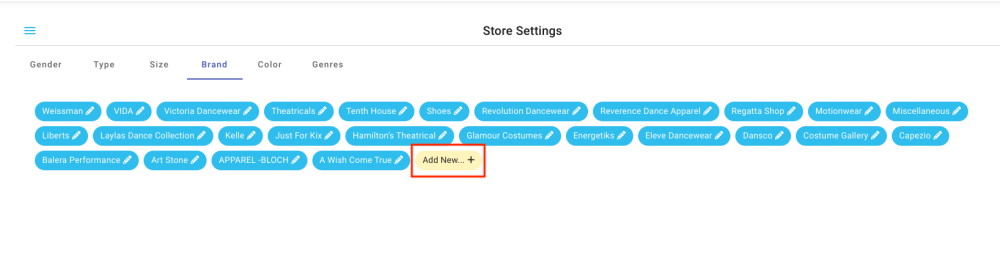
Step 1: Accessing Store Settings
1. Navigate to Store Settings:
- Go to the Admin Tab, then select Store.
- Choose Store Setting to view the options for Gender, Type, Size, Brand, Color, and Genres.
* Default sizing options are provided to help you start with standard shoe and clothing sizes.
- 2. Adding New Selections:
- To add a new selection in any category (e.g., Gender, Type, Size), click Add New+ under the respective tab.
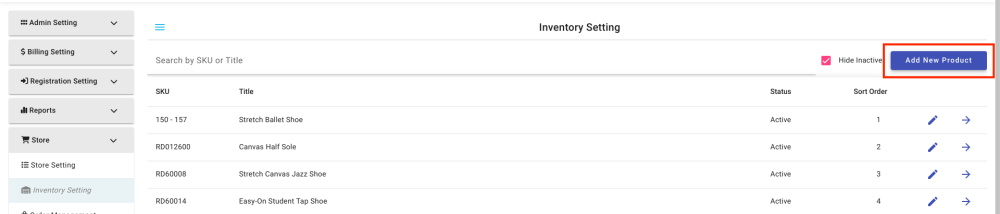
Step 2: Setting Up Inventory
1. Access Inventory Settings:
- Under Inventory Setting, you can add, activate, or deactivate products.
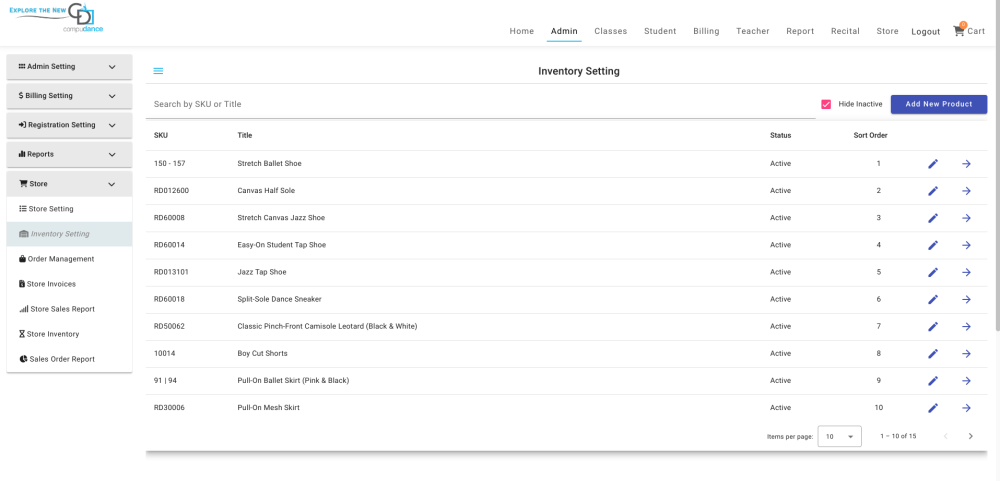
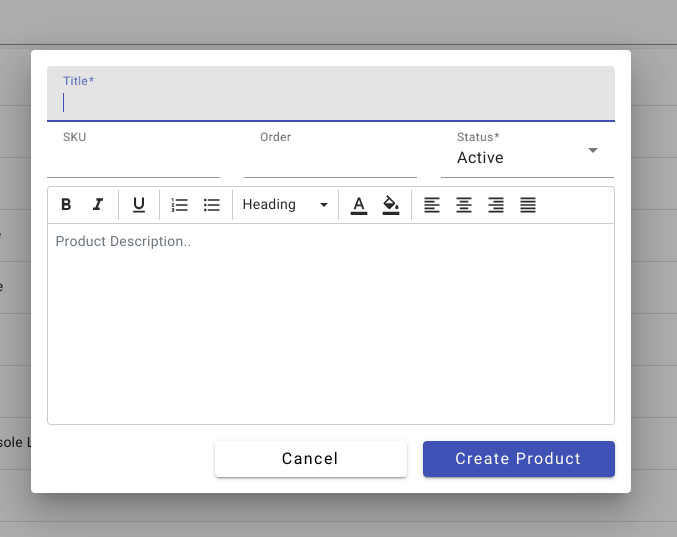
2. Add a New Product:
- Click Add New Product on the right side of the screen.
- Complete the product details form and click Create Product.
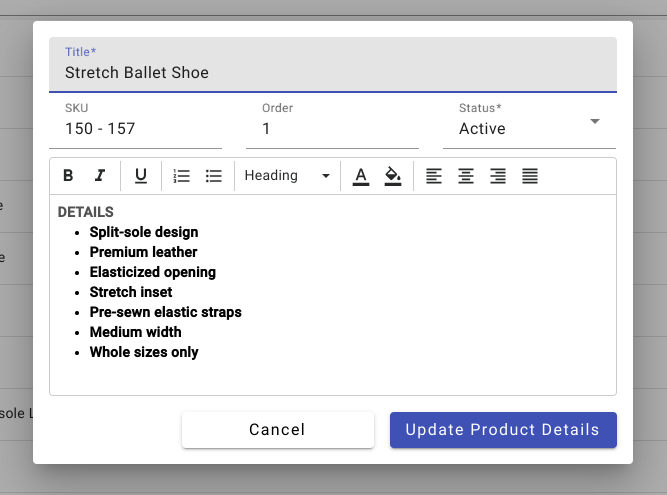
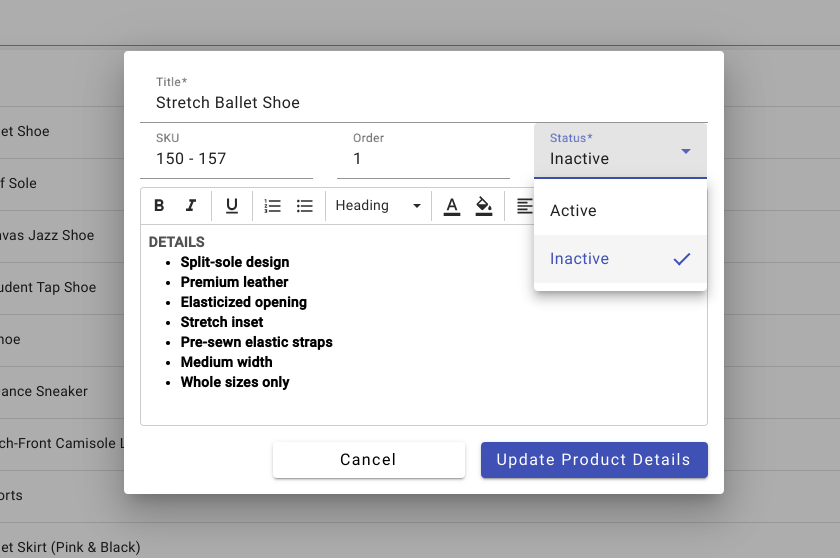
3. Edit an Existing Product:
- Click the pencil icon next to the product you want to edit.
- Update the product details as needed and click Update Product Details.
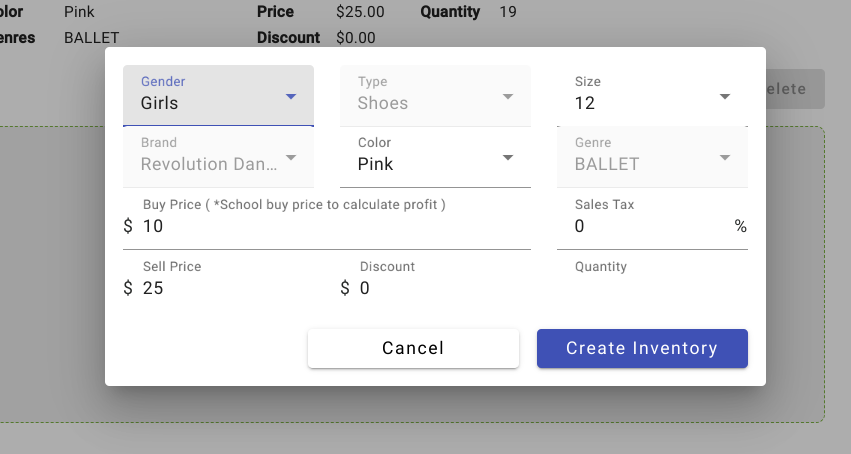
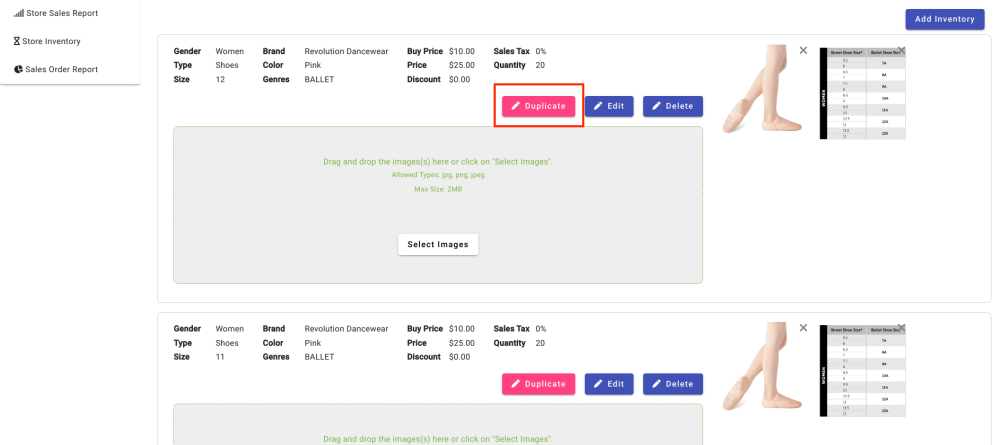
4. Add Inventory Selections (e.g., sizes, colors):
- Click the pencil icon next to the product, then select Add Inventory.
- Complete the form for the new selection (size, color, etc.), then click Create Inventory.
5. Duplicate for Additional Selections:
- To add multiple selections, select Duplicate to create a new selection for each.
- This will duplicate all details of the original item, allowing you to adjust or change the color, size, and quantity as needed.
- If you don’t have inventory for a specific item, set the quantity to zero, and it will not be displayed for parents in the store.
6. Deactivate a Product:
- Click the pencil icon next to the product, change the status to Inactive, and click Update Product Details.
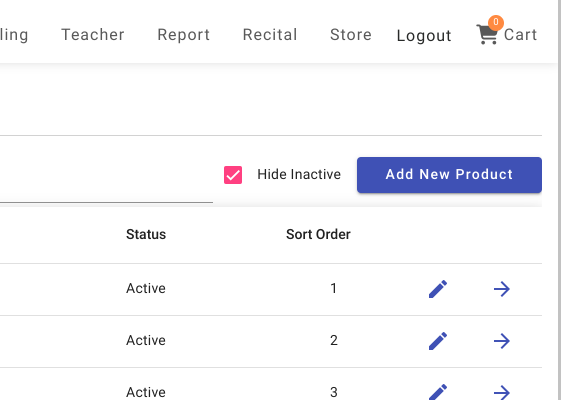
7. Hide Inactive Items:
- Check the box for Hide Inactive to remove inactive items from the list view.
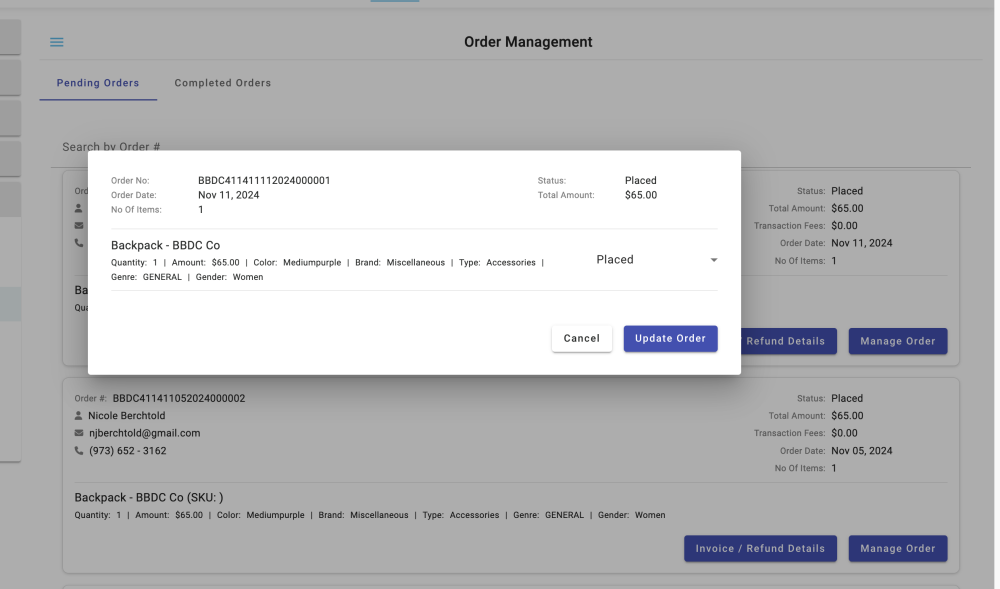
Step 3: Managing Orders
1. Access Orders:
- Under Order Management, you can view both Pending and Completed Orders.
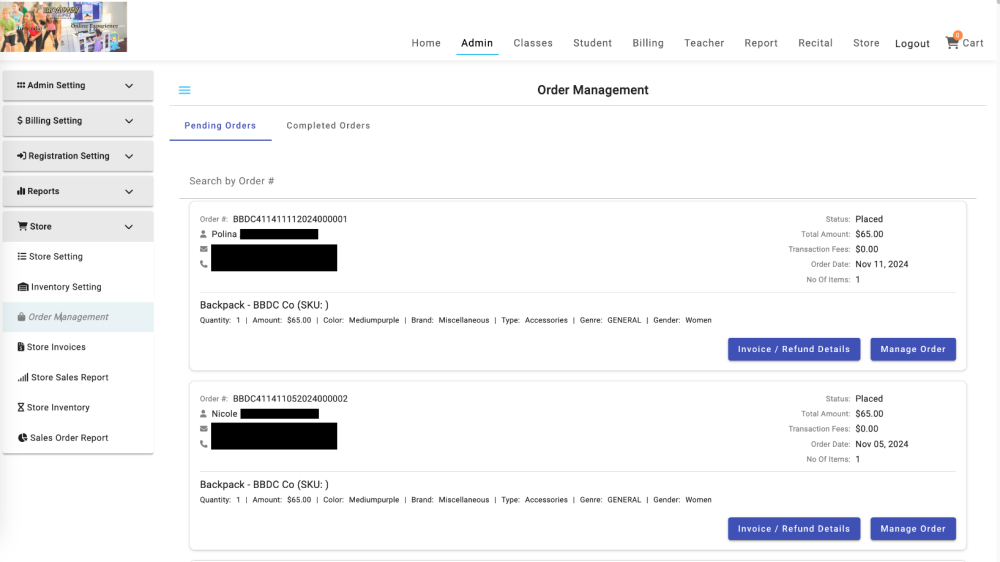
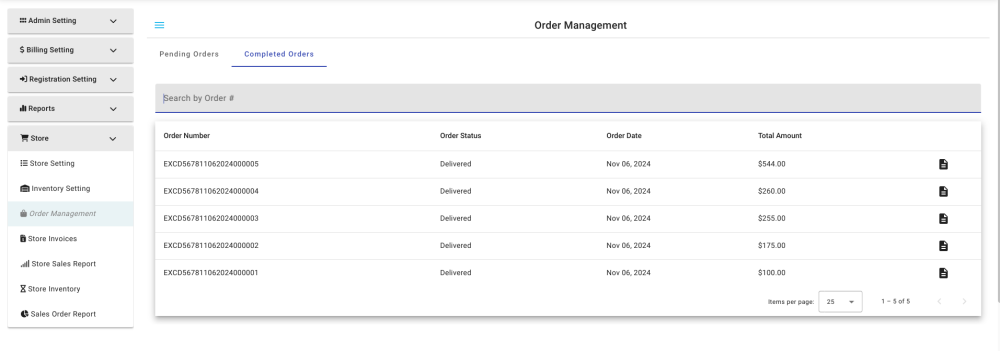
2. Search for Orders: Pending & Completed
- Use the search bar to find orders by Order Number or Payee Name.
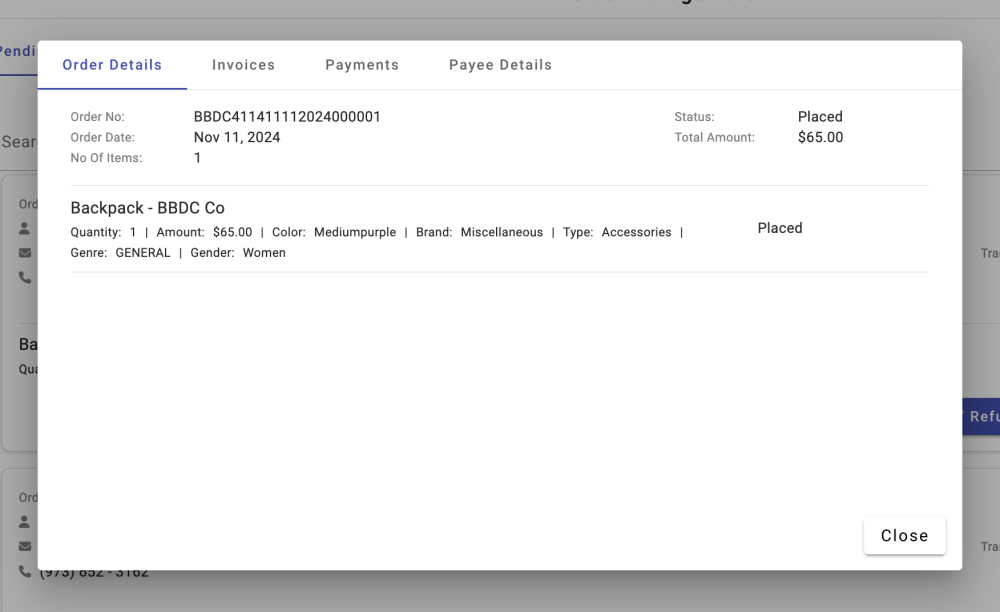
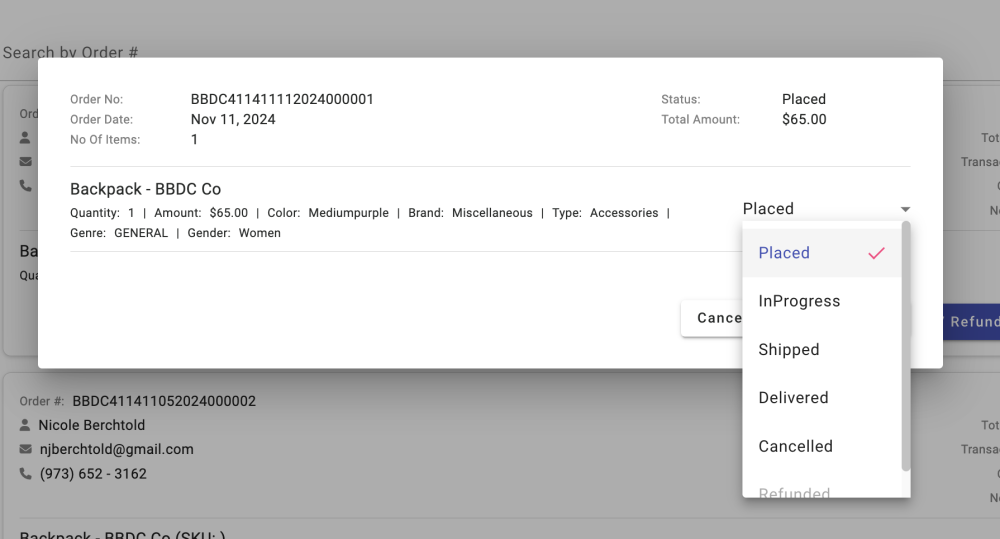
- Click “Manage Order” to update the status of pending orders. Select the new status from the drop-down menu and click “Update Order” to save.
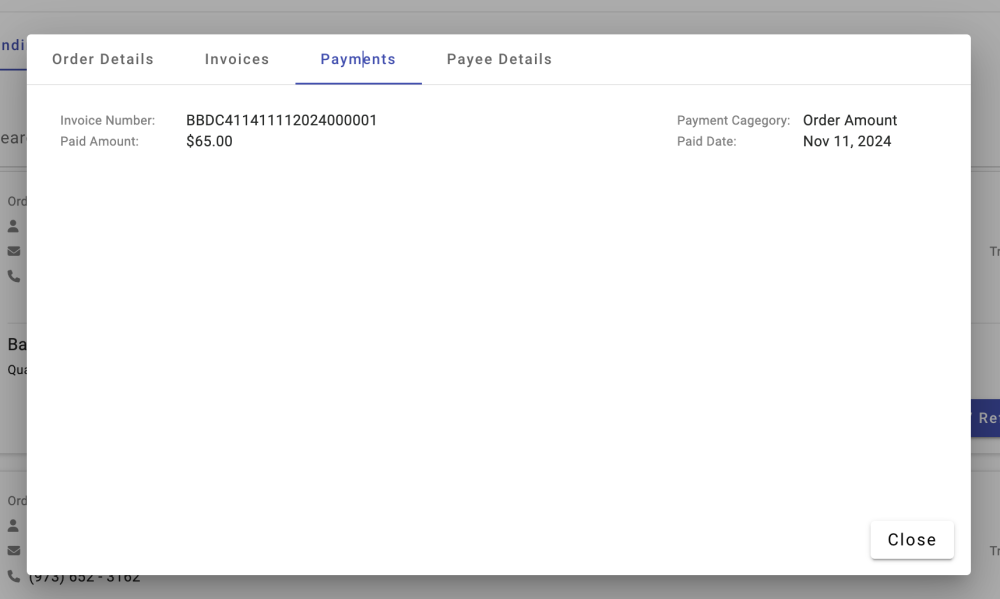
- Alternatively, click “Invoice/Refund Details” for additional options.
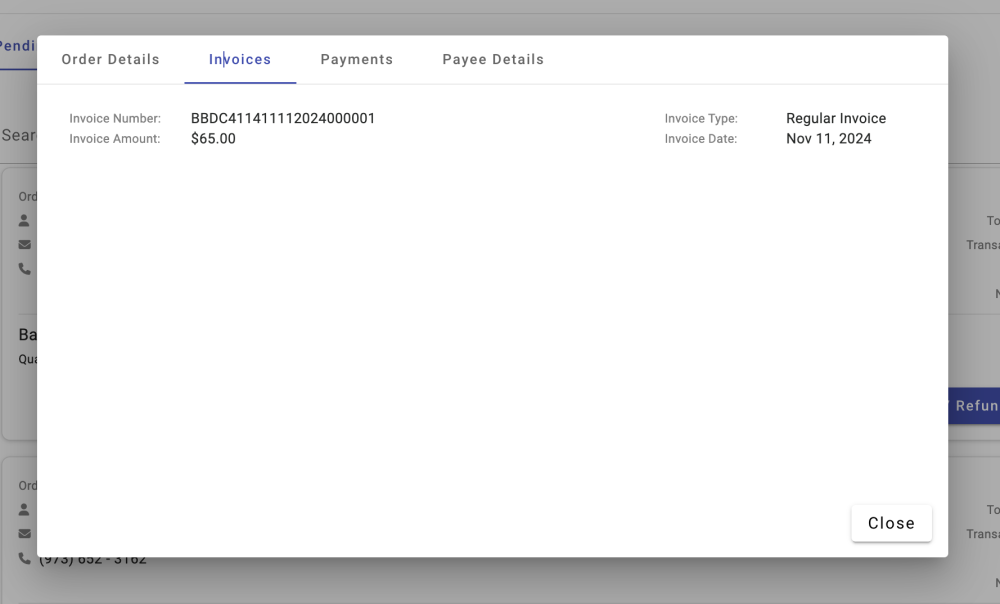
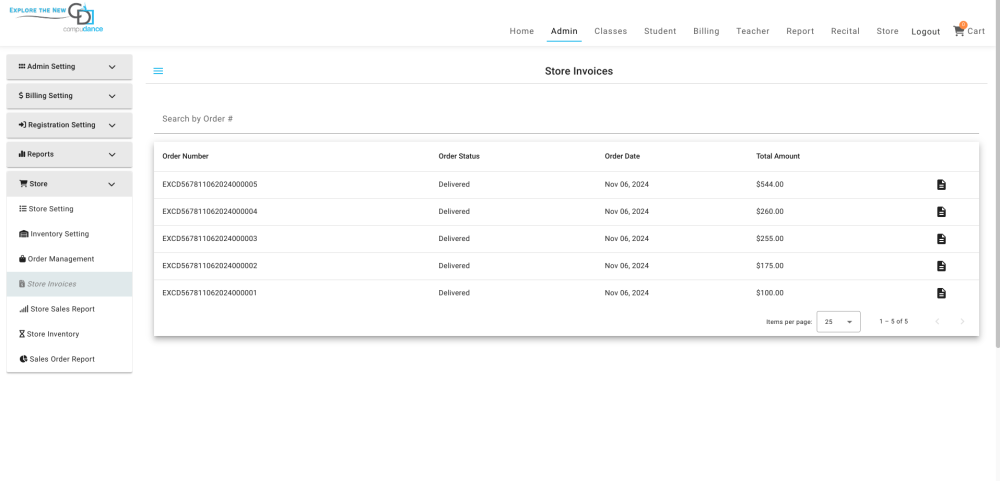
3. Store Invoices:
- For store Invoices, you can search by Order Number or Payee Name.
- Click the paper icon on the right to open an invoice.
Step 4: Running Reports
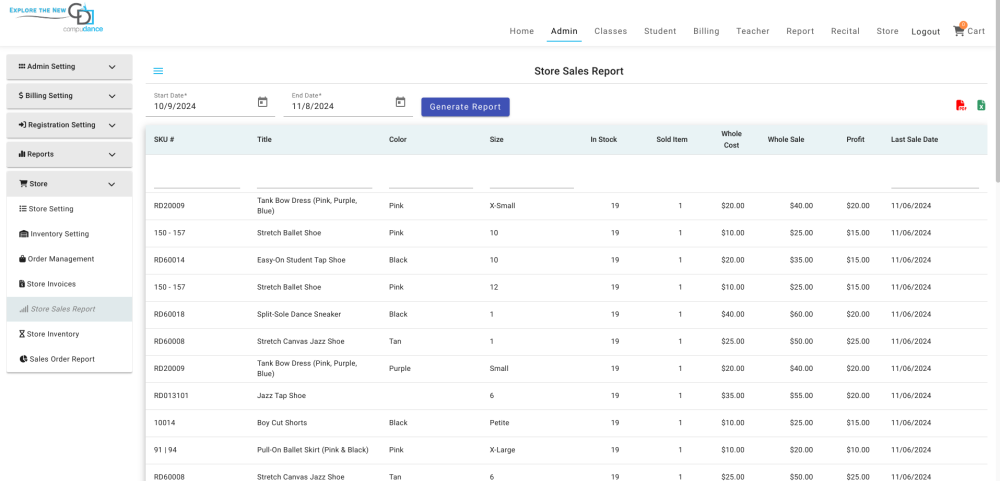
1. Store Sales Report:
- Search by entering a start and end date, then click Generate Report.
- Export the report as PDF or Excel by using the icons at the top right of the chart.
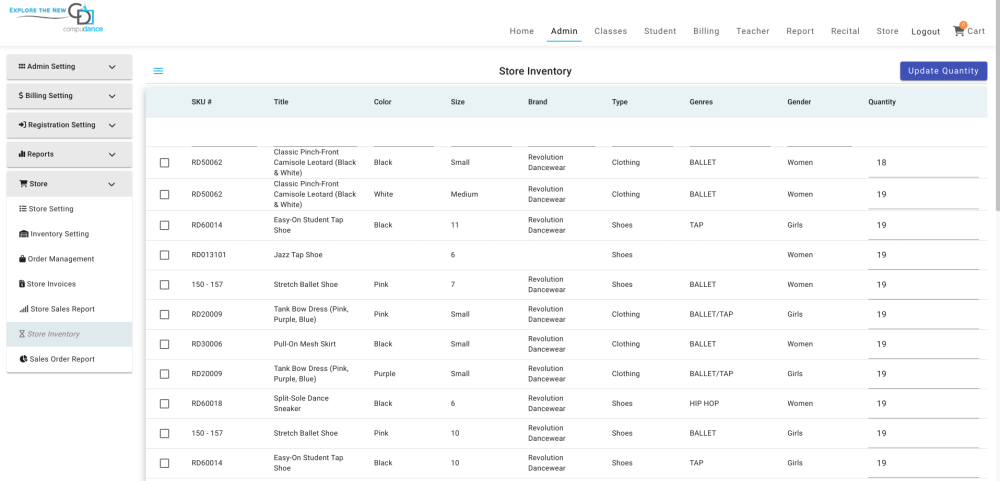
2. Store Inventory Report:
- To update inventory quantities, adjust the number in the last column and click Update Quantity
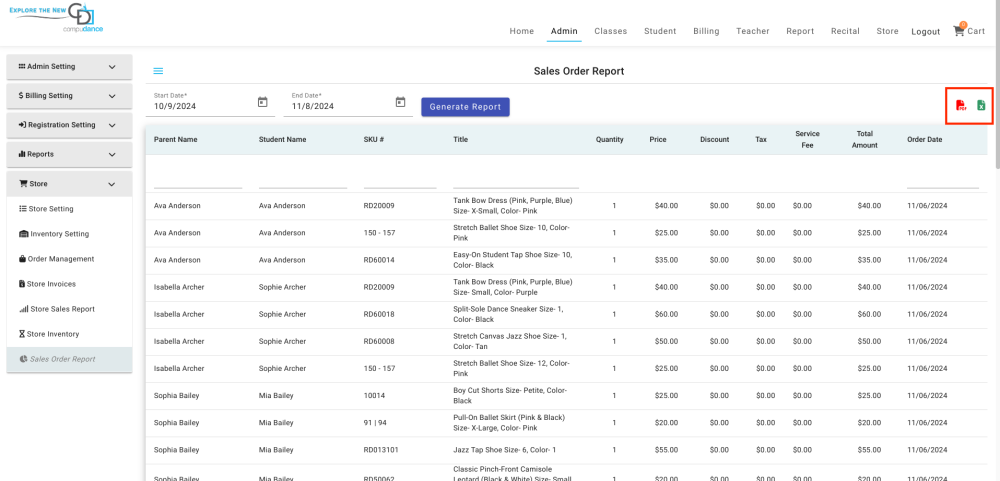
3. Sales Order Report:
- Search by start and end date and click Generate Report.
- You can also search by name, SKU#, or order date.
- Export the report to PDF or Excel via the icons at the top right.
Need more help with this?
Please complete our support form if you need assistance.
Powered by