
Overview
KC-BRAINware server hardware requires a different setup from our SL family of hardware. There is some command line requirement for the KC-BRAINware installation.
Kramer Control Setup
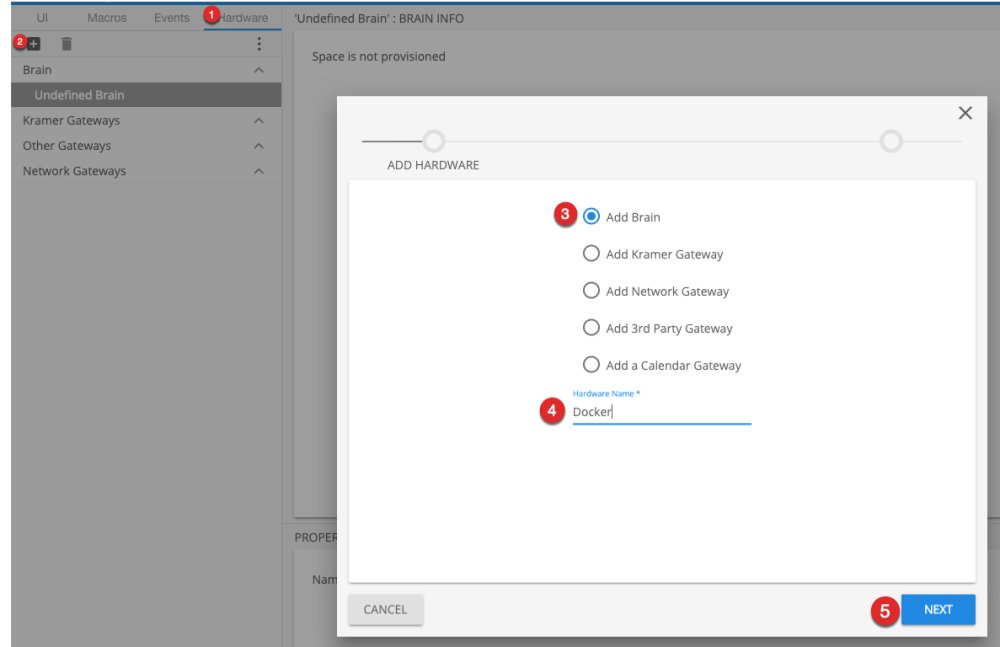
Within the Builder you will need to select the Docker – BRAINware hardware type before provisioning
- Launch Builder
- Select the hardware tab
- Add New Hardware
- Add Brain
- Name your Brain
- Click Next
Select the Docker Brain type and Click Create
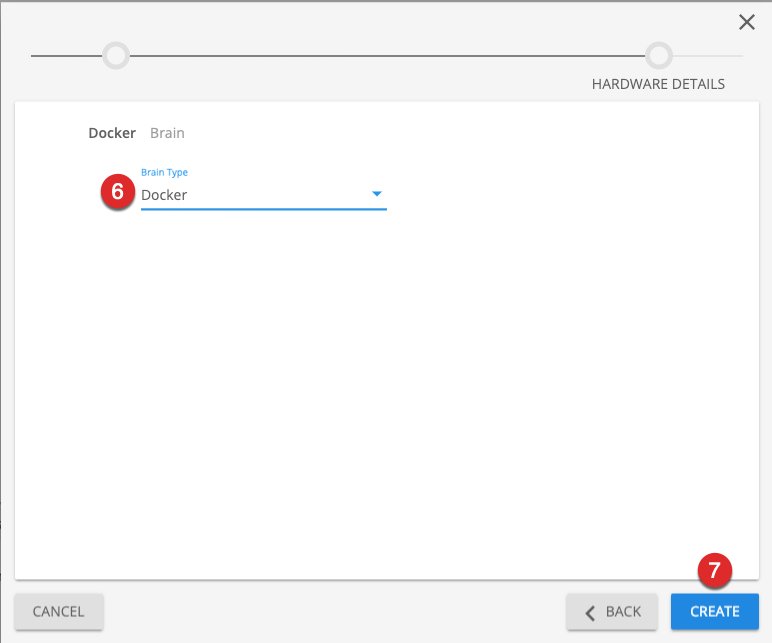
Note – The Provisioning process is the same as other Brain types.
Network Setup
Run kramer config within your CLI tool to view the setup details of your machine. The output from this command is shown below
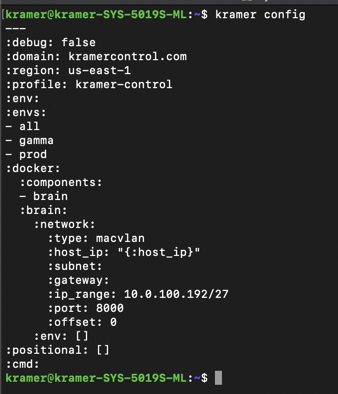
Some items may need to be adjusted within your Kramer Configuration file. When making changes you will need to execute set commands in the following manner
- Changing IP Range
kramer config set docker.brain.network.ip_range=%(color-red)%- The IP range should look something like this 192.168.10.192/27. You will need to enter a recommended starting address with the number of IP addresses available on your Network. If you have a dedicated Network for the Kramer Control server you can enter the IP address in this manner 192.168.10.0/32.
- Changing Subnet
kramer config set docker.brain.network.subnet=%(color-red)%
Note The Network type should be macvlan
Brain Logs
KC BRAINware does not have the same API endpoint as the SL brains. If you need to download a log file from the Brain, you will need to download the Docker log based on the container ID. The steps below explains this process in more detail
- Open CLI tool
- Type docker container list
You should see an Output like the one below. This example is using a machine running two Brains
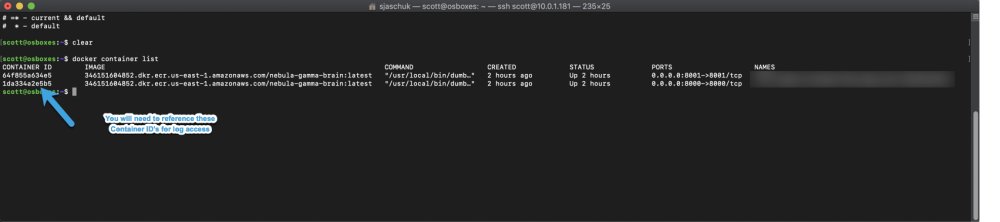
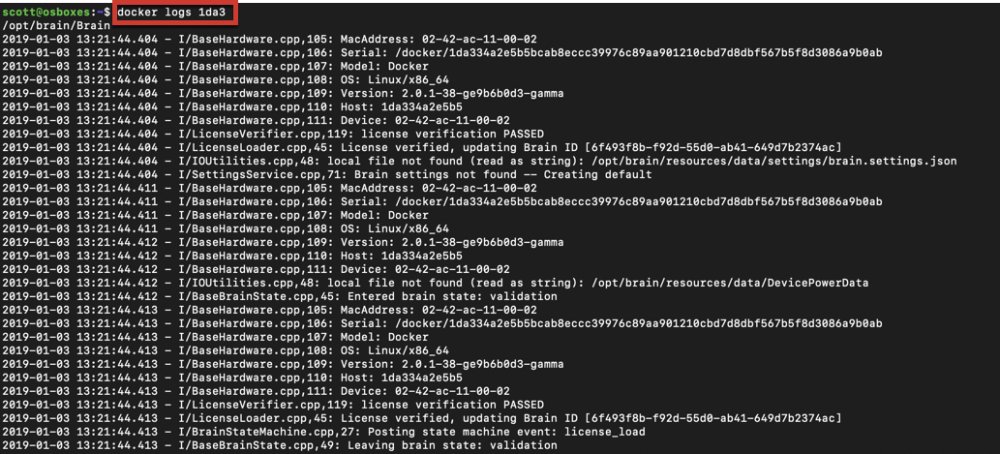
Once you have the ID, you can access the log by typing docker logs container_id
- Note – You only need to enter the first four characters of the Container ID to view the log file
Downloading Docker Logs
The process above explains how to view the log file in the CLI tool you are using. However, if you need to download the file to send to Kramer Control support you will need to enter a different string in your CLI tool. The image below shows the necessary string that you will need to enter
String to enter – docker logs container_id >& ./Documents/
- Note – The file does not need to be saved to the Documents folder, it can be saved anywhere as long as you know where to access the file later
- After downloading and storing the file you can change your machine directory and run the ls command to view the stored file

Post your comment on this topic.