
Importing refers to a command or process that assists the user in filling in the data into the QRT Data Points accurately.
The following file types are supported by the Tabular import routine:
Here are the steps on how to import data into the Tabular Workbook:
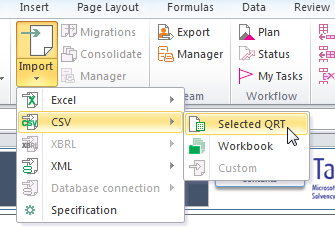
1. Click the Import button in the MS Excel Ribbon.
2. Select the appropriate type of file to import in the context menu as shown in the image below. Choose SELECTED QRT option if you wish to import data only to a specific QRT, or choose WORKBOOK to import into the entire Return.
3.The Import task pane will be displayed with several configurable options:

OVERWRITE INTERACTIONS
For Data Points within the Return that were derived from other Data Points (e.g. subtotals), the default setting is not to import into the cells to replace the formula. However, this can be changed through this setting (note, all calculation formulas can be retrieved from the database at any point, see Calculation cell section).
IGNORE DATA VALIDATION
For data points within the return which are limited by the taxonomy or other restrictions to a closed list of valid values or particular data formats then the default setting is not to import values which are not compliant with those rules. However, this can be changed through this setting.
If ignore data validations is set to “no”, then those invalid valid values will not be imported (note: valid values will still be imported). If ignore data validations is set to “yes”, then those invalid valid values will be imported along with the valid data.
OVERWRITE NON-MONETARY
For numeric data points which don’t represent monetary values (such as risk factors and other ratios) and text and date fields, this setting will set whether the value will be overwritten from the import file or not.
CONSOLIDATE
To append data to existing data (relevant for table QRTs only) the append option (default setting) should be selected. To overwrite existing data and replace select consolidate.
OVERWRITE — table QRTs
When consolidate is not selected for a table QRT the current contents of the QRT will be removed and replaced with the import file.
OVERWRITE — static QRTs
Similar to table QRTs, when consolidate is not selected for a static QRT the current contents of the QRT will be removed (calculations excluded unless overwrite calculations is also selected) and replaced with the import file.
APPEND — table QRTs
When consolidate append is selected for a table QRT the current contents of the QRT will be remain and the contents of the import file will be appended below.
APPEND — static QRTs
When consolidate append is selected for a static QRT the current contents of the QRT will be remain and be “consolidated” with the contents of the data file. For example, if S.02.01.1 data point C0010_R0050 contains 34 and the import file for this data points contains 10, post import S.02.01.01 data point C0010_R0050 will show 44.
RUNNING IMPORT
1. Click “Select File” to locate the import file you wish to import.
2. Once the file selection has been made and other import settings have been set as required, click “Import”.
Note for table QRTs, the excel table object will be expanded to the required size depending on the number of valid rows being imported; this does not need to be set up prior to importing.
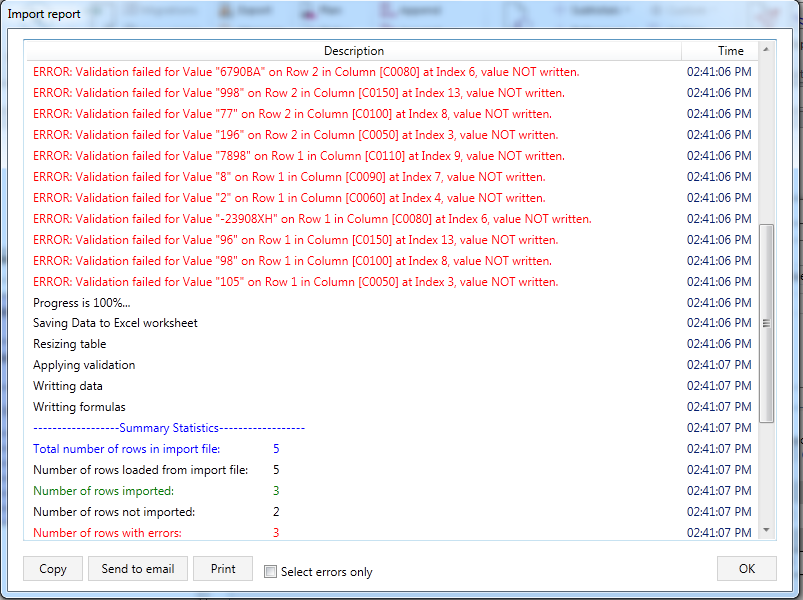
Pre-import validation checks will be performed to ensure the import file is consistent with the chosen specification. This check is performed at the row level, so rows not in the correct form for the import routine to import will be omitted although the rest of the return will import correctly (note the rows not imported will be listed in the import report).
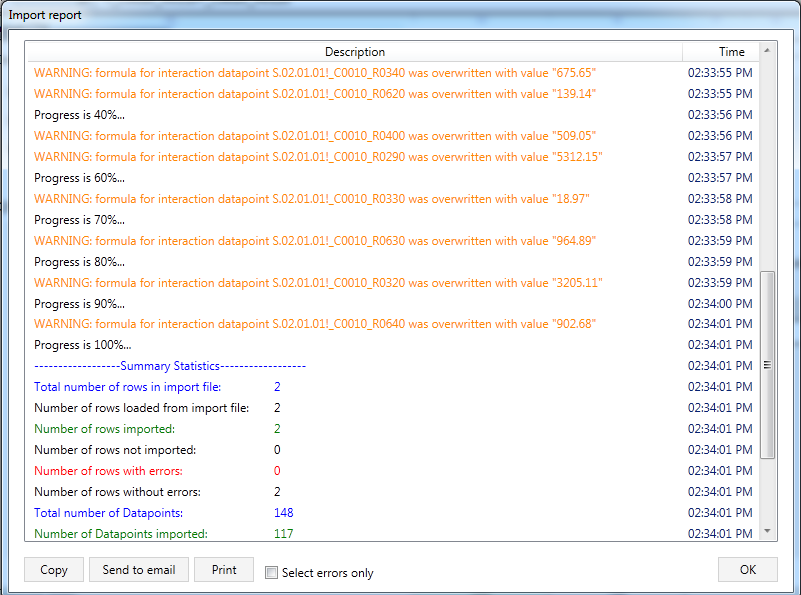
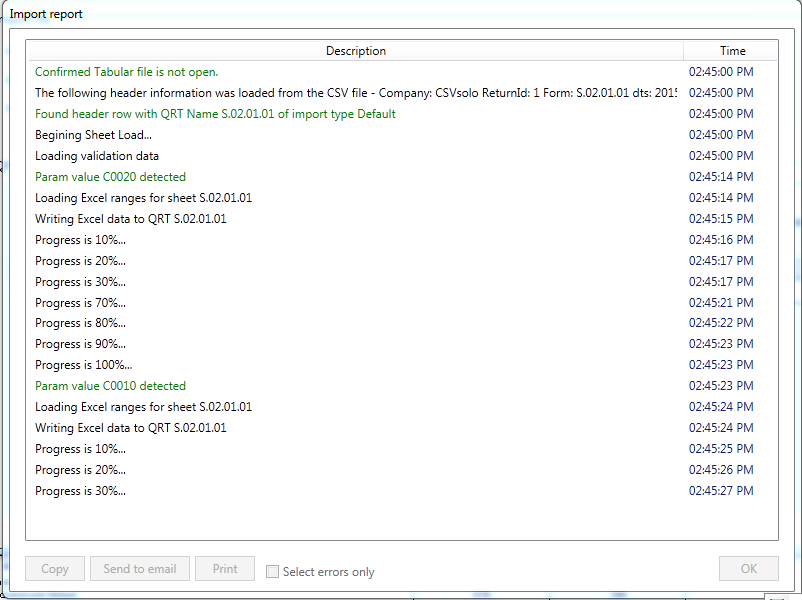
The import report will provide feedback on the pre-import validations and provide progress updates to the user on the processing.
POST IMPORT REPORT
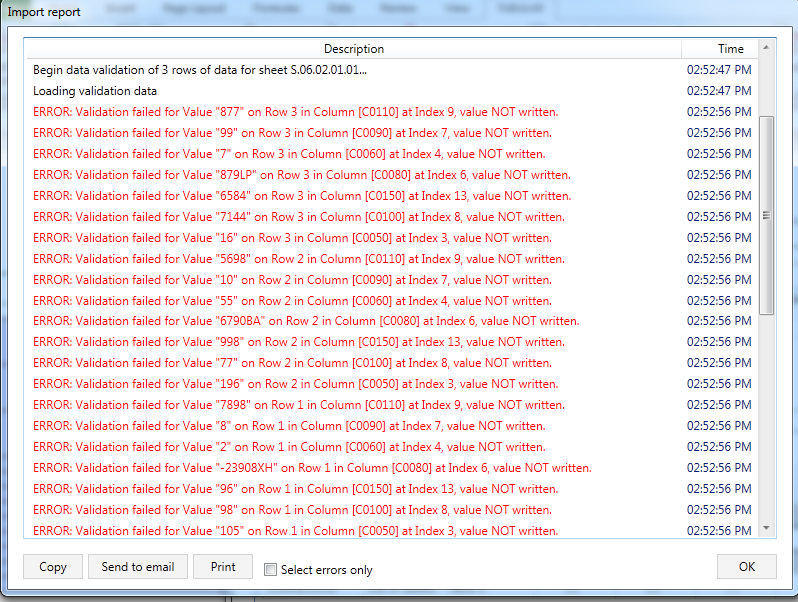
Following the completion of the import the import report window will show each data validation error within the import file; providing the row number, data point (eg “Issuer name”) and the value.
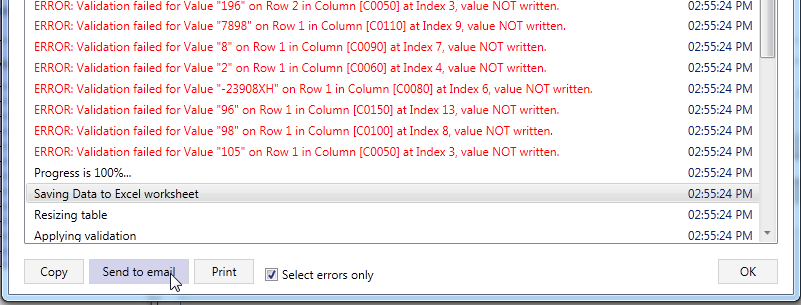
This report can be filtered to remove information lines to only show the errors and can be copied into another application, send to the users default email client or printed:
Post your comment on this topic.