
Roles are a set number of rules which enable specific functionality. Creating a new role is a 2 step process.
First, you create the role from the following screen:
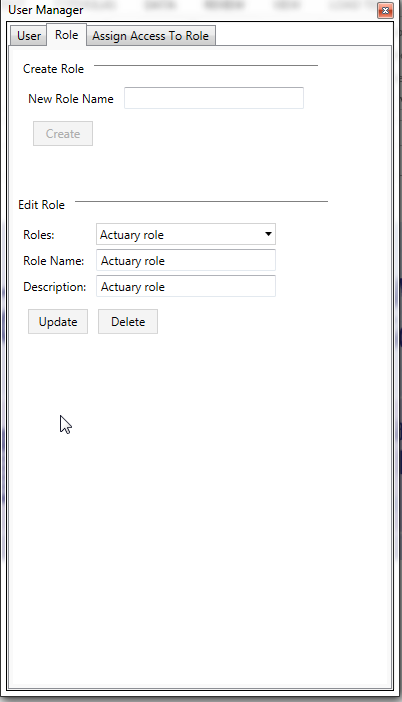
To do this, just write the Name of the new role and click Create. From the Edit role screen below you can delete this role or change its name or add a description.
After you have created the role, you should navigate to Assign Access to Role screen. This is the screen where the actual functionality/QRT enabled for this role is added. Select the role you want to edit in the dropdown on top and then you will see two grids.
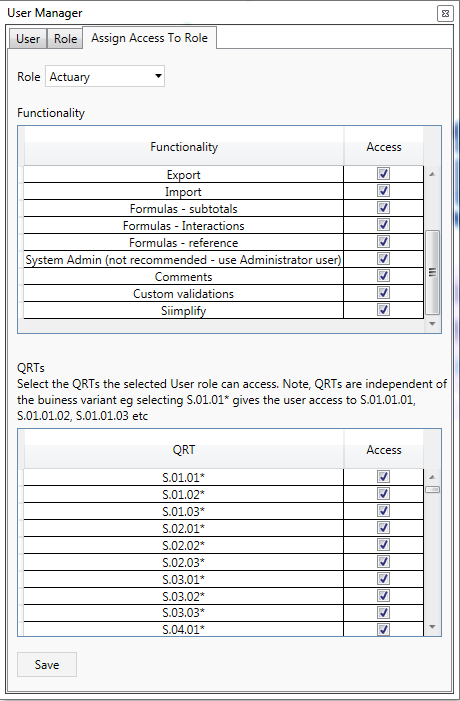
The first one is where you control what functionality will be enabled for this user. You start with all of the functionalities checked(enabled). Most of the functionalities are self explanatory and their names reflect and area on our Ribbon. Note that it is always advised to uncheck the System Admin functionality as this gives control over all Administrator functions including editing/adding new users.
The second grid has all QRTs inside. Not the full name of the QRTs are presented, but instead a * is used at the end to show that this selection is for all QRTs of this type, so selection S.02.01* will give access to all variants of the balance sheet, so S.02.01.01; S.02.01.02; S.02.01.08 etc.. In this grid you should check only the QRTs that you want this role to have access to. All unchecked QRTs will be visible for this user with this role, but he will not be able to add data or edit them. When you have made all your changes, don’t forget to click the “Save” button to save the role.
Post your comment on this topic.