
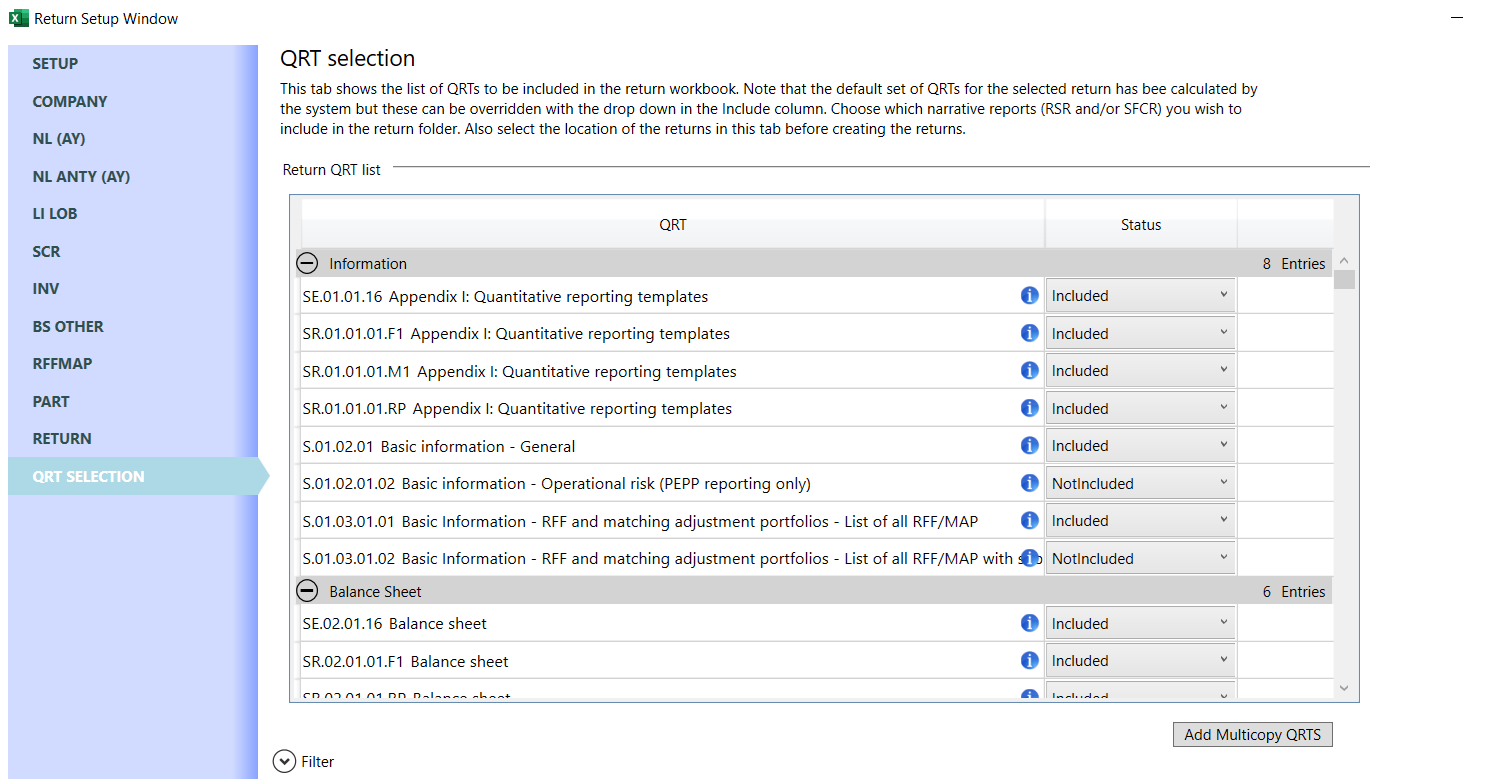
Based on the selections made in the preceding tabs, the QRT table will include all applicable QRTs for the Company Type (Solo/Group/Lloyds) and Reference Period (Annual/Quarterly/Ad-hoc) selected, grouped by the EIOPA QRT groupings (e.g. Information, Assets etc.). Within that set of QRTs, those relevant to the business profile and other selections made will be made available. Any QRT that is not selected as it is not required for submission can still be included within the return by selecting IncludedOver from the drop down as shown below.
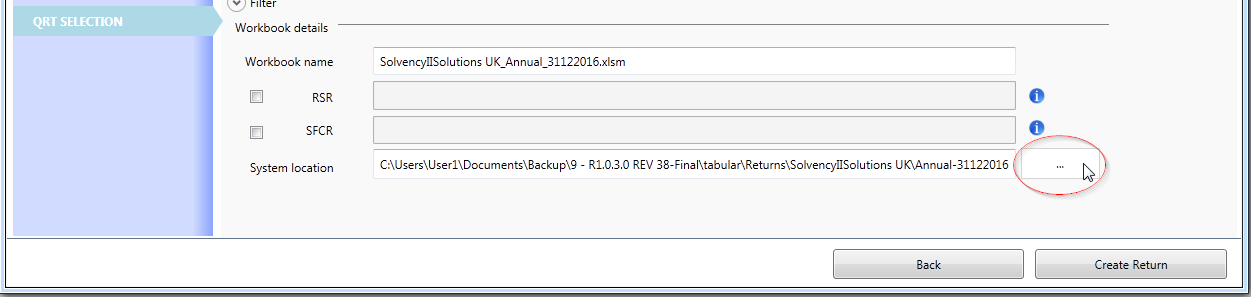
Once the QRTs for inclusion in the return are selected, the final step in the Return Setup is to choose where to save the return files (workbook, word document and supporting files). The first section under the sub-section Workbook Details is where you can assign the Workbook Name, the narrative report name (RSR, SFCR) and the System Location or the location of where the files will be saved (the default is where you have all your Tabular files saved).
By clicking this you will be able to browse other folder and save the files where you want.
Creating a Return
Once you are happy with all the Templates and Lines of Business for the return, you can now create the return by clicking “Create Return” at the bottom of return setup window:

Goldencopy status for return can be set by selecting Created return should be ‘Golden copy’ checkbox.
If the return being created is for the purposes of running a test (or e.g. scenarios) and you do not want the return to be used in future roll-forwards then uncheck the box.

Create a return based on an existing return’s workbook checkbox allows user an existing workbook instead ‘Clean template’. More information you can be found here.
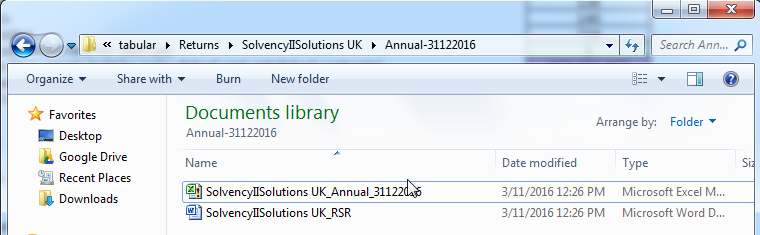
The new return is created in the system memory. Once this process is complete, the Tabular.xlsm file will be close automatically. The network location of the newly created return will then open automatically in Windows Explorer. Open MS Excel like a regular spreadsheet and log in to the return to commence working with the new return:
Post your comment on this topic.