
This is a typical layout for programming a timeline using both layer and mix presets. You can find the ‘Presets’ pin for both layers and mixs as a subordinate of the ‘Layer’ and ‘Mix’ pins.
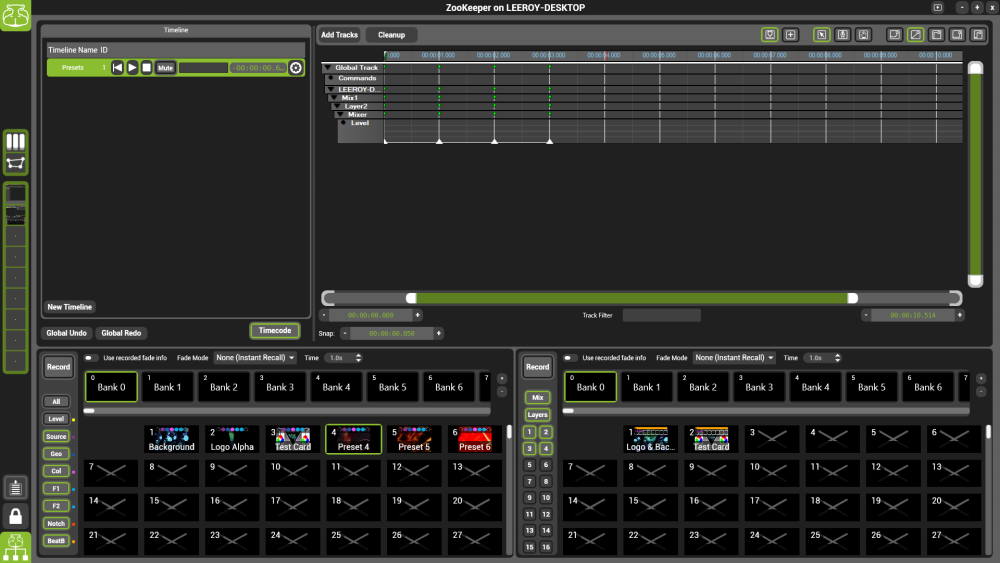
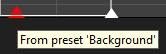
A preset is denoted by a triangle on the timeline. Hovering over the triangle will show you the label assigned to that preset. You can also right-click on a preset marker in a particular track to detach this from the preset meaning it is no longer affected by changes to the original preset.
Benefits of using this method:
- Quick programming once presets have been created, simply drag and drop the presets into the corresponding layer or mix.
- Changes made to presets also update in the timeline.
- Preset information can be applied to either a single track or a parent track and follows the hierarchical structure.
- Drag a preset onto a level track to only recall the level data, drag a preset onto the layer track and include all the data for any subordinate tracks within that layer track
More information regarding preset manager can be found here
Tips:
- Take time to decide which tracks you wish to include. Opening all tracks within an entire layer and only using a few of them makes the timeline both cluttered and inefficient.
- Name your presets to help identify the preset you have stored in the timeline.
- If you like the look of a preset but need to change a particular parameter within it. Detach the track information for that preset by right-clicking the preset marker and selecting ‘Detach from preset’ this only applies to that parameter.
Post your comment on this topic.