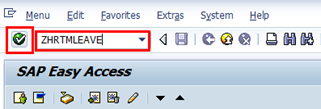
- Start the transaction using the menu path or transaction code.
- Click
or hit enter after typing ZHRTMLEAVE in the Command text box.
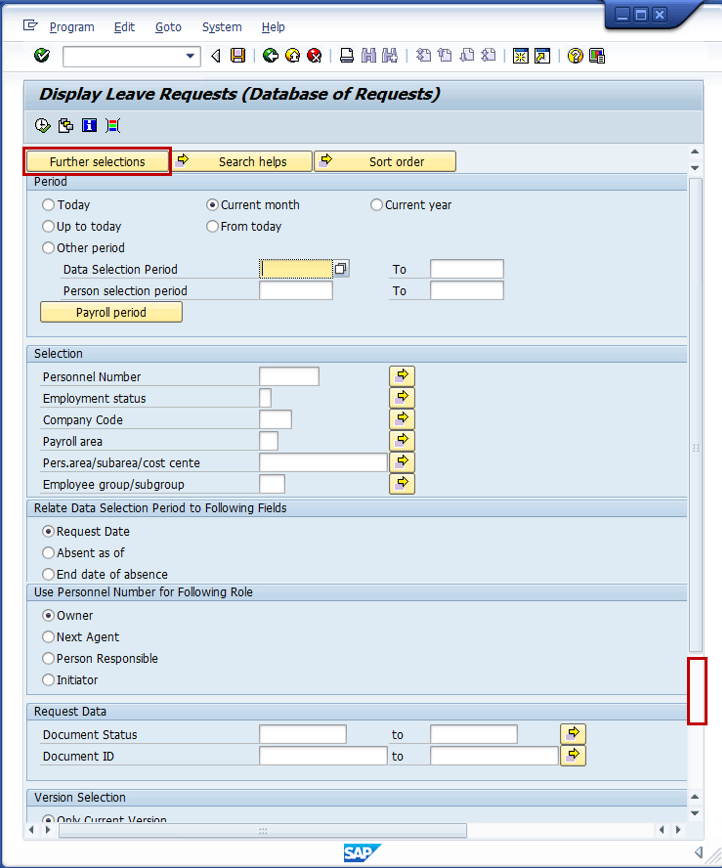
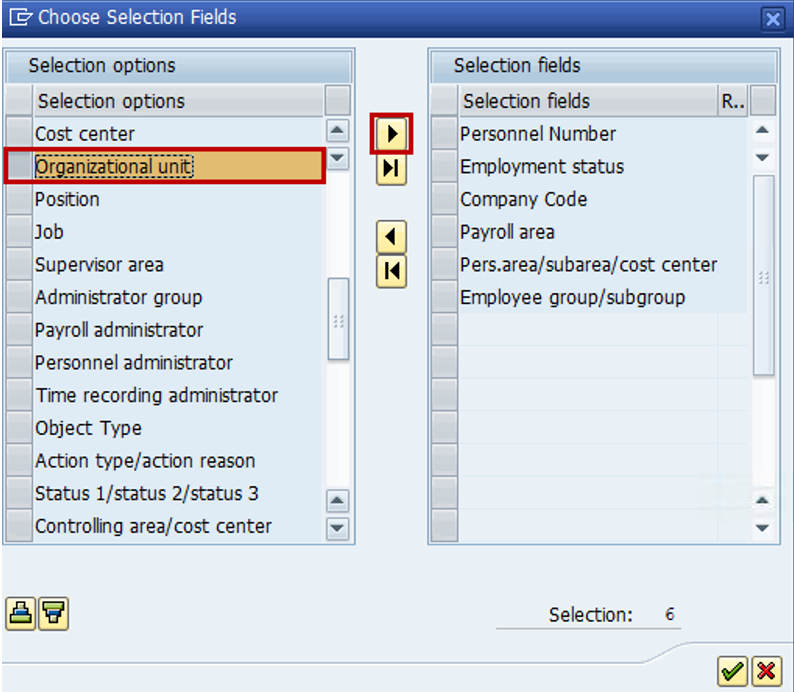
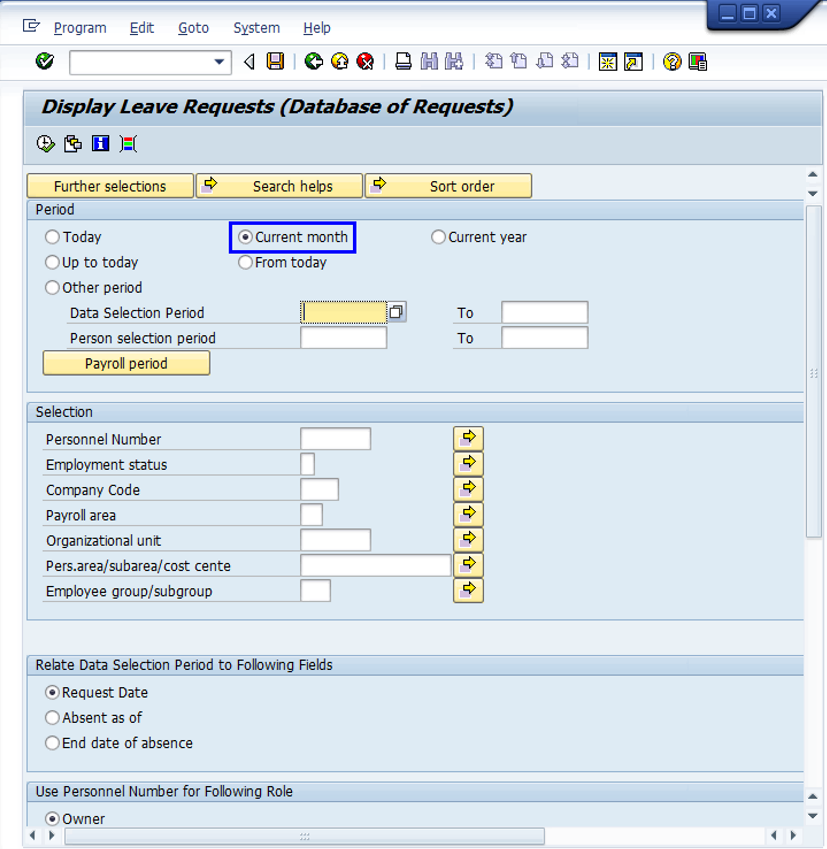
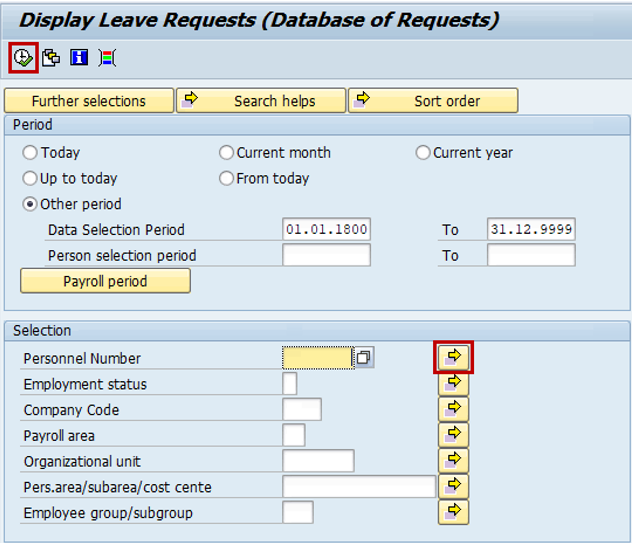
- Organizational unit is not part of the default Selection pane. You can either add Organizational unit to Selection or use a variant which already includes it. Click on Further selections to add Organizational unit to Selection pane and then scroll down.
- Select Organizational unit then click
to add the option to the Selection pane.
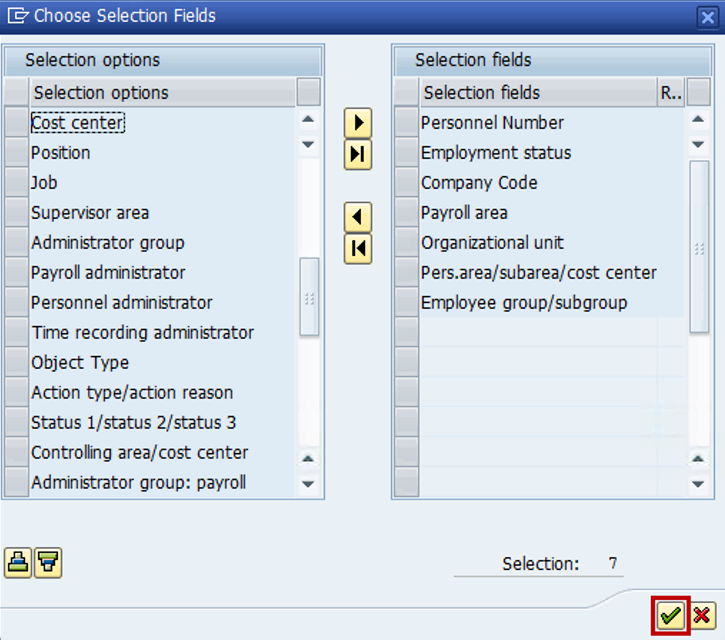
- Click
to confirm selection.
- The Period defaults to Current month.
- Click Other Period/Data Selection Period includes the following parameters:
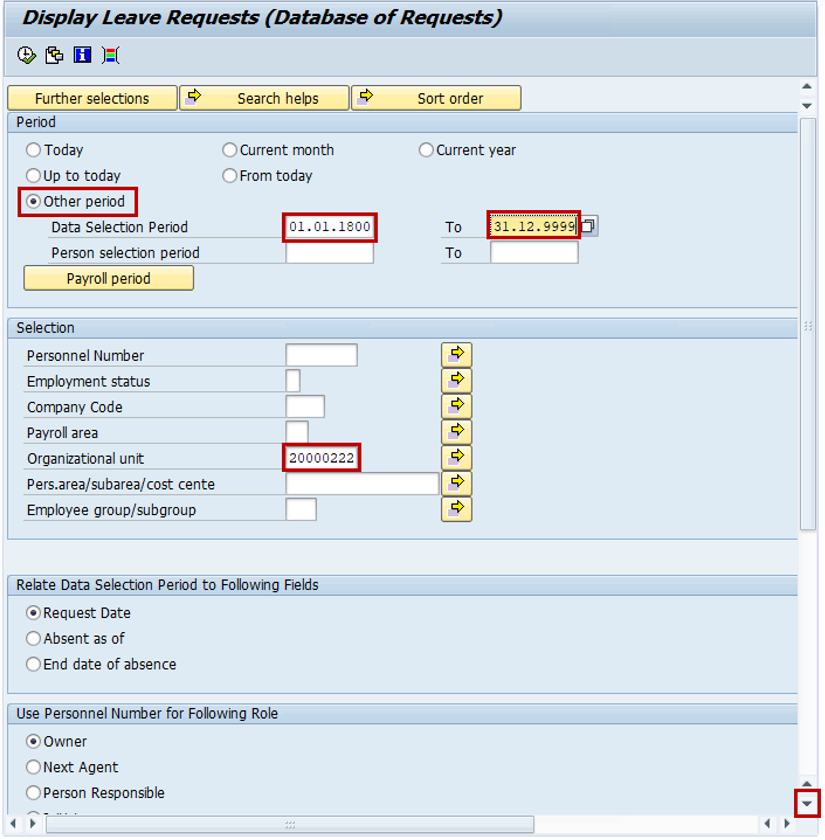
Under the Period section, select Other Period radio button and enter dates 01.01.1800 to 31.12.9999 in Data Selection Period field. This will include all requests of leave that have already passed as well as leave requests for future dates.
You may also customize the period by selecting one of the other options:
- Today – This will capture only those leave requests that are submitted today
- Up To Today – This will capture any leave requests that are pending approval from the Umoja Go Live date (i.e., 01.11.2015 for C4 entities) up to today
- Current Month – This will display any leave requests that are pending approval in the current month
- Current Year – This will display any leave requests that are pending approval in the current year
- From Today – This will capture only those leave requests that are submitted today
Type the Organizational unit number in the Organizational unit field then scroll down to the Request Data section.
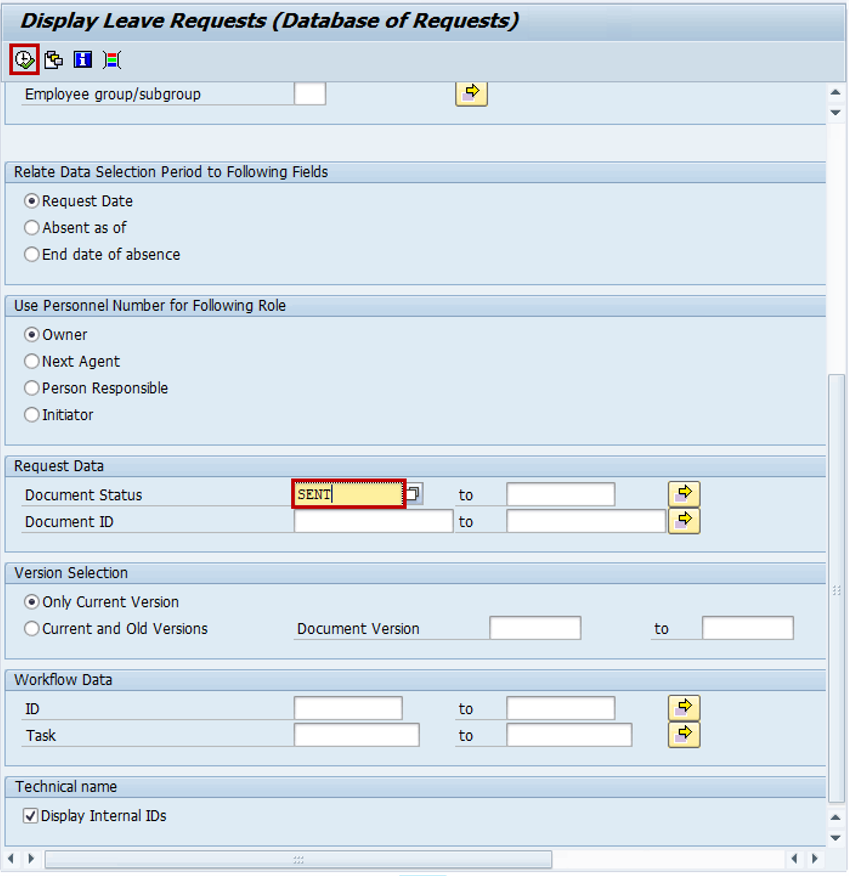
- Type SENT in the Document Status field of the Request Data section then click
. This will generate all sent requests for staff members in the Organizational Unit you are running the report for, for example, the Advisory Committee on Administrative and Budgetary Questions (ACABQ), Organizational Unit code: 20000222 on the Employee Self- Service Portal, which are pending next-level approval.
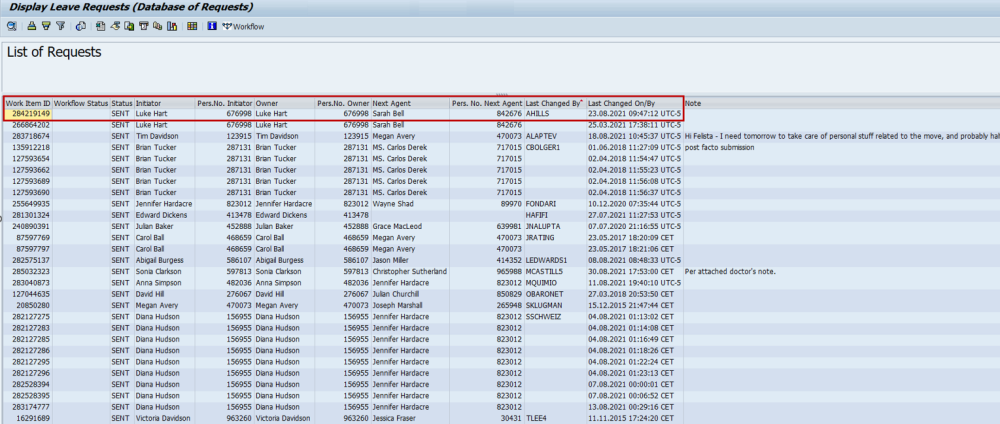
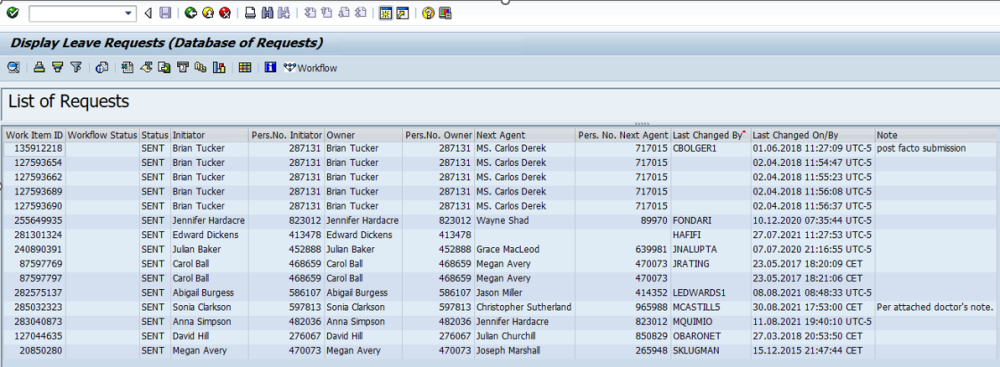
- The resulting report lists all staff members whose leave requests are pending approval within the Organizational Unit that was chosen.
You may scroll right or down to see additional columns and rows.
You may choose to export this list to a spreadsheet [i.e., Excel] for further analysis offline. To do so, click the Local File icon or press CTRL+SHIFT+F9. This will allow you to export the report results to an Excel file and save it to your computer.
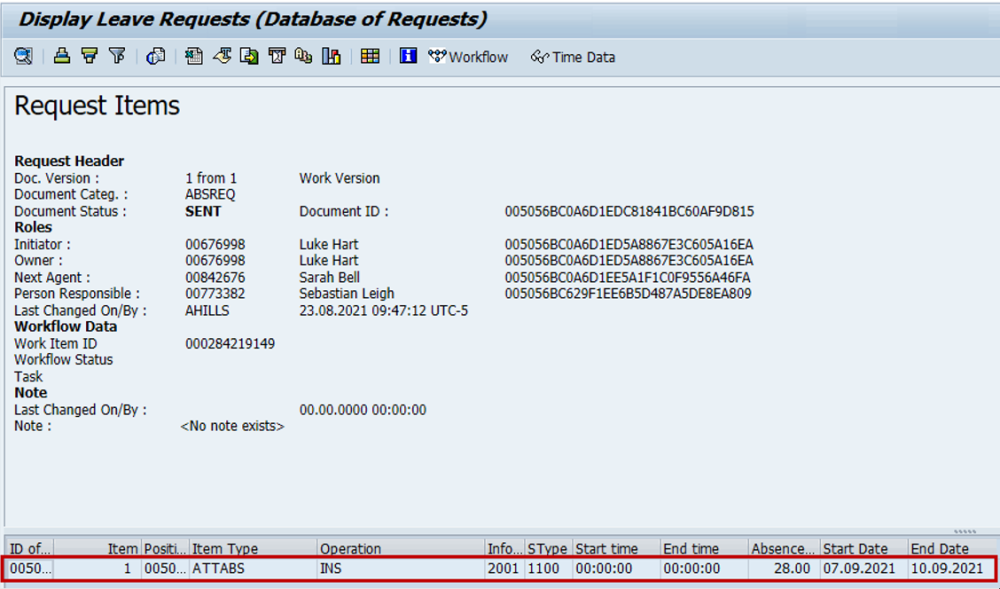
You may also continue your analysis online using the following tools. Double-click on one of the rows to see additional details. - This view displays the details of the leave request, such as who initiated the request, who the next approvers are, etc.
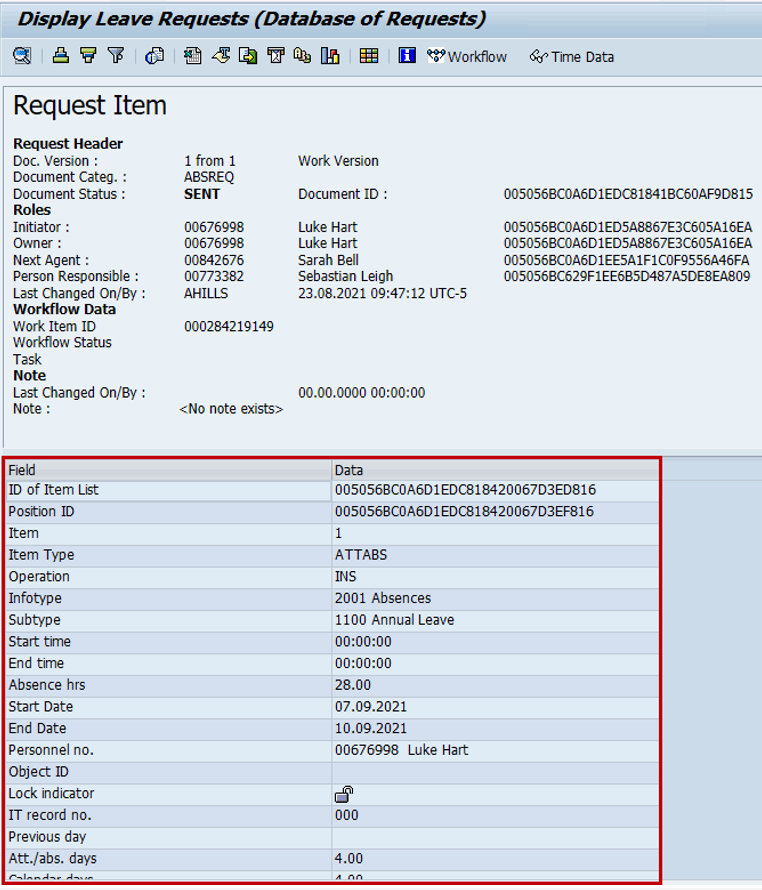
To see the type of leave and dates that were requested, double-click on the item row in the bottom portion of the screen to further expand the details. - Immediately, you can see that this record falls under Infotype 2001 Absences with Subtype 1100 Annual Leave. The dates requested by the staff member are also displayed (i.e., 07.09.2021 to 10.09.2021). Scroll down to see the rest of the information.
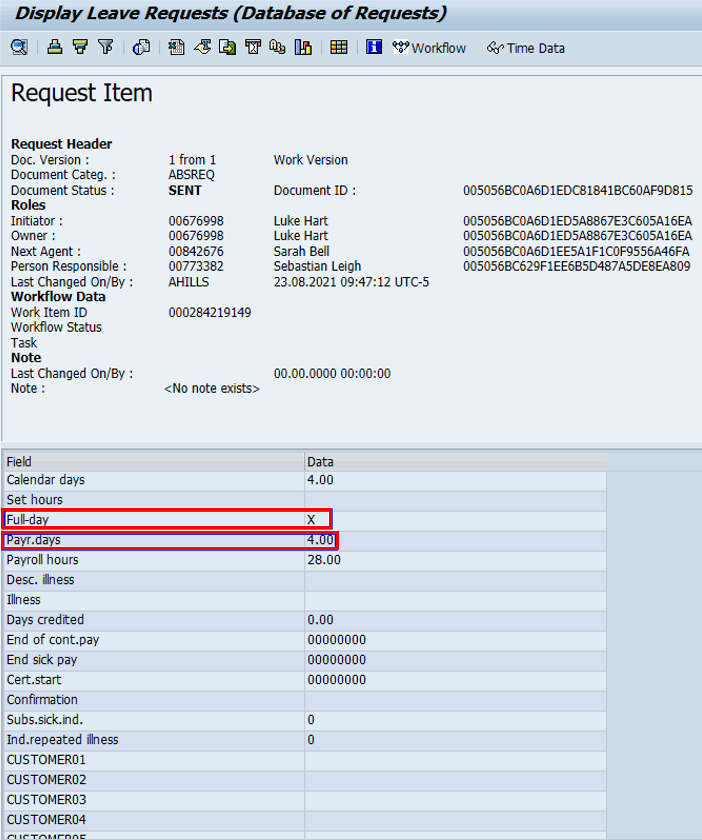
- This view also displays the total of days this request was for (i.e., Full- day = X (Yes), Payroll days = 4).
- Click
to return to the previous view, or three times to return to the parameter selection screen.
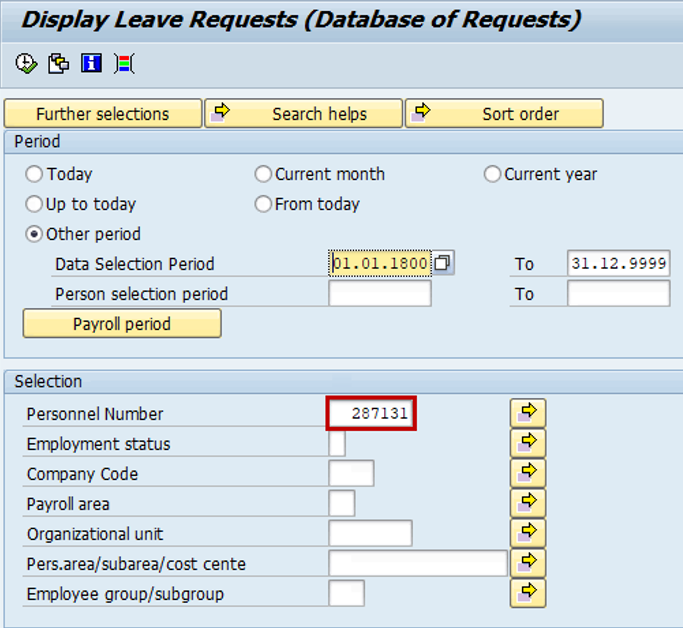
- It is also possible to create the report for an individual staff member or group of staff members. Enter the staff member’s personnel number in the Personnel Number text box.
- For a group of staff members, click
and enter the list of personnel numbers numbers either by typing manually or by using “upload from clipboard” option for a list of copied personnel numbers. Click
to execute the report.
- Based on the parameters chosen, the system will generate a list of all leave requests created on the Self-Service Portal that require the next-level approval by either a Time Manager, Medical Services or HR Partner.
Along with the staff member’s identification, this initial display will show the request’s initiator, owner, next responsible agent(s), the date when the record was last changed and by whom. You may scroll to the right of the screen to see the rest of the columns, which describe the document IDs.
Note that the next responsible agent can be one person in a group of responsible agents (i.e., one HR Partner from a group of HR Partners authorized to review the record).
To open a record, double click on an item row to see the details of the leave request.
Click 
)footnote1
Last modified:
17 January 2023

 and enter the list of personnel numbers numbers either by typing manually or by using “upload from clipboard” option for a list of copied personnel numbers. Click
Post your comment on this topic.