
The rescue tube is a widely used, cost-effective piece of rescue equipment.
Swim fins (‘flippers’) should be used for tube rescues as they greatly increase the speed and efficiency of a tube rescue[20].
Entering the water
- Pull the end of the belt and allow the rescue tube to unwind.
- Place the belt over your head and under one arm, like a sash.
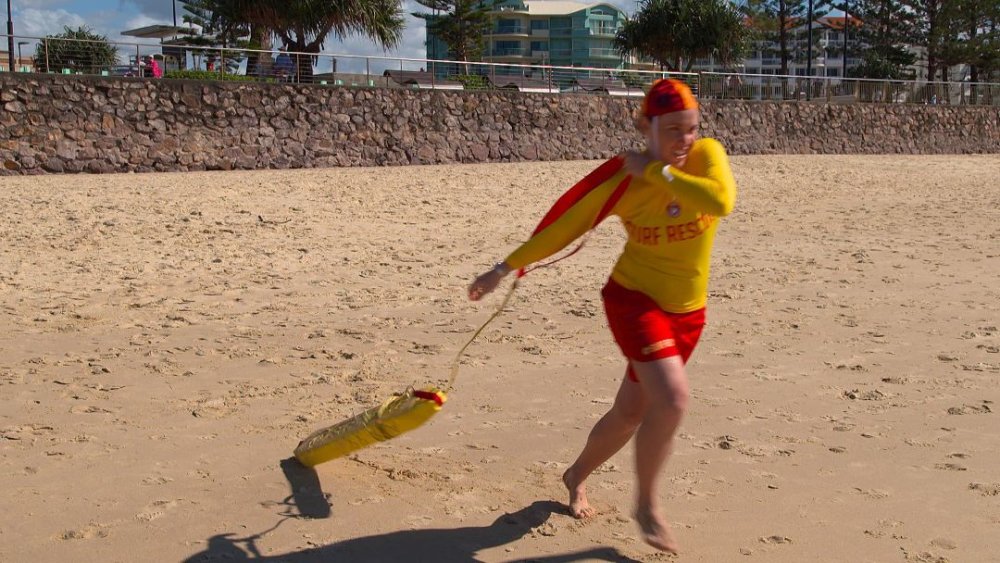
- Hold the tube under your arm (or in one hand) with your swim fins in the other while running on the sand towards the water.
- Throw the tube to the side when at the water’s edge.
- Commence wading through the surf.
- Put swim fins on when reaching waist-deep water.
- Monitor the victim’s position and progress while swimming by raising your head every few strokes.
Conscious victim
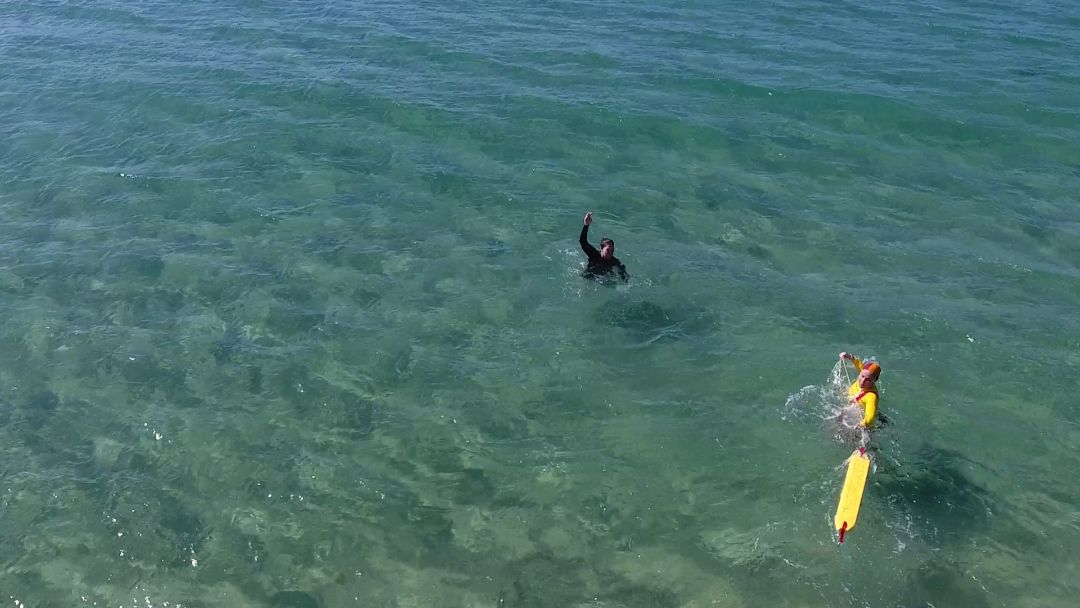


- Stop at a safe distance from the victim.
- Reach back for the rescue tube and push it towards the victim.
- Reassure the victim and encourage them to remain calm and follow instructions.
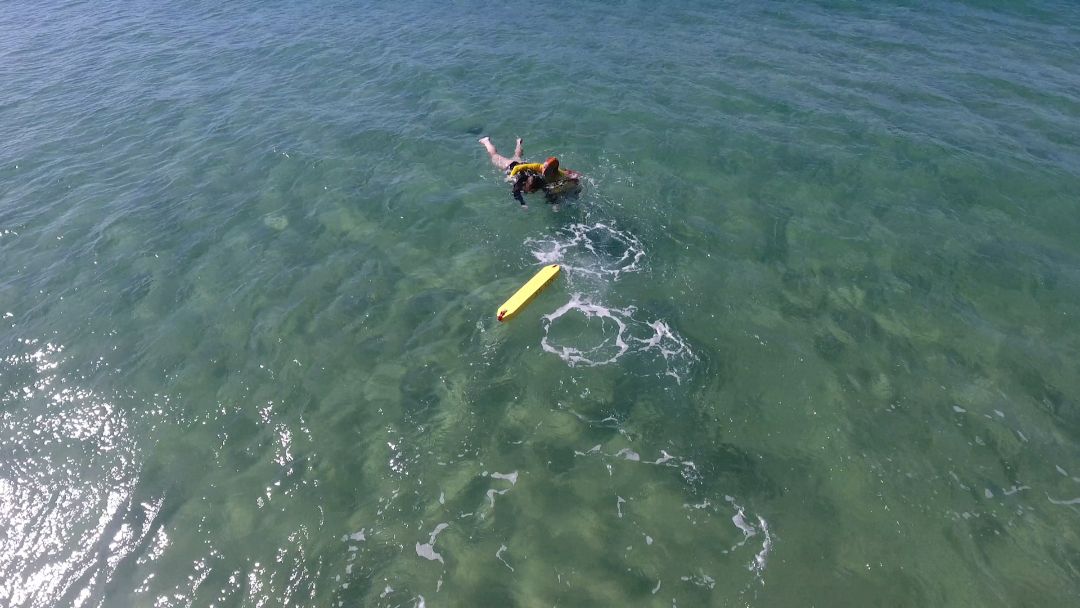
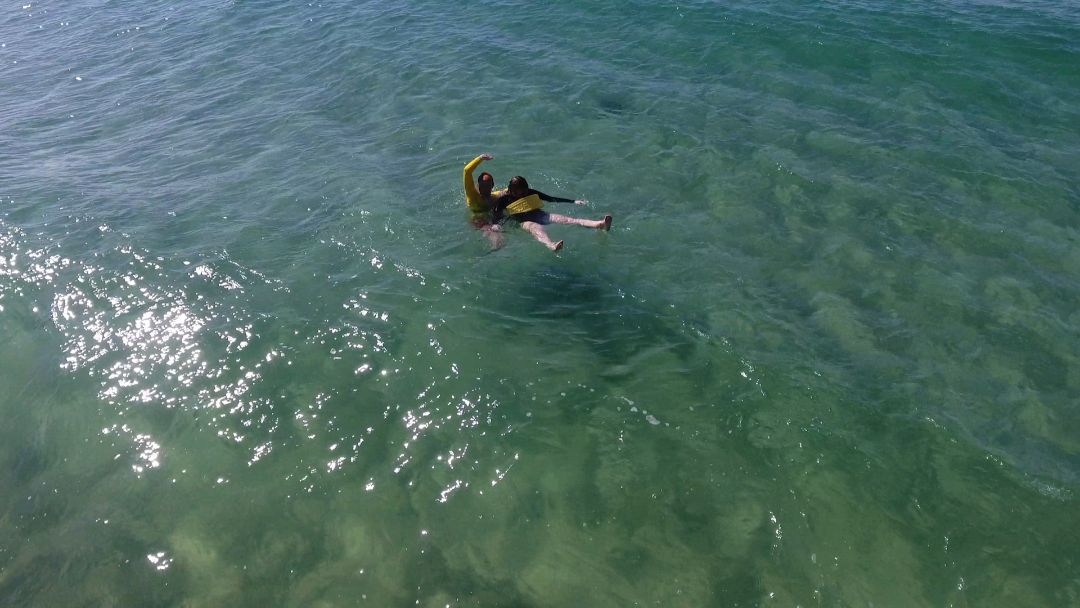
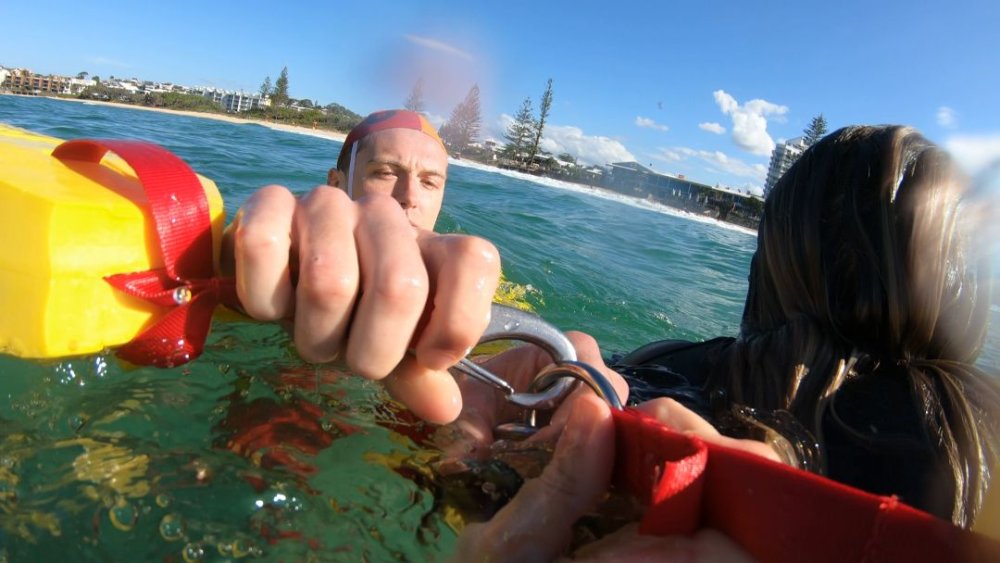
- Ask the victim to put their arms over the tube and hold it to their chest.
- Clip the rescue tube securely around the victim under both arms while continuing to reassure the victim.
- Determine whether you can return to shore safely with the victim:
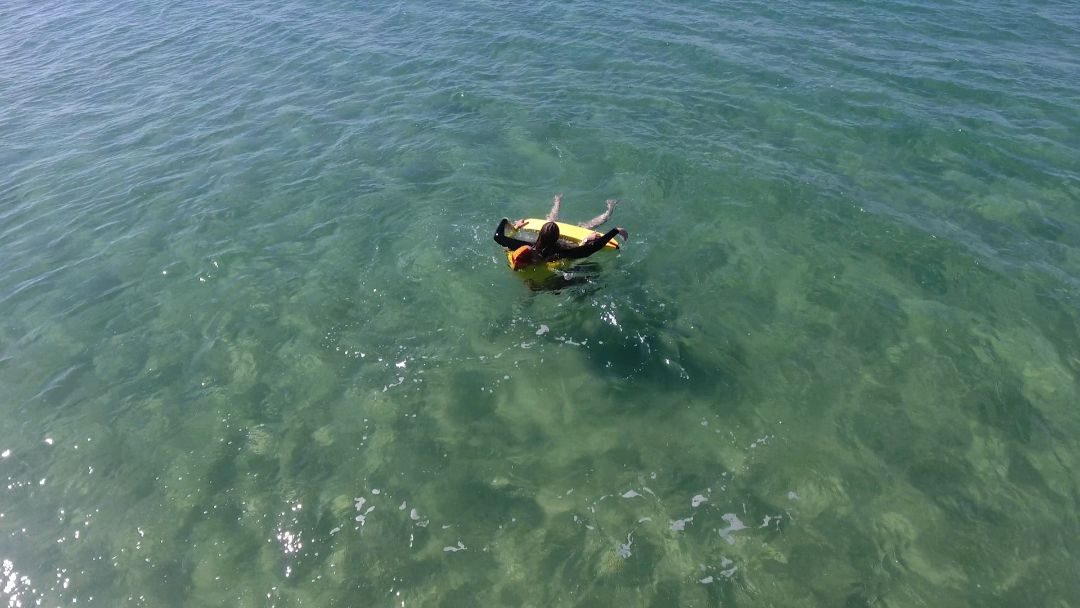
- safe—instruct the victim to lie on their back and kick their legs if possible
- unsafe—reassure the victim and signal ‘assistance required’ or move to a safer position to wait for further assistance.
Unconscious victim

- Determine if the victim is unresponsive as you approach the victim
- Remove their face from the water by turning the victim onto their back.
- Clip the tube under both arms and around the victim’s chest.
- Determine whether you can return to shore safely with the victim:
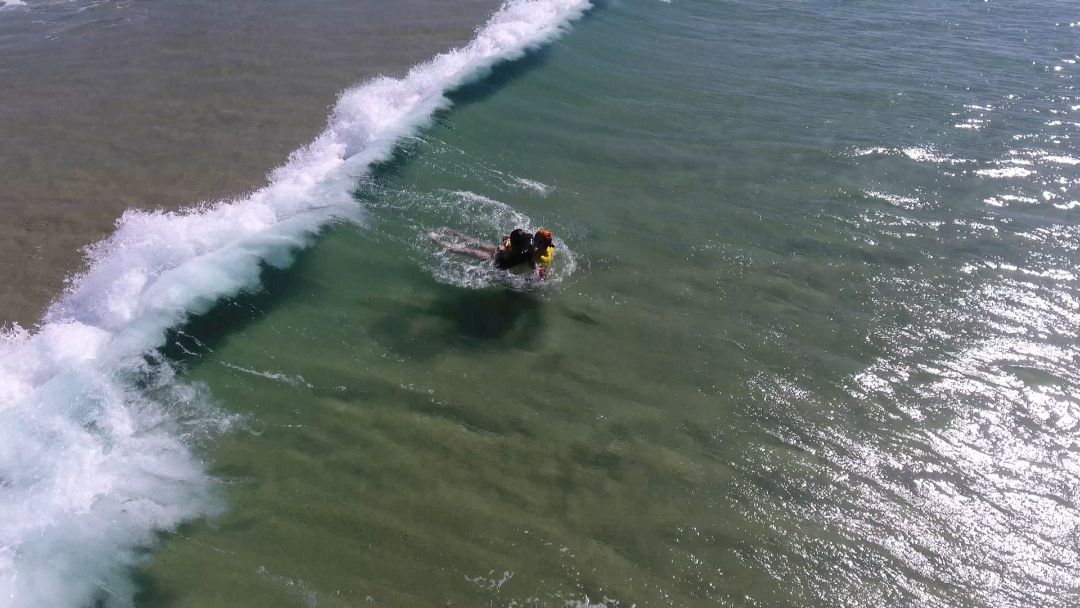
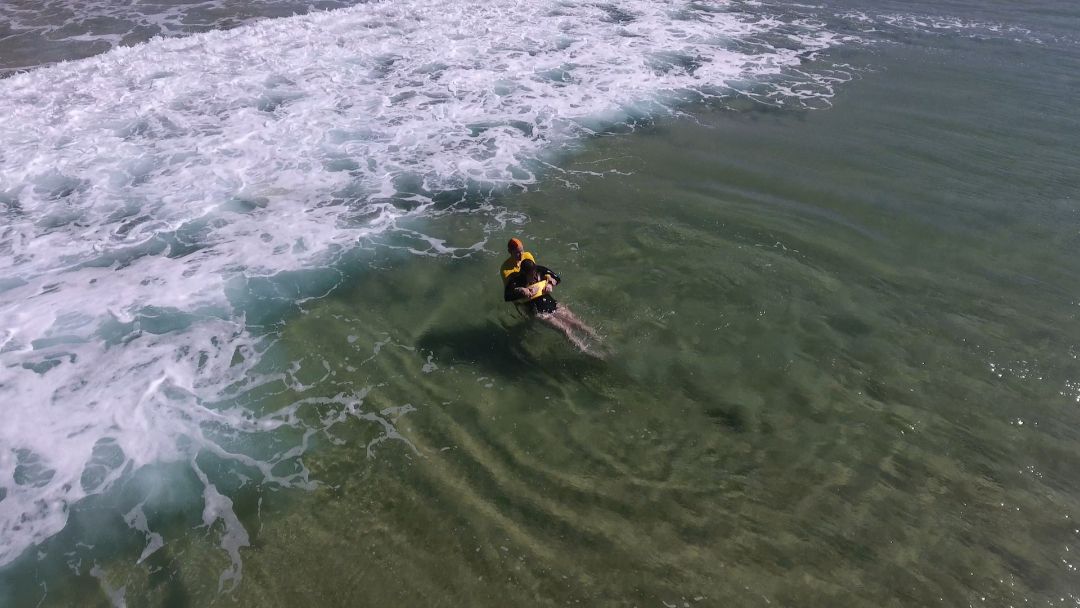
- safe—swim to shore while towing the victim. Turn every few strokes to check that the victim remains upright with their face out of the water
- unsafe—signal ‘assistance required’ or move to a safer position to wait for further assistance.
Note: In some surf conditions you may need to sidestroke while holding the victim to maintain control.
Moving back through break zone
- Turn every few strokes to watch behind you for breaking waves as you tow the victim to shore.
- Pull the victim towards you when a wave approaches and place yourself between the victim and the wave:
- large wave – reassure the victim and ask them to take a deep breath
- small wave – lift the victim over the wave if the wave is small enough and you are on a sandbar.
- Help your victim stand and stabilise them in a standing position once in shallow water and as you both move towards the shore.
- Carry the victim to the shoreline using the most appropriate carry and support technique outlined in this manual.
- Assess the victim’s condition once at the shoreline and treat as required (see Primary assessment—DRSABCD).
Note:
- If the victim is weak or unconscious and you can stand, place your arms under their armpits and lift them into a standing position. Stabilise them and signal ‘assistance required’ to carry them to the shoreline.
- If you lose contact with the victim, regain control and continue to shore. Consider signalling ‘assistance required’ again.
- You may need to place your hand over the victim’s mouth and nose and hold on to them when a large wave approaches. If using this method, ensure your arm is fed under their armpit first and then place your hand over their mouth. This method is done to refer any impact from the wave to their armpit, not their neck.
- Where there is a ‘shore break’, you may need to reassure your victim and wait for a lull before proceeding.
Double tube tow
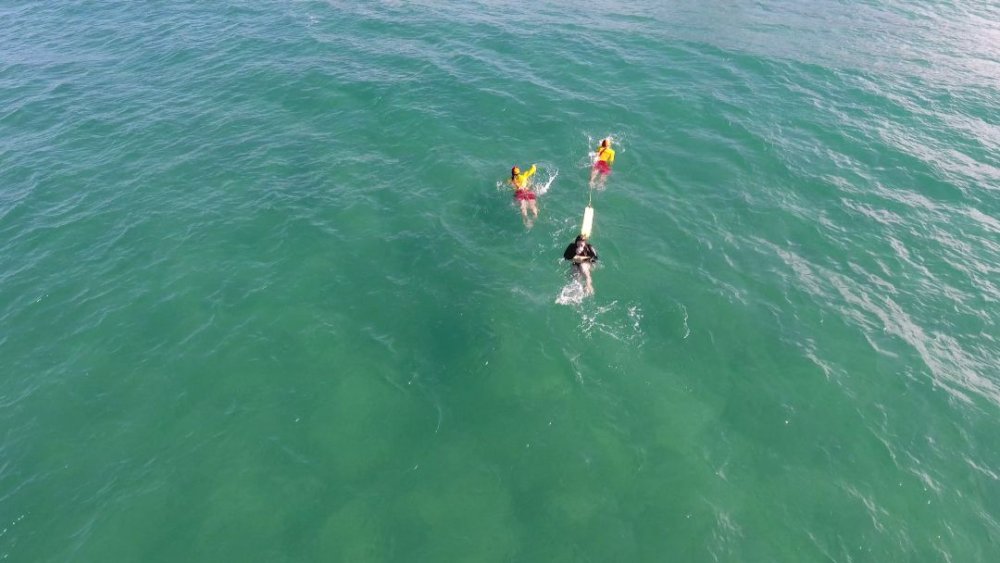
A second lifesaver, equipped with a rescue tube and swim fins, can assist in returning a victim to shore using a double tube tow. This is very effective for heavy victims or in difficult surf conditions such as strong winds, choppy surf or strong currents. Great care must be exercised in the surf zone due to the risk of the ropes becoming tangled.
- Lifesaver 1 clips their rescue tube under both arms and around the victim’s chest.
- Lifesaver 2 clips the end of their secondary rescue tube onto the ring of the tube already around the victim.
- Both lifesavers tow the victim to shore while swimming about 1 m apart. Lifesaver 2 will be about a body length in front and to the side of Lifesaver 1.
- Both lifesavers wait for a lull to start swimming safely towards the shore.
- Lifesaver 1 keeps watch on the victim and the surf when in the surf zone.
Note:
- If a large wave approaches, Lifesaver 1 should secure the victim while Lifesaver 2 moves to the side. This minimises the chances of getting entangled in the ropes.
- If either lifesaver feels it is not safe to proceed through the surf zone together, Lifesaver 2 will unclip their tube and swim freely alongside Lifesaver 1 and the victim.
- Both lifesavers need to swim at the same pace.