
Maintaining the patient’s airway takes precedence over other injuries, including the possibility of spinal injury. The one exception is the management of severe, life-threatening bleeding. Once life-threatening bleeding has been controlled, assess the airway. Refer to your first aid training on critical bleeding. If multiple operators, one can focus on critical bleeding while the other begins the airway assessment.
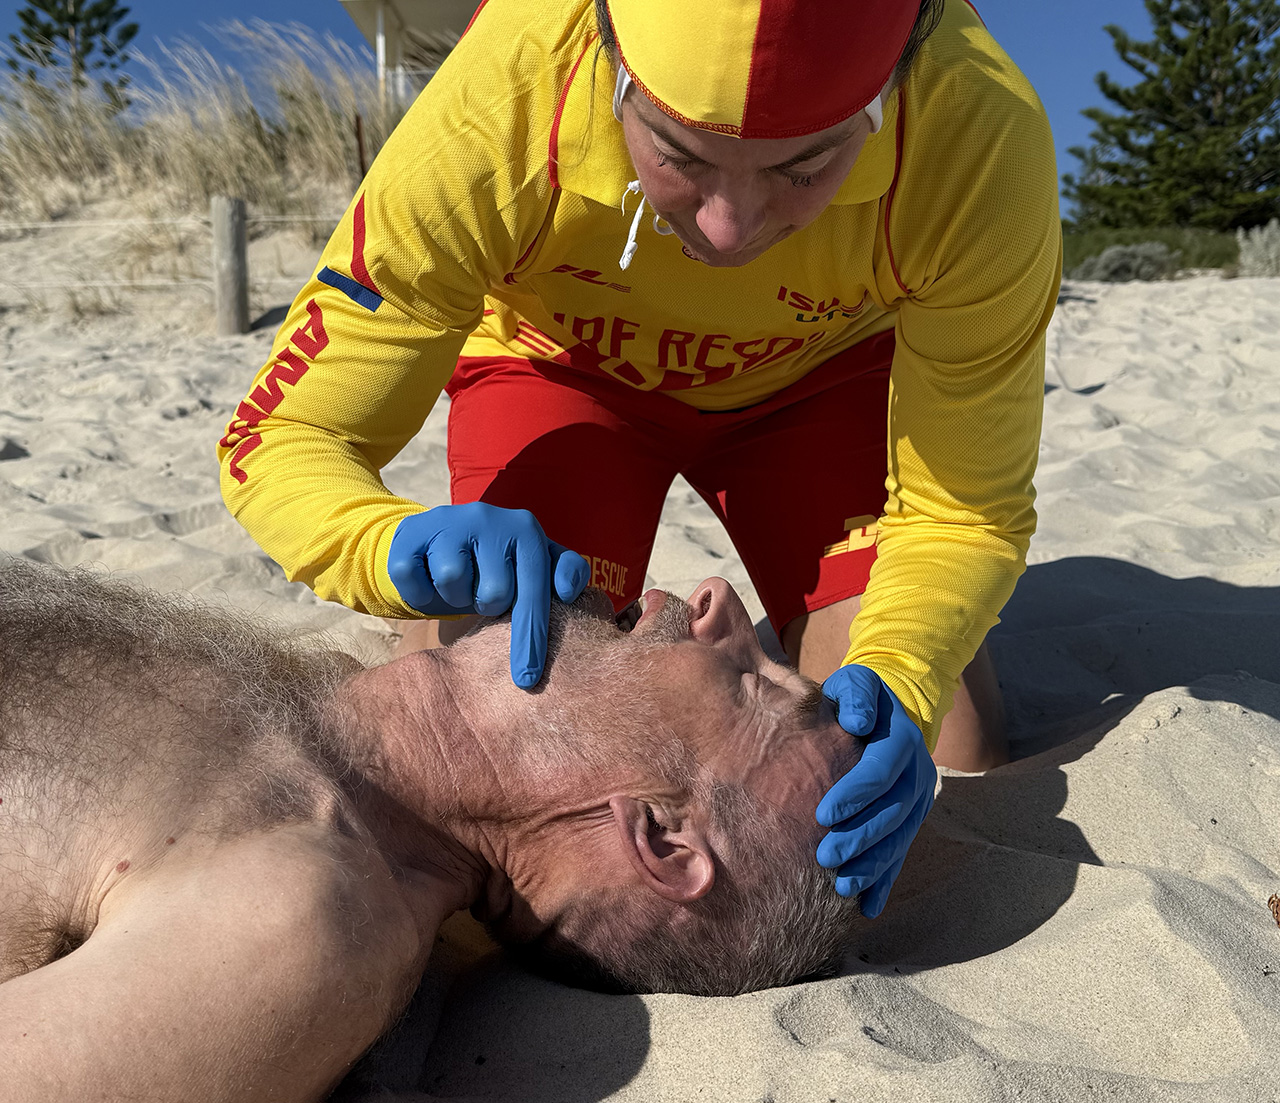
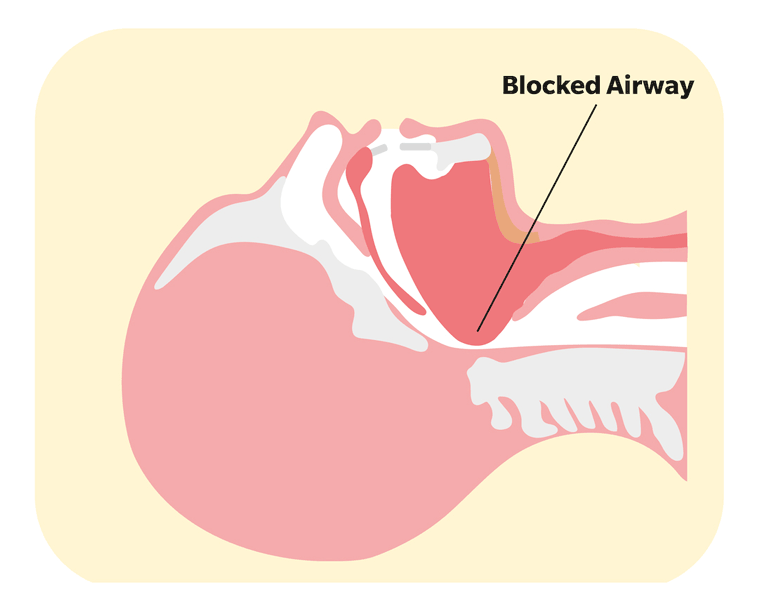
An open airway is achieved by applying backward head tilt and chin lift. One hand is placed on the patient’s forehead or top of the head, and the other is in pistol grip, providing chin lift. The mouth is opened, and head tilted back simultaneously, to ensure that the jaw is lifted forward, and the tongue and soft tissues are lifted away from the back of the throat.
If no obstruction is present, the patient should remain on their back during airway and breathing assessments, as this takes less time, is easier and avoids unnecessary movement compared to rolling on their side. Maintain an open airway by applying backward head tilt and chin lift via the jaw support (‘pistol grip’ – use if alone) or jaw thrust methods (if in a team). The patient’s airway should be kept open when possible, whether on their back or their side.

If an obstruction is present, the patient can then be rolled (described below), to clear any visible foreign matter from the unconscious patient’s upper airway. It is important to avoid excessive force, especially where a spinal injury is suspected, using jaw thrust to provide rescue breaths after the initial assessment, rather than pistol grip (jaw thrust described below in rescue breathing section). Commence with neutral head position and only progress as necessary towards backward head tilt in order to achieve chest rise with each breath, signifying an open airway. Good observation of, and access to the patient’s airway must be achieved.
Vomiting or regurgitation can sometimes occur after drowning due to large amounts of swallowed water. If matter such as sand, debris or vomit is found on initial assessment, or at any time during resuscitation, this needs to be removed from the upper airway to prevent obstruction. Repeated attempts, however, to clear frothy or blood-stained fluid that continues to accumulate in the upper airway during resuscitation are likely to be unsuccessful and delays chest compressions – lifesavers should continue with compressions and rescue breaths in these instances, to minimise unnecessary interruptions. The majority of airways are not blocked by any foreign matter, with most choking cases treatable using the steps outlined in the choking algorithm, without the patient deteriorating into cardiac arrest from hypoxia.
If there is vomit or debris in the airway, follow the flowchart below:

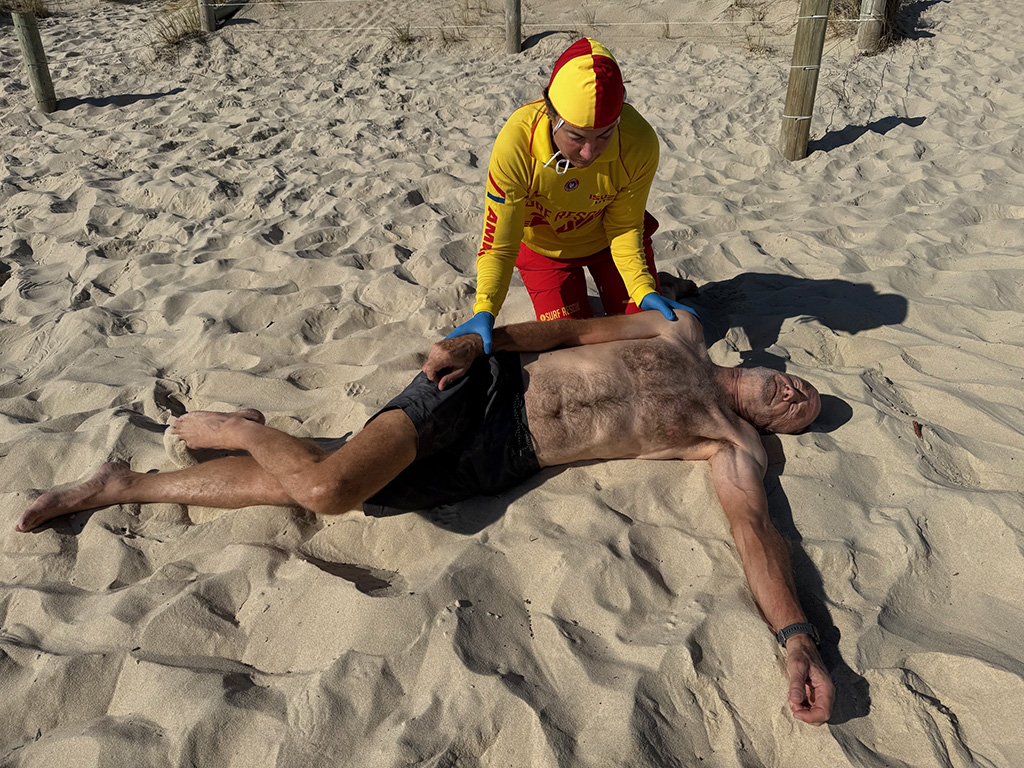
Rolling a face-down patient onto their back (supine position)
Note: For the purpose of this description, you will be on the patient’s left-hand side, facing the surf. It is possible to perform the procedure on either side of the patient.
Follow the steps below to roll a face down patient onto their side.
- Kneel beside the patient.
- Place the patient’s right arm along their side and ensure that the left arm is extended above their head.
- Using the patient’s hip and shoulder, roll the patient onto their back.
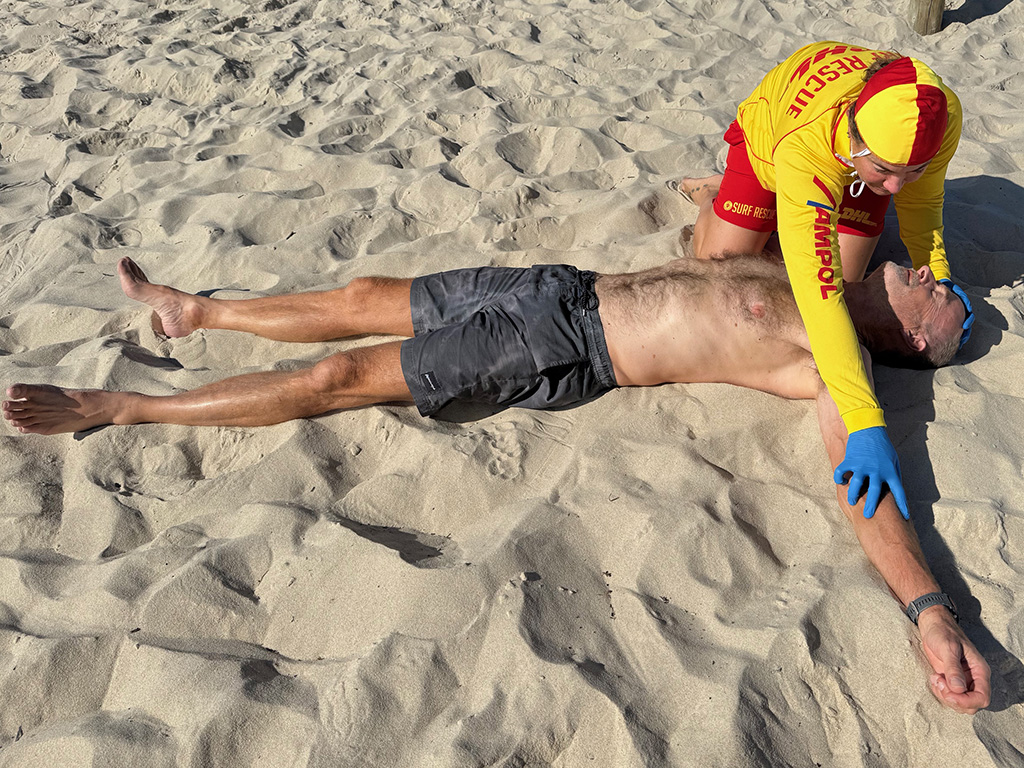
Rolling a patient onto their side (lateral or recovery position)
You should roll a patient onto their side with a sense of urgency if they are vomiting, regurgitating, or showing signs of recovery during CPR. This should be a coordinated roll if being undertaken by a team.

Note: In this description you are on the patient’s right-hand side, facing the surf.
- Kneel beside the patient.
- Place the patient’s left arm at right-angles to their body, pointing to the surf.
- The patient’s right arm may be across their chest or along their side.
- Raise the patient’s right leg at the knee that is closest to you.
- Use the patient’s hip and shoulder to roll them onto their side, towards the surf.
- Angle their right thigh to approximately 90 degrees to their torso to prevent them rolling onto their stomach.
- Tilt the head backwards and slightly downwards while support of the jaw is maintained. This position allows drainage of fluids and mucus from the mouth. The patient’s right arm can stay where it is or be placed under the patient’s head for added support.
Note:
- If CPR is being carried out by a single operator, the patient should ideally be rolled away from the operator to enable them to then clear and re-check the airway and assess breathing.
- If CPR is being carried out within a team environment, the patient should ideally be rolled to their left, however if this is not possible, adjusting roles will be required for which operator clears the airway and who subsequently re-assesses breathing. Take note of the team positioning in diagrams to follow.
- For larger patients, you may put one arm under the patient’s raised knee to provide extra leverage instead of using the hip to roll the patient or use team members to assist with a roll.
- A hip and shoulder roll should be carried out in a timely but controlled manner to minimise the aspiration of stomach contents into the lungs.

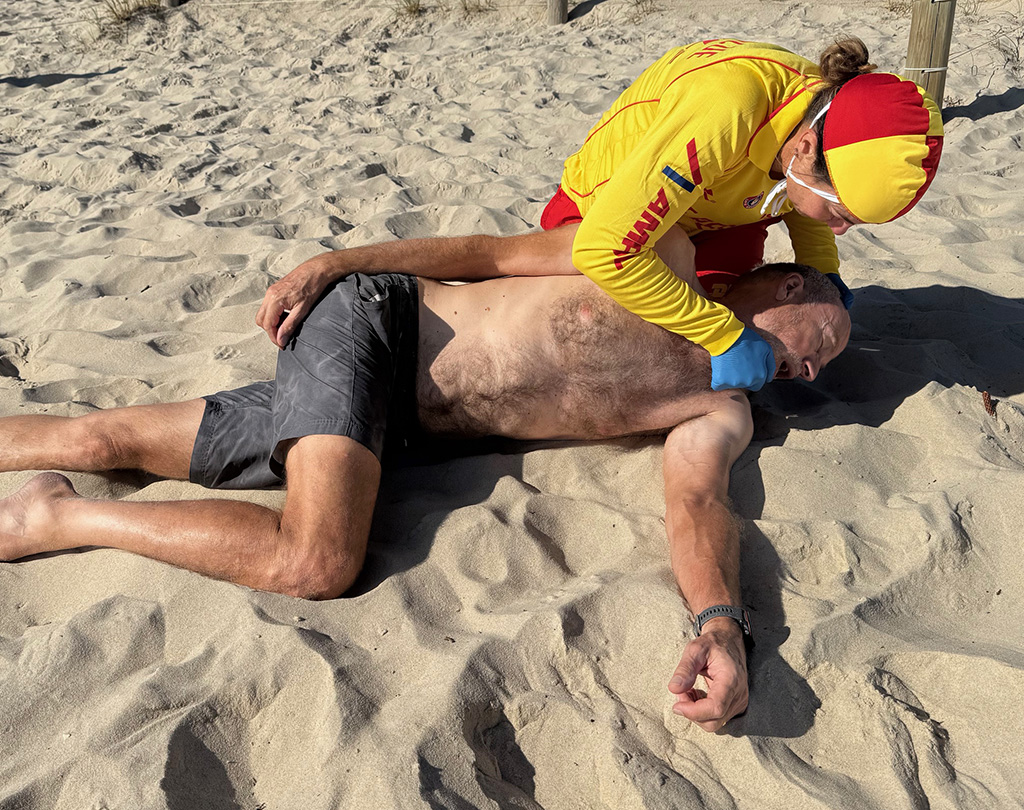
Clearing the airway

![]()
If there are visible obstructions in the patient’s mouth, let go of the chin, reach in with your (the rescuer) gloved fingers, and remove them with your gloved fingers. Allow vomit and stomach contents to drain freely. False teeth (dentures) should not be removed unless they are loose and interfering with the patient’s airway.
ANZCOR suggests against the use of blind finger sweeps for removing vomit/regurgitation. You should always look in the patient’s mouth before attempting to clear their airway by seizing and removing any visible items, and re-look once the obstruction has been removed to check the airway is now clear.