
The very nature of lifesaving requires that lifesavers be trained and prepared to administer mouth-to-mouth rescue breathing. The International Lifesaving Federation Medical Position 11 that CPR for a drowning patient should include both chest compressions and rescue breaths. However, if you are unwilling or unable to perform mouth-to-mouth rescue breathing for a patient, and you do not have a resuscitation mask, you should do chest compressions only.
There are three main methods of performing rescue breathing:
- Mouth-to-mask rescue breathing
- Mouth-to-mouth rescue breathing
- Mouth-to-nose rescue breathing
No matter which method is used, each breath should be delivered in 1 second and compressions are to be re-started, whether the 2 rescue breaths were successful or not.
1. Mouth-to-mask rescue breathing
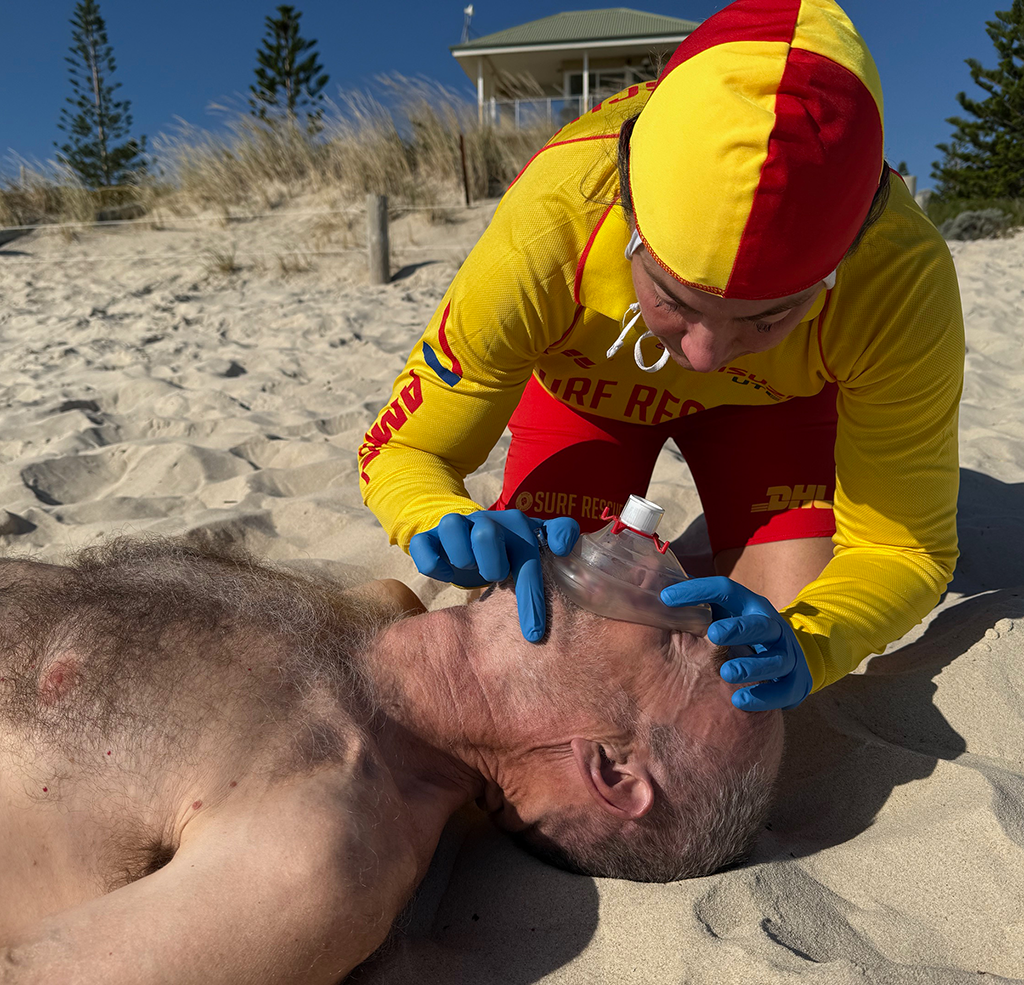
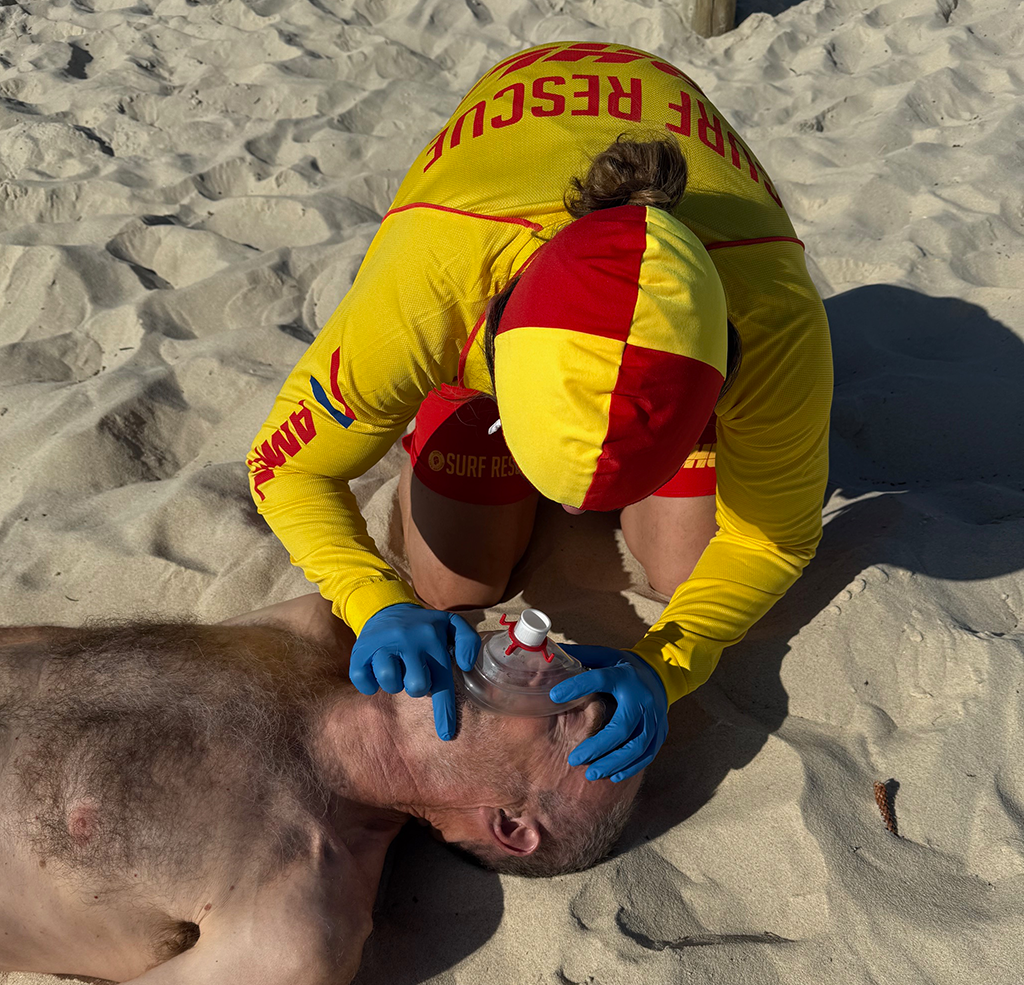
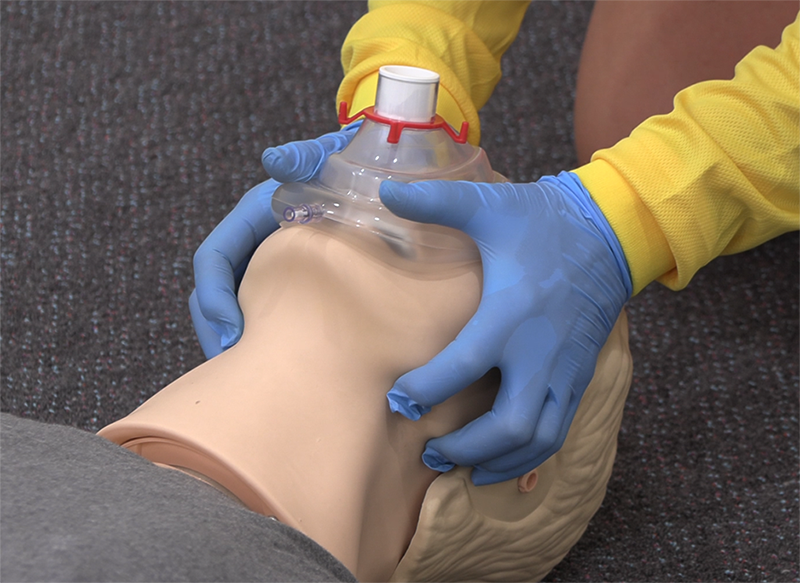
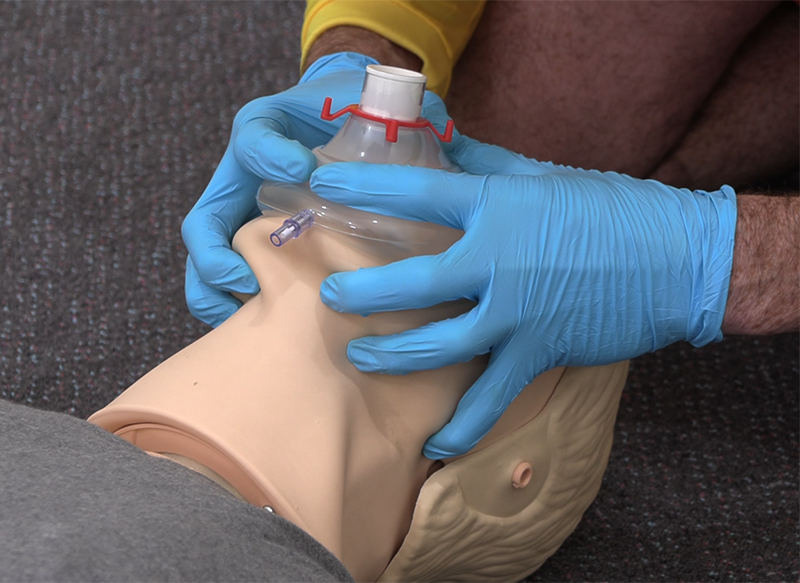
This is the recommended form of rescue breathing, using the jaw thrust method to hold the airway open. The general rules are exactly the same as described later for mouth-to-mouth rescue breathing, but mouth-to-mask rescue breathing should be used when a mask is available. Where possible, a one-way valve should be used on the mask to minimise risk to the operator. The patient’s jaw may be lifted using the ‘pistol grip’ or jaw thrust method.
Caution must be taken when applying backward head tilt if a spinal injury is suspected – start with a neutral head position and gradually increase head tilt until chest rise is seen with each rescue breath.
CPR should never be delayed while waiting for a resuscitation mask or oxygen to arrive at the scene. Resuscitation masks should be carried with you when on patrol.
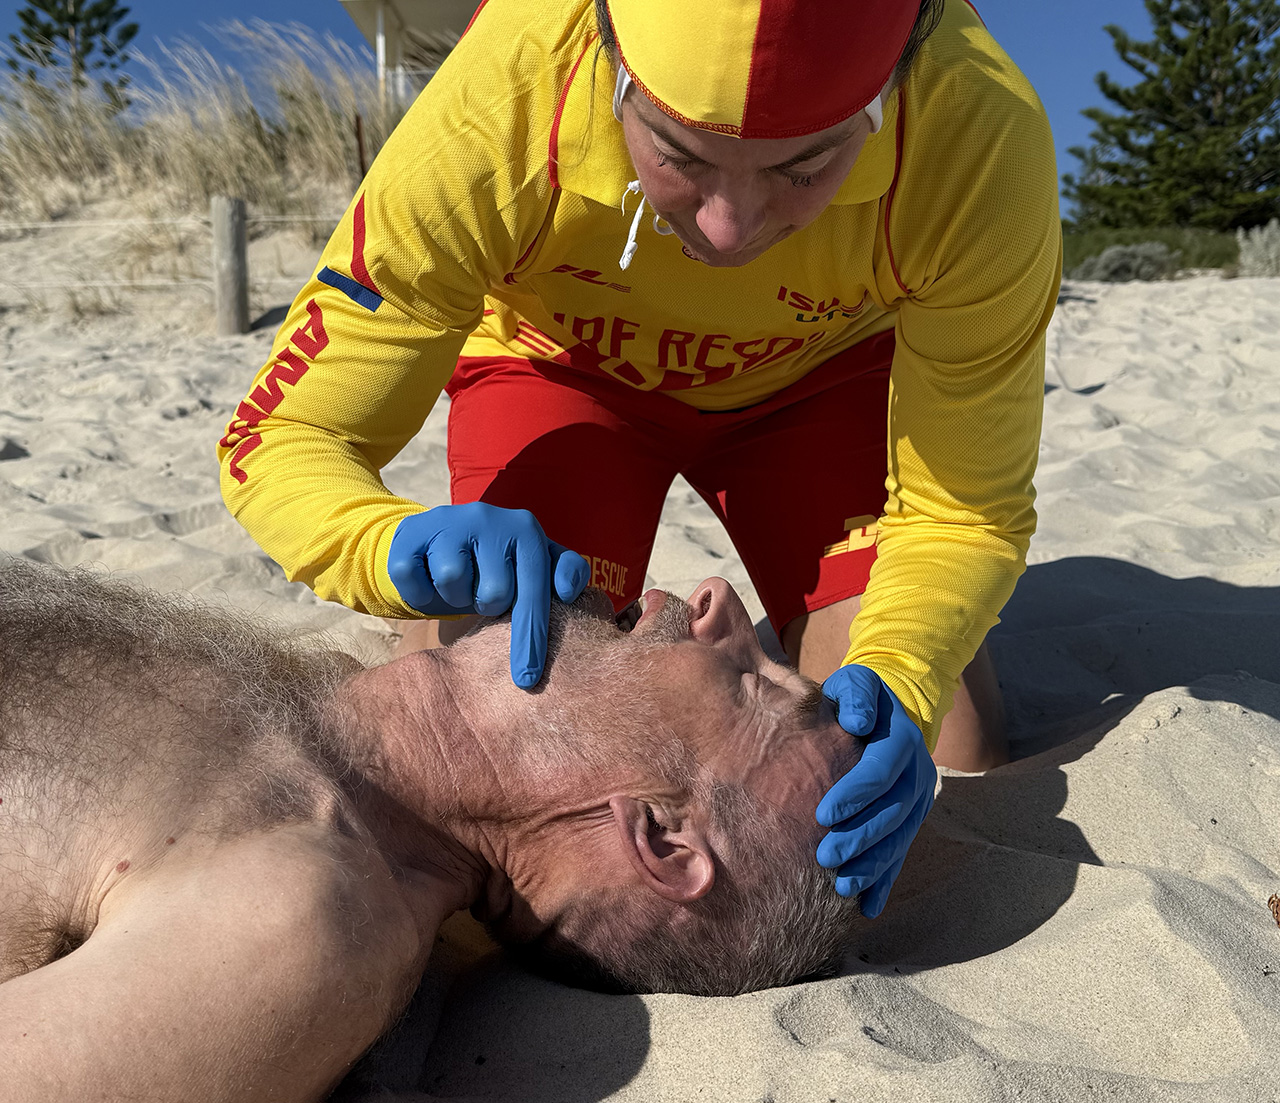
Jaw support (‘pistol grip’)
Place the thumb over the chin below the lip and support the tip of the jaw with the knuckle of the middle finger. The hand is held in a ‘pistol grip’ fashion with the index finger lying along the jaw line. Care is required to prevent the ring finger from squashing the soft tissues of the neck. The jaw is held open slightly and lifted up from the chin, to lift the tongue forward. This method is recommended for single-operator CPR.
Jaw thrust
Jaw thrust is a very efficient method of achieving backward head tilt and chin lift. You are encouraged to use this method in two-person or team CPR scenarios.
In the jaw thrust method, you are positioned behind the top of the patient’s head. The goal is to lift the patient’s jaw up towards the mask, as opposed to putting pressure down towards the patient’s face. It is recommended you grip the mask with your thumbs on either side of the mask to prevent hand fatigue. This technique is useful for those with smaller hands and those who do not manage patient’s airways on a regular basis. An alternate method called the C-grip can be used if preferred – where your middle, ring and little fingers are applied to the back part of the patient’s jaw on either side of the angle of the jaw — lifting the jawbone upwards and outwards to open the airway. The index finger is applied to the line of the jaw, in front of the angle of the jaw. The thumbs are applied to either side of the mouth or, when using a mask, are used to seal the mask against the face.
In learning this hold, there is no substitute for frequent practice sessions on people rather than manikins. While manikins are essential in practice, jaw holds are best taught on the human jaw, as there are great size variations both in jaws and in your hands.
2. Mouth-to-mouth rescue breathing
Follow the steps below to perform mouth-to-mouth rescue breathing:
- Kneel beside the patient’s head and open their airway by tilting their head back and lifting the jaw using jaw support or jaw thrust (cautiously if a spinal injury is suspected).
- Place your mouth over the patient’s slightly open mouth, sealing their nose with your cheek.
- Deliver breaths – blow steadily and firmly in the patient’s mouth, allowing about one second per breath. Look with your eyes for chest rise. Lift your mouth from the patient’s mouth to allow air to exit from their nose and mouth. Repeat this for a second breath and then re-start CPR. Care should be taken not to over-inflate the chest, as this may lead to stomach distension and regurgitation.
- If the chest does not rise, check for inadequate breath volume, seal leaks around mouth and nose, or any obstructions in the airway (inadequate head tilt, chin lift, tongue or foreign material).
3. Mouth-to-nose rescue breathing
Mouth-to-nose rescue breathing is used:
- in CPR of infants, when the lifesaver’s mouth should cover the infant’s mouth and nose
- in cases where severe facial injuries make it the preferred method
- in deep-water rescue breathing
- when a patient’s jaw is tightly clenched
The technique for mouth-to-nose rescue breathing is similar to that used for mouth-to-mouth, except that in mouth-to-nose rescue breathing:
- air is blown into the nose
- the mouth must be sealed during inflation. In both methods, the air exits through both the mouth and the nose
- sealing the mouth is achieved by pushing the lips together with the thumb. You can also seal the mouth using the jaw thrust method
- the mouth is then opened after inflation, for air to exit
The rules for inflating and watching the patient’s chest are the same as in mouth-to-mouth rescue breathing.
Sealing the patient’s airway
Sealing the patient’s nose is necessary during mouth-to-mouth rescue breathing, and this is best done by the lifesaver’s cheek. Occasionally, air will continue to escape from the patient’s nose. In such cases, it may be necessary to seal the nostrils with your thumb and forefinger. If the nostrils are sealed using thumb and forefinger, there is a tendency to lose head tilt, so added care is needed to make sure that this does not happen.