
Before splitting by COGO, check the box in Editor Preferences. 
Start Split in LandMark
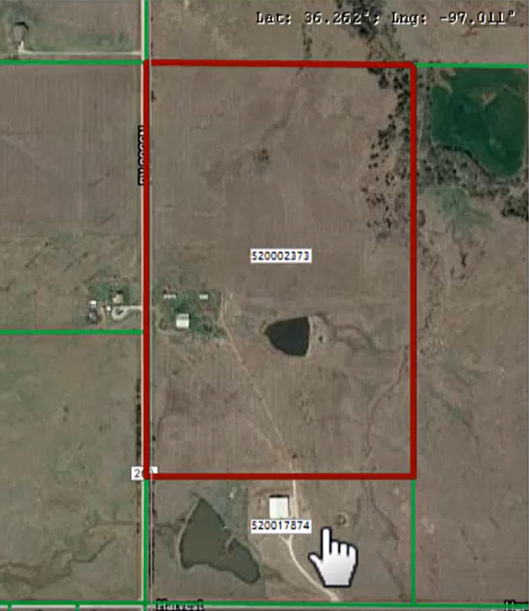
FIND Account
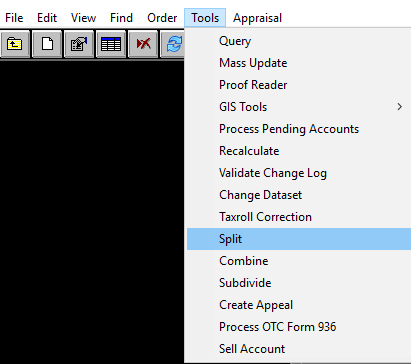
Tools — Split
Landmark’s Parcel Split Utility will open
CLICK Split Map since splitting by metes and bounds
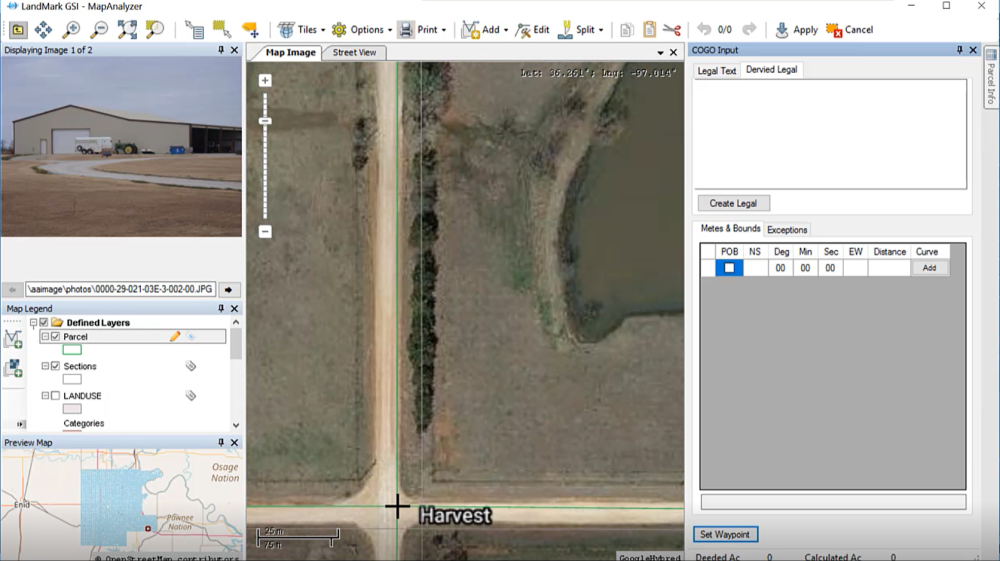
This will open MapAnalzyer
CLICK Split — Split by COGO (Coordinate Geometry)
The COGO Input box will come up.
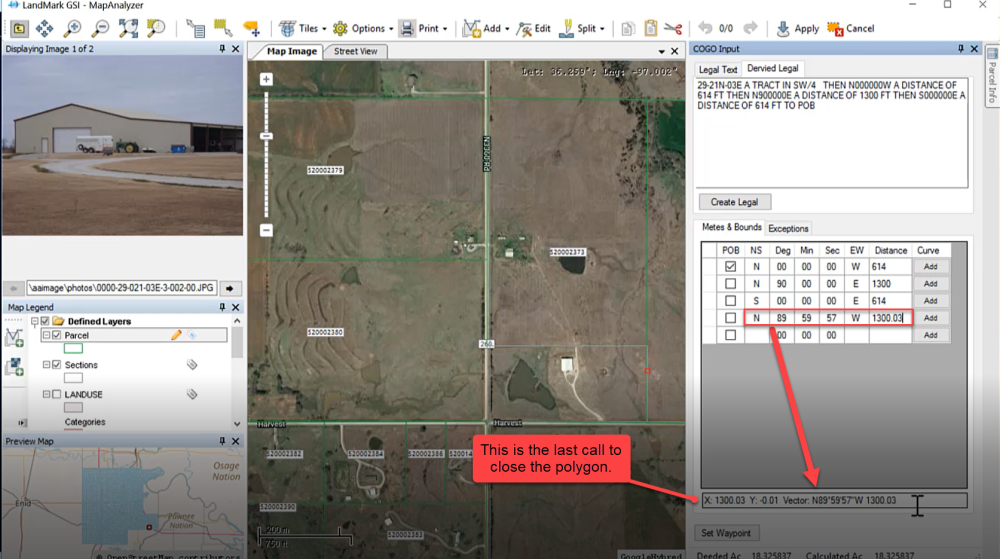
CLICK on Derived Legal Tab to watch the system build the new legal description.
Definitions
Legal Text: This is where the user can paste the legal description of the parcel being added.
Derived Legal: As users input the metes and bounds data, Map Analyzer builds a legal description for the account being created.
Parse Legal: This button take the legal text and creates the calls under Metes & Bounds. If it is a rectangular survey it will draw it on the map.
Metes & Bounds: Users will place there calls under the columns the legal falls under
POB: Point of Beginning, users will check this box at the call the polygon will begin.
NS: North and South directions for the call, user will enter a N or S in the column.
Deg: The degrees in which the said call is going, this ranges from 0-90.
Min: The minutes of the call, this ranges from 0-59.
Sec: The seconds of the call, this ranges from 0-59.
EW: East and West direction, users will enter a E or W in the column.
Distance: How many feet the call is going. Users only need to enter the numbers.
Curve: users can hit the add button to add any curve parameters.
Exceptions: Users can add the less and excepts from the parcel being drawn here.
Waypoint: commencing point
CLICK Set Waypoint (commencing point)
+ Cursor will change.
CLICK on map to set waypoint
A diamond shape will appear on map and cursor will change back.
Under the Metes and Bounds tab (right) If legal has less and excepts type in under the Exceptions tab.
ADD Metes and Bounds by arrows, tab or enter
ENTER to go to next line
User can add as many metes and bounds as they need before setting Point of Beginning (POB)
SET PO* by checking the box.
Drawing will begin
The last call will be the x/y vector call in bottom box and will close the drawing.
Align Vertices
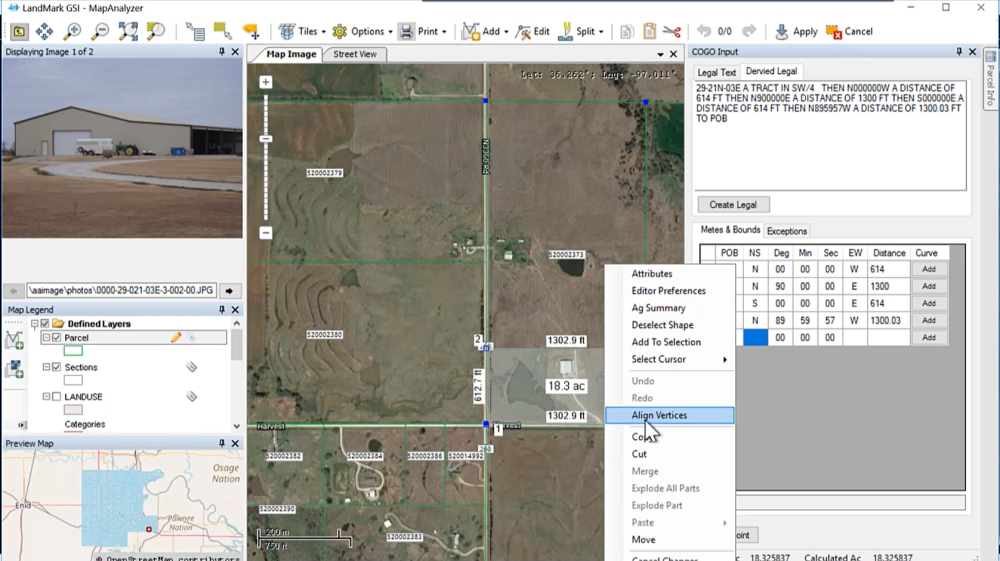
CLICK Apply Button
User will then be out of Edit Mode and Parent should be outlined in Red
GO to LandMark
CLICK in Child Legal Box to add derived legal.
CTRL V to paste new derived legal.
UPDATE parent legal
Ex: Less Tract in _______ or Less Tract and CTRL V to paste derived legal
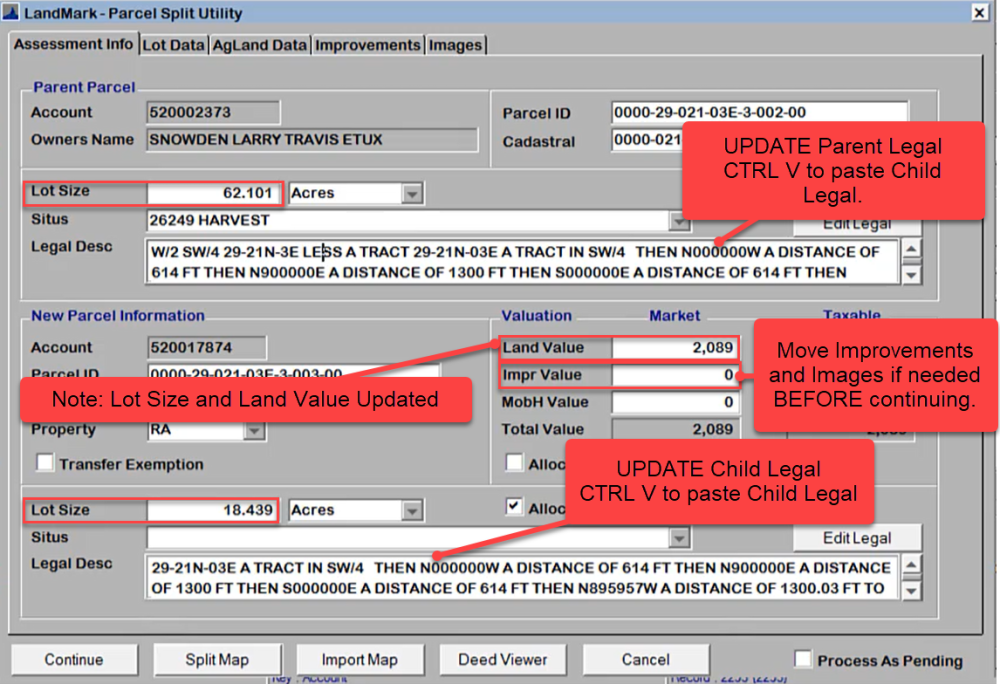
CHECK to see if land units and values came over.
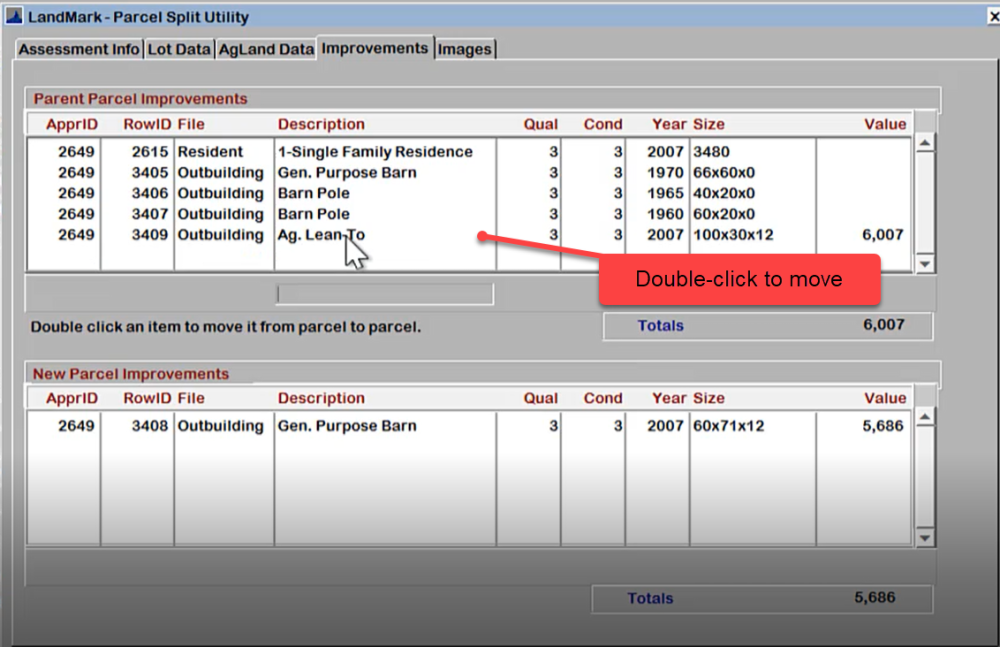
CHECK map to see if any Improvements need to come over
FIND improvement to move to child and double-click to move (double-click) to move back
FIND images to move (look at images in MapAnalyzer to identify) double-click to move
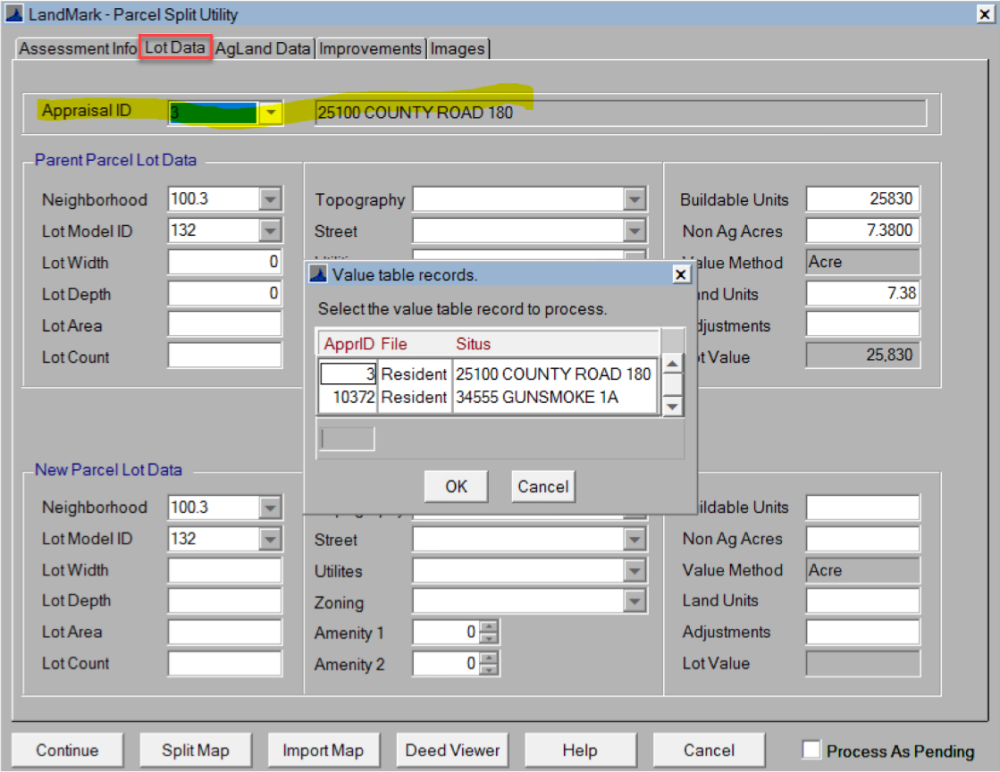
Notice: When doing a Split with Multiple Appraisal Records user must select correct Appraisal Record in the Lot Data tab before clicking Continue to process the Split. Example: Rural residential with a commercial wedding venue.
CLICK Continue
YES Process Split
The Split is done.
- In Attachments Tab the split should be noted with account numbers.
- Next step is to update the deed by selling or working the deed if same owner.
- UPDATE Appraisal Values on Parent and Child accounts
From the Assessment File
Appraisal — Read Appraisal Values
CHECK all boxes
CLICK Continue

Troubleshooting Splits
Split Fails to calculate Ag Land from Parent
Splits with No Ag Land Summary
Split Child Deeded Acres not Correct
Ag Land Summary Wont’ Run After Split
 LandMark MUST BE RAN on the primary screen to allow the system to read values over.
After starting a split in LandMark, splitting in MapAnalyzer, clicking apply and going back to LandMark my computer appears to freeze. Users now have to HIT Esc (escape) in the LandMark window to cancel the LandMark system from following the map when doing combines or splits. The system may appear locked up, there will be a status bar message in the bottom left corner of the window stating “Watching for Update, Escape to Cancel”. After hitting the Esc key, users may proceed in correcting legal and finishing combine or split.
Post your comment on this topic.