
To Import a new layer from the GIS Configuration Module in LandMark
Main Menu — System — System Tables — GIS Configuration
CLICK Import button on the toolbar. 
The Import GIS Layer box will then open.
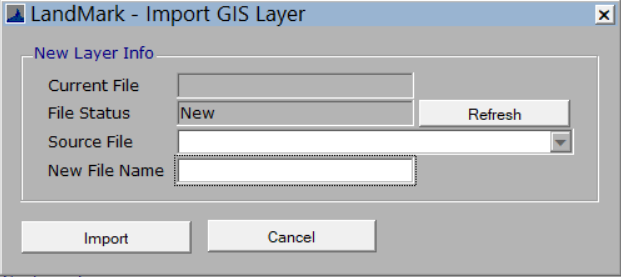
CLICK Source File drop down
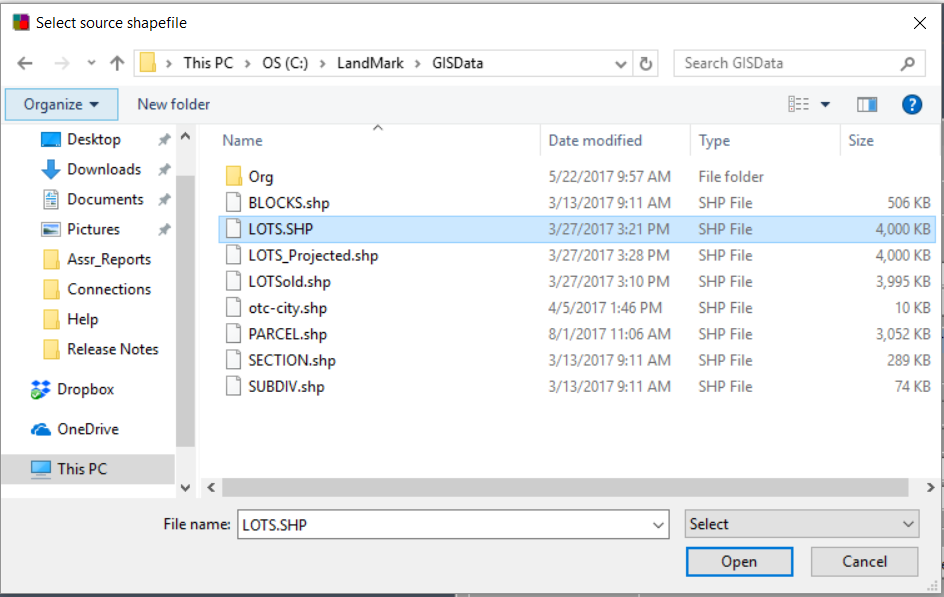
SELECT a shapefile to Import
NAME the new file.
CLICK Import
LandMark will automatically import the shape file into the destination Shape Path file and, if necessary, re-projects the shapefile.
The Shapefile will then have to be added to the Defined Layers or User Layers in MapAnalyzer (unless the Shapefile is a Parcel, Soil or Use layer).
To Add a Shapefile layer to MapAnalyzer go to:
Options — System Setup
CHECK Reproject Layers When Adding Box
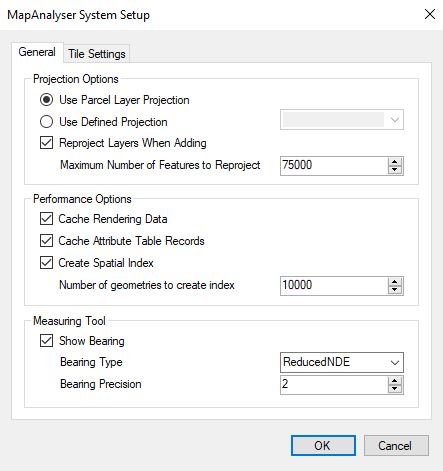
CLICK OK
SAVE the current map state ![]() icon in the top left hand corner of the map.
icon in the top left hand corner of the map.
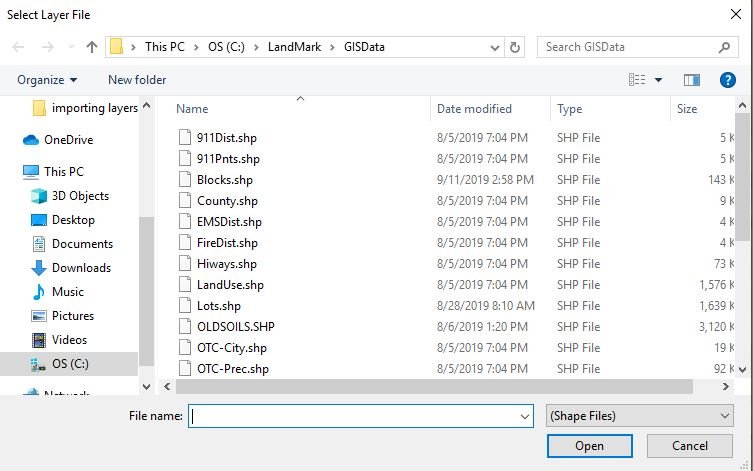
CLICK Import Button on the left side of the Map Legend. 
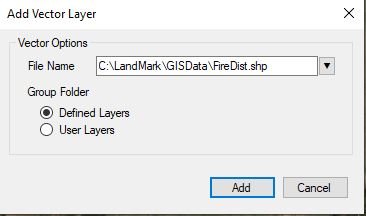
This will open the Add Vector Layer pop-up.
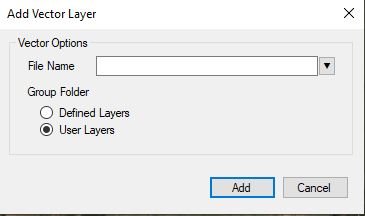
DROPDOWN the File Name
SELECT the shapefile
It will open the Shape Path File that was chosen in the GIS Configuration
SELECT if this layer should be a User Layer or a Defined Layer.
A User Layer will only show on the specific user’s map that is uploading the shapefile.
A Defined Layer will allow all users to see the new layer.
MapAnalyzer will automatically validate the projection of the shapefile and save the reprojection of the shapefile if necessary.
To add this new layer to the MapAnalyzer Map Legend:
CLICK Add
The layer will add to the map with a fill.
If user doesn’t see the layer being added,
RIGHT-CLICK on the layer
SELECT zoom to layer.
If it does not show in the county the file may need to be reprojected.
To save the changes made to the map:
CLICK Save Button on the Toolbar ![]()
Post your comment on this topic.