
MapAnalyzer requires a parcel layer to be defined in LandMark before the application can start. The parcel layer is the only required layer to be added to the map.
To change the MapAnalyzer configuration from LandMark:
Main Menu — System Tables – GIS Configuration
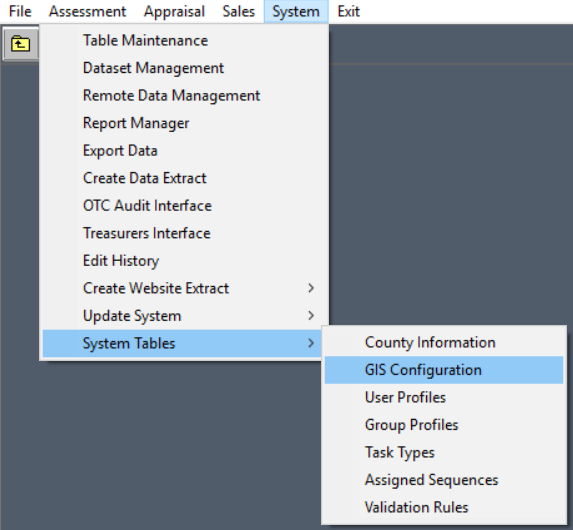
This will open the GIS Configuration module.
TOOLBAR
![]() – Exit the GIS Configuration utility.
– Exit the GIS Configuration utility.
![]() – Edit the Configuration data.
– Edit the Configuration data.
![]() – Open MapAnalyzer.
– Open MapAnalyzer.
 – Opens the SQL query log made to update the parcel shapefile attributes table as defined on the Linked Fields tab.
 – Clears the SQL query log file.
 – Imports a shapefile into the folder defined in the Base Map Path field, this import verifies and, if necessary, re-projects the shapefile
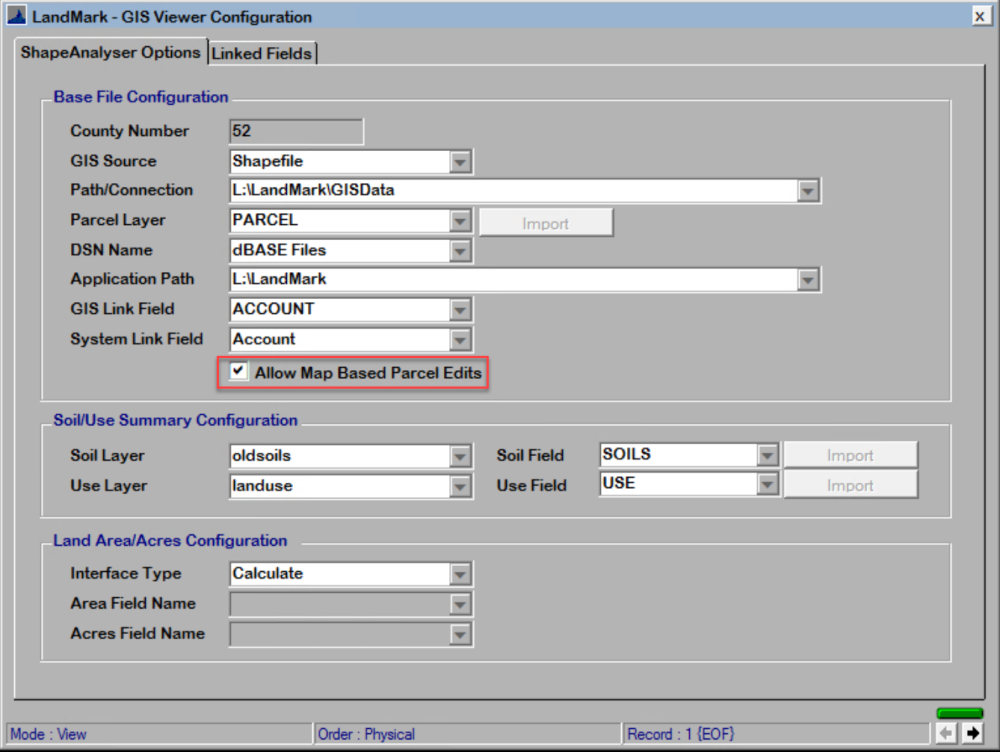
To allow users to edit vector data in MapAnalyzer, it must be enabled at the system level and then specific users or groups require permission to perform edits.
To enable editing at the system level, check the Allow Map Based Parcel Edits box in the GIS Configuration Table.
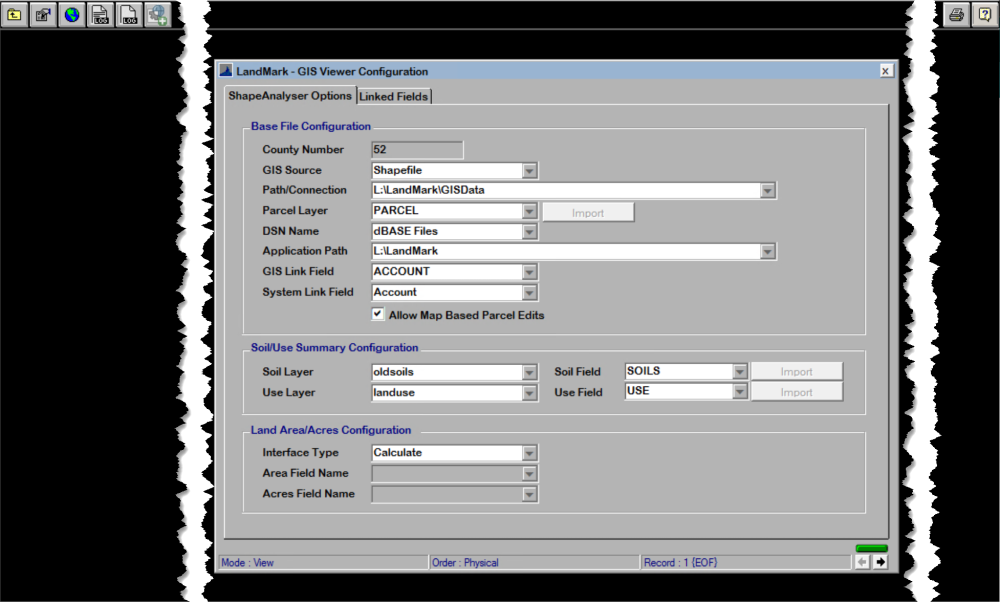
ShapeAnalyzer Options
- County Number: The county’s number
- Shape Path: The folder where the shapefiles that are used in MapAnalyzer are stored.
- Primary Shape: This should be the Parcel Shapefile. If the county keeps the shape file updated in a different program such as ESRI, the new parcel files can be uploaded by pressing the Import button.
- DSN Name: Data Source name, this is the drive and other information that is required to access data.
- Application Path: This is the root folder of the Landmark instillation.
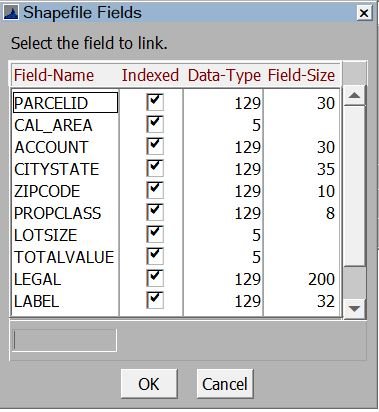
- GIS Link Field: This links the attributes to the shapefile. Users can define which field they would like to link the landmark data to the shapefile.
- System Link Field: Fields used in Landmark to link back to the shapefile.
Soil/Use Summary (link in map keys have to link to those field) cross reference codes
- Soil Layer: Soil Type Layer
- Soil Field: Attributes associated with the soil layer.
- Land Layer: LandUse layer
- Land Field: Attributes associated with land use layer
Land Area/Acres Configuration
- Interface Type: This allows the user to calculate or defines the way landmarks calculates your acres from the shapefiles
- Acre Field Name: This will only display if the Interface type is set to defined.
- Acres Field Name: List of attributes in the primary shape file.
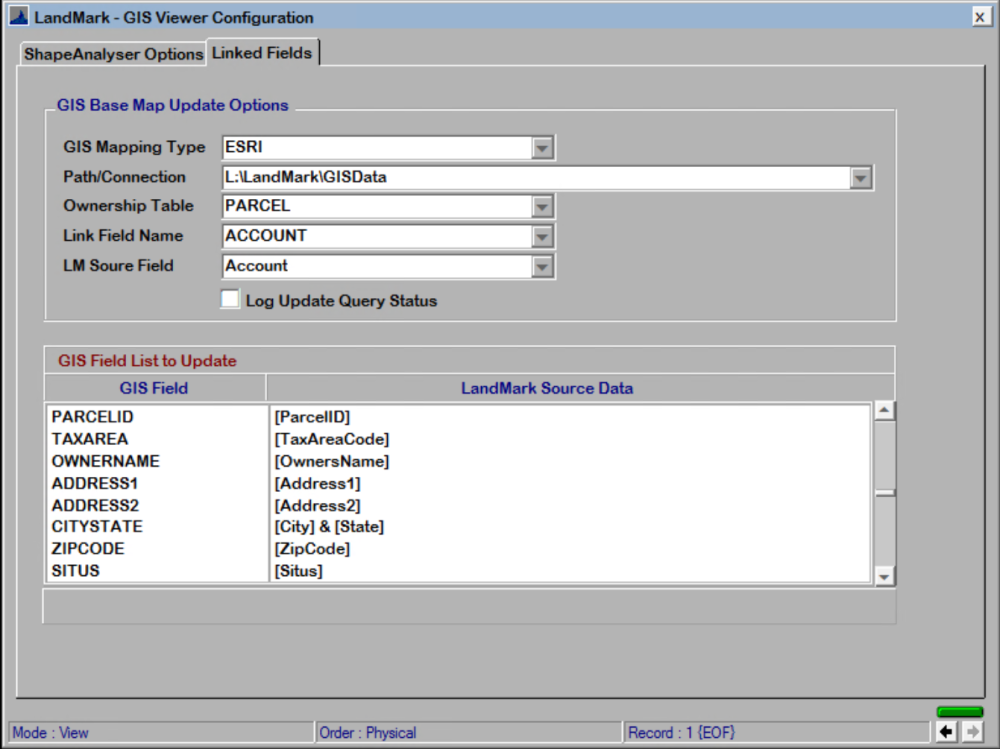
GIS Base Map Update Options
- GIS Mapping Type:
- ESRI: Target file is a shape file
- ESRI: GeoDB- Geo Data Base
- mims: Any time a parcel record is edited it writes out a specific file to whatever the user has in the base map path
- mims/esri: Both paths you are updating
- undefined: not doing any link
- Base Map Path: Directory of the GIS mapping type selected
- Ownership Table: Layer you are updating
- Link Field Name: Data Attributes
- LM Source Field: Landmark attributes
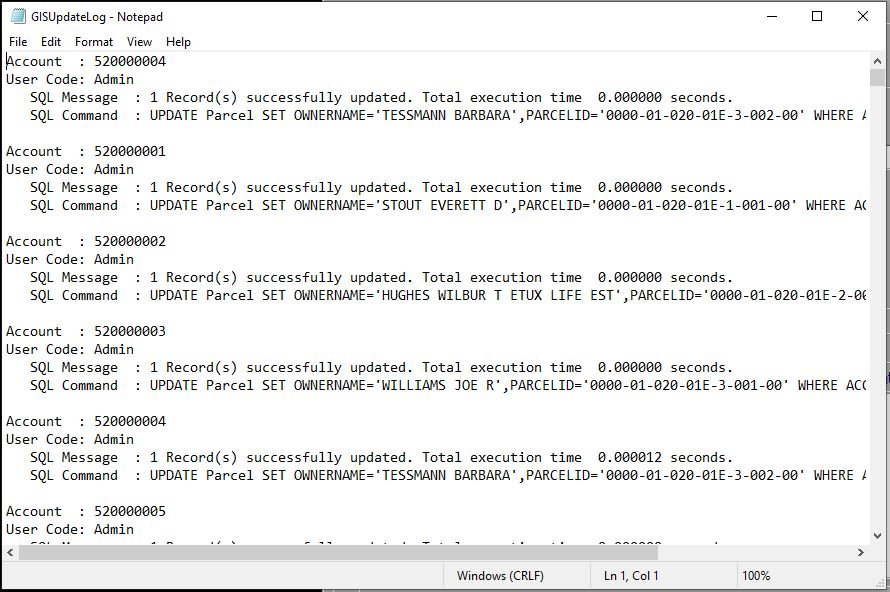
MapAnalyzer is able to track what GIS Fields List is being updated to our parcel shapefile attributes table.
To access this log
CLICK the edit icon ![]()
This will open the form in edit mode.
CHECK the box 
CLICK the X in the right hand corner to save.
Once the Log Update Query Status is checked:
CLEAR the query log by CLICKING the icon in the tool bar.
Clearing this log out is important. Every account in the parcel file that is refreshed or updated will be logged into the query log.
To check the log
CLICK on the
A list of the updated accounts will be shown. This log will only show the fields listed in the GIS Field List.
The GIS Fields Lists allows users to add additional information to the shapefile attributes table and use as a label on the parcel file.
To add a field to the list
CLICK the edit icon ![]()
This will open the GIS Configuration module in edit mode.
CLICK in the white box under the GIS Field
This will open a field with the option for a drop-down box.
DOUBLE-CLICK to add
Once added HIT the Tab Key on the keyboard.
This will tab over to the Source Data.
This is where the user will ADD the expression for the information to be generated in the attributes table.
CLICK the drop-down arrow in box
The form will display.

Under field name CLICK in the box and TYPE to search for the lot size.
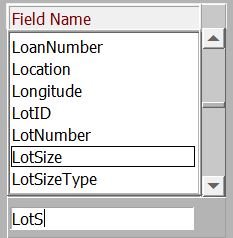
DOUBLE-CLICK on the LotSize.
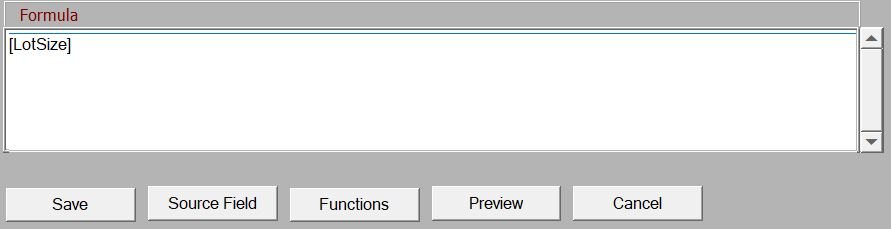
This will generate the formula for that specific field.
CLICK Save
PRESS Tab on keyboard
CLICK the “X” in the top right-hand corner of the module and SAVE
To add a custom label (such as a label that calls for the last five digits of an account number.)
Under GIS Field SELECT Label
If Label does not appear, the users can TYPE Label in the box on the module and TAB over to the source data.
If the user is not sure on the correct way to type the expression,
CLICK on the function key, a help file will open on expressions.
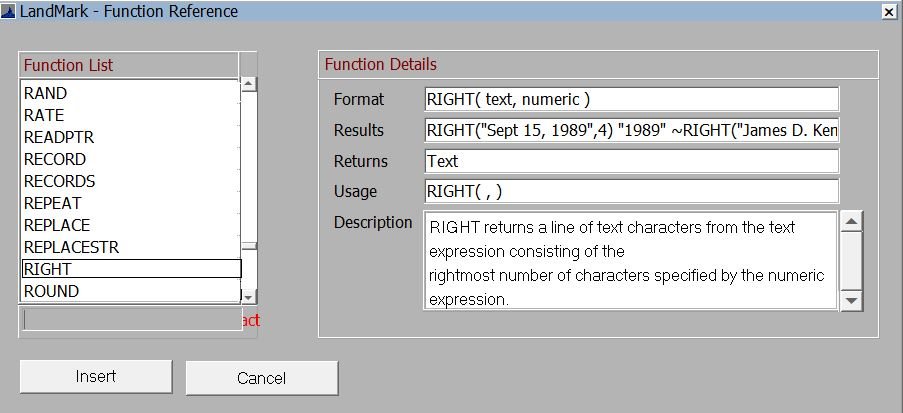
SEARCH keyword “RIGHT” because we are looking for the numbers to the right of the account number.
DOUBLE-CLICK and the function details will generate along with an example.
SELECT Insert
It will insert the formula.
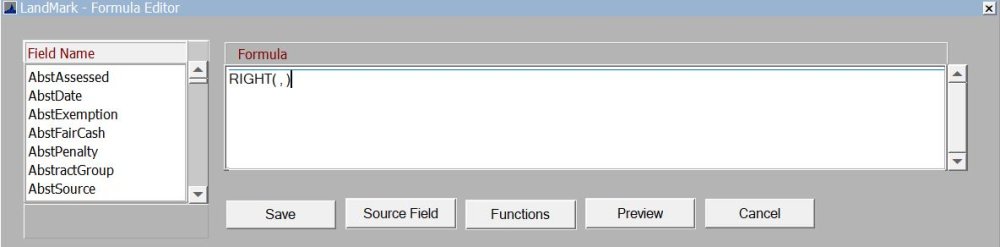
To the left of the comma in the parenthesis, find account in the field list and double click, to the right of the comma type “5”.
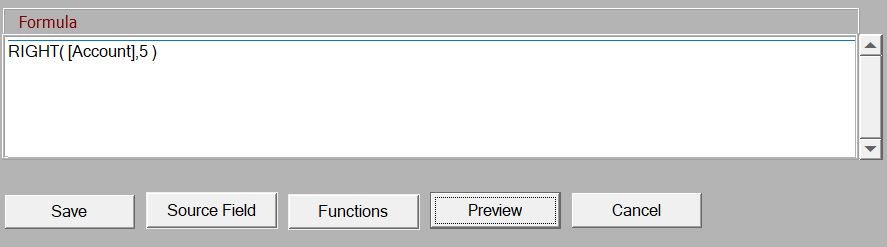
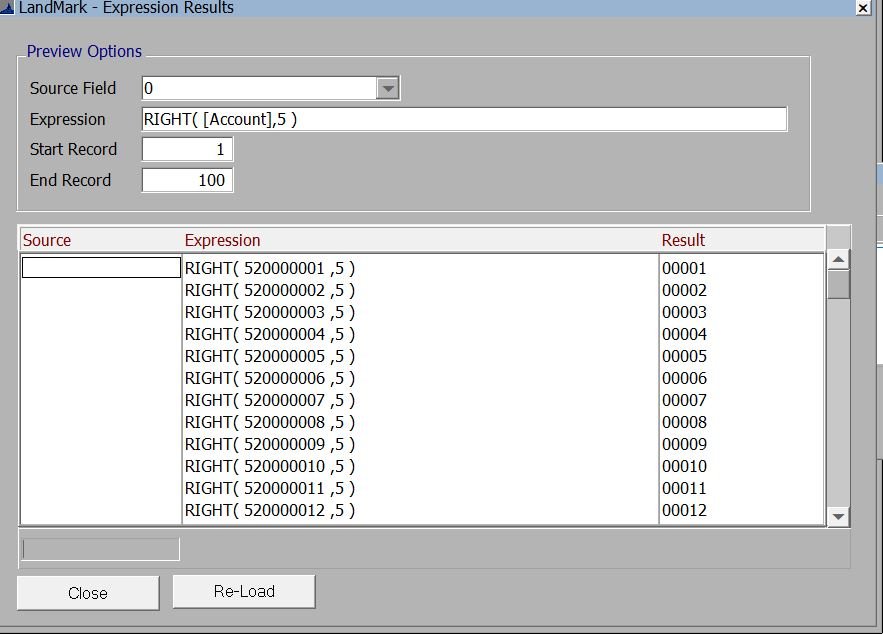
to preview this expression select preview and the preview function box will show.
SAVE
These fields will not display in the Shapefile Attributes until the user adds it.
For more information on this step see Editing Attributes Data.
Post your comment on this topic.