
In this module, you will learn:
- How to import vendor invoices to Add Inventory via the Store side portal.
Importing Invoices
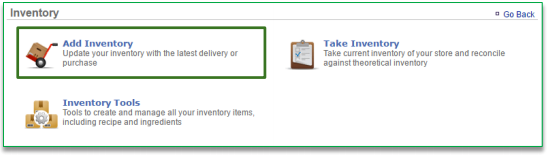
The ability to import invoices allows you add items received from vendors into your inventory in bulk with formatted Excel files. To import invoices you will need to navigate to the Product Management module and click Inventory.

To Upload Invoices
- Click Add Inventory
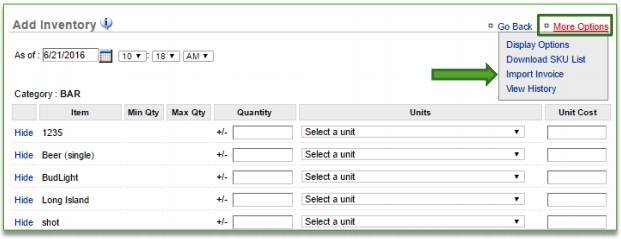
- Click More Options
- Click Import Invoice
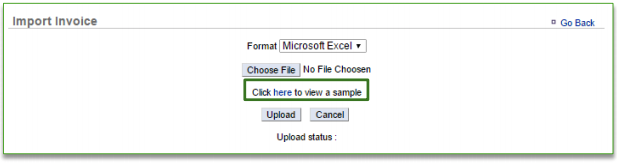
- Click here to download the formatted template.
Important reminders about the format of your invoice
- You MUST have SKU numbers set up in Console for each ingredient listed within your invoice
- Those SKU numbers MUST match the SKU numbers listed within your invoice
- Quantity field MUST include the quantity
- Quantity field CANNOT include non-numerical values

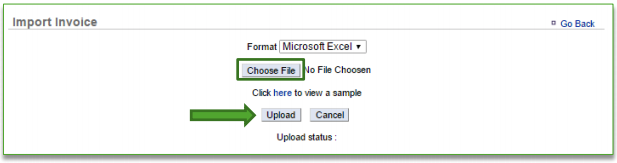
- Click Choose File to select the invoice you wish to upload
- Click Upload
- You will be redirected to the Add Inventory page
- This page will be populated with the totals from your imported invoice provided they meet the required format criteria noted above
- Those items that do not meet the required criteria will not be imported to show totals
- From here you can made additional changes to any of the editable fields, including the date and time
- Ensure that the “As of” date reflects the date on the invoice
- If the Units defined in the import file are not an exact match to what is set up in Console, then the largest unit of measure will be populated on the page
- This page will be populated with the totals from your imported invoice provided they meet the required format criteria noted above
- Click Next at the bottom of the page

- A summary of your Add will appear in a pop-up window
- Click Finalize

Note: To ensure that the SKU numbers on your invoice match the SKU numbers in the application, click More Options and Download SKU List. This will generate a file that allows you to compare what you have set up for each item to the SKU listed on your invoice.
