
Overview
With the release of v2.5.0 programmers can now provision a Brain that is not connected to WAN. Follow the steps below to setup your Brain.
Process
- Select Project from list of Projects
- Select Space from inside Project
- Make sure that you have Published the Space
- For Reference Spaces you must first ‘Publish All References’ from the Master Space (if the Space is newly created)
- Enable Express Mode – If you want to be able to access the Control function from Web Browser
- Open menu in center pane and select generate provisioning file

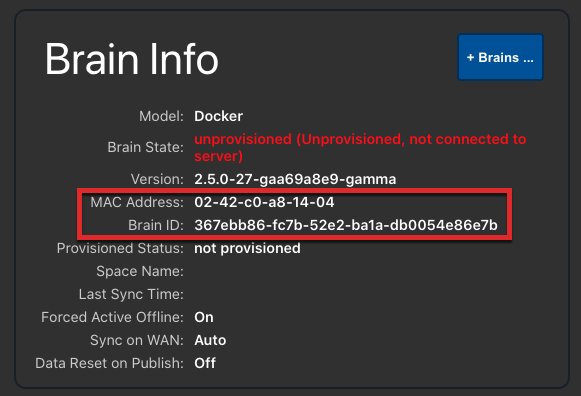
For this next step, you will need to know the MAC address or Brain ID of your hardware. This can be found by opening the Kramer UI webpage of the hardware and copying one of the options shown in the Brain info section
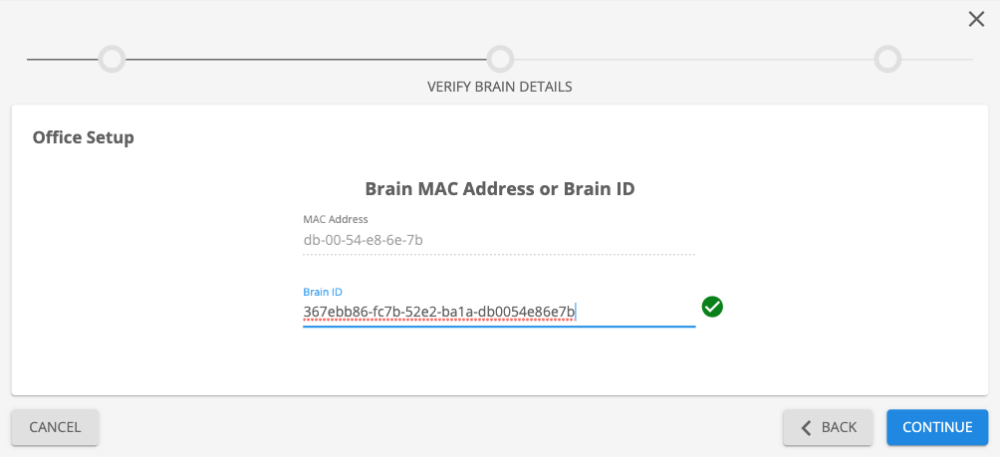
Paste the Brain ID or MAC address into the popup wizard and a green check will appear next to a valid entry, click continue then request your provisioning file in the last step
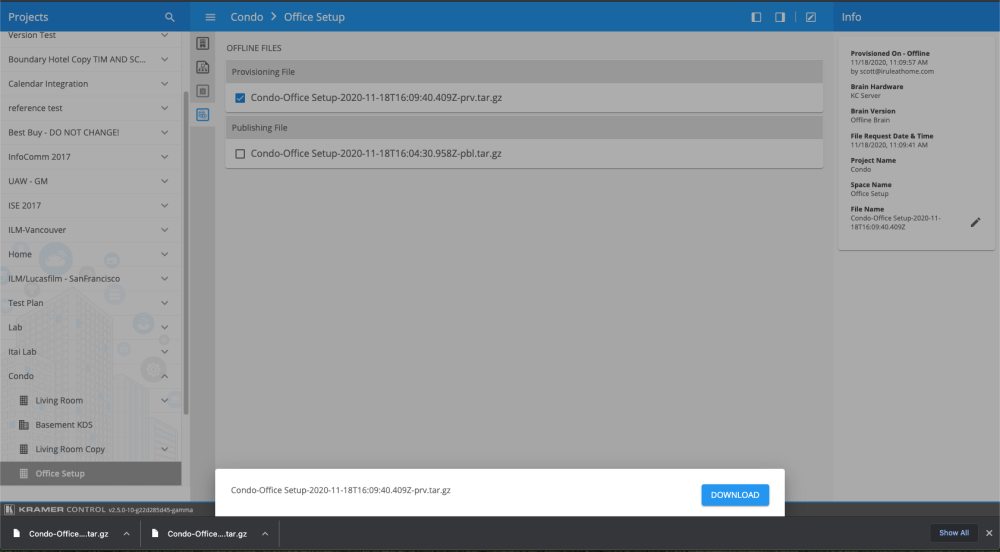
Once the file is requested, open the file management option in the vertical toolbar, then select the Provision file and select Download from the bottom snack-bar.
The final steps are to open the Kramer UI webpage, expand the Offline provisioning section, and drag the provision file to the section that appears or click on the field to open the finder to navigate to the location of the file.

Post your comment on this topic.
Scott wrote: Jun 6, 2025
Offline provisioning is only available when the brain was also provisioned offline. If your Brain is offline and needs to be unprovisioned, unprovision the space in the manager, and temporarily add WAN to the brain so it changes state
Rosendo Guzman wrote: Sep 22, 2023
Very confused, can see to find the way to off line provision a replacing brain with an existing programm