
In order to fix the issue with Google Play issues on the KT-1010, KT-1010SC & KT-1010RB the following steps will need to be followed to remove the dependency on Google Play and Google Play Services and to install the KramerAppUpdate application that will be used to update the Kramer Control and Kronomeet apps on the KT-1010.
Step 1. Factory Reset KT-1010
- Enter the Settings of the KT-1010 using one of the following methods
- Option 1 – Press the round ‘Menu’ button on the top back of the KT-1010 & enter password ‘Kramer’
![]()
- Select ‘Home Page’
- Select the ‘Settings’ button
![]()
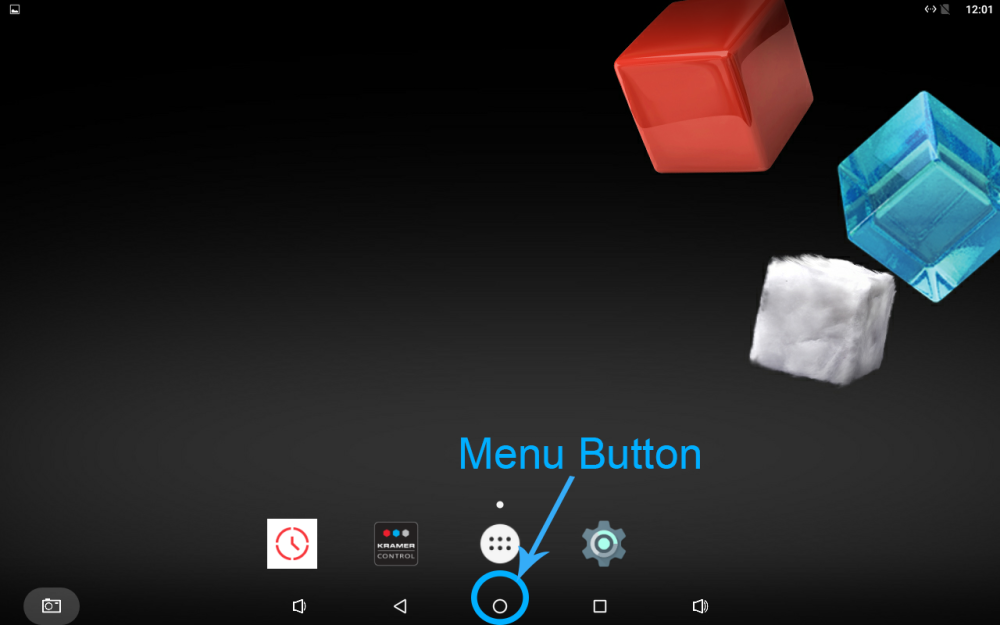
- Option 2 – Swipe up from the bottom (if navigation bar is enabled) and press the circle icon
![]()
- Select the ‘Settings’ button
![]()
- Select the ‘Settings’ button
- Option 1 – Press the round ‘Menu’ button on the top back of the KT-1010 & enter password ‘Kramer’
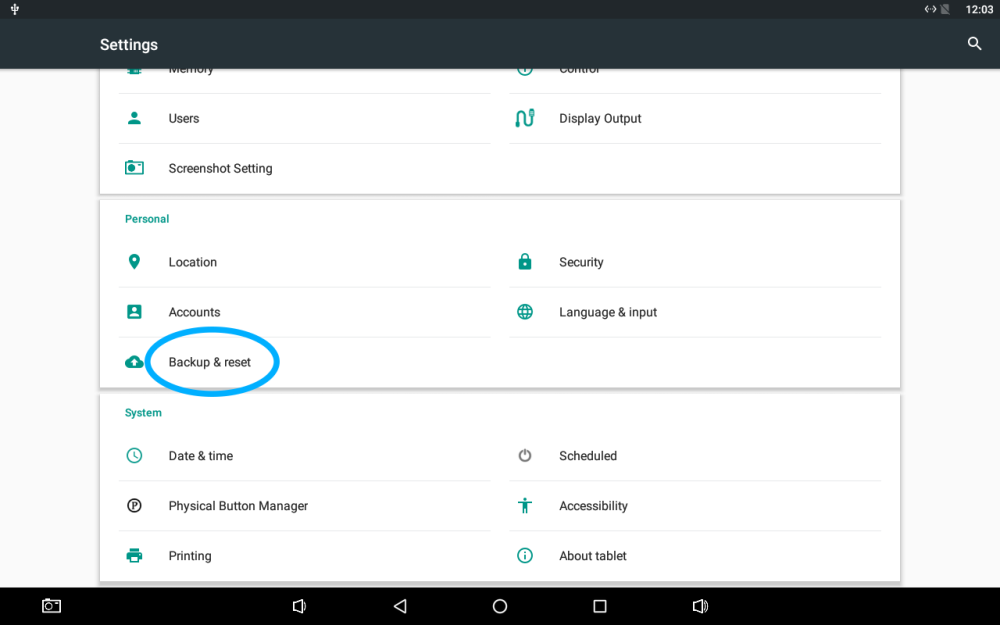
- Scroll down & tap on the ‘Backup & Reset’ option under the ‘Personal’ heading
![]()
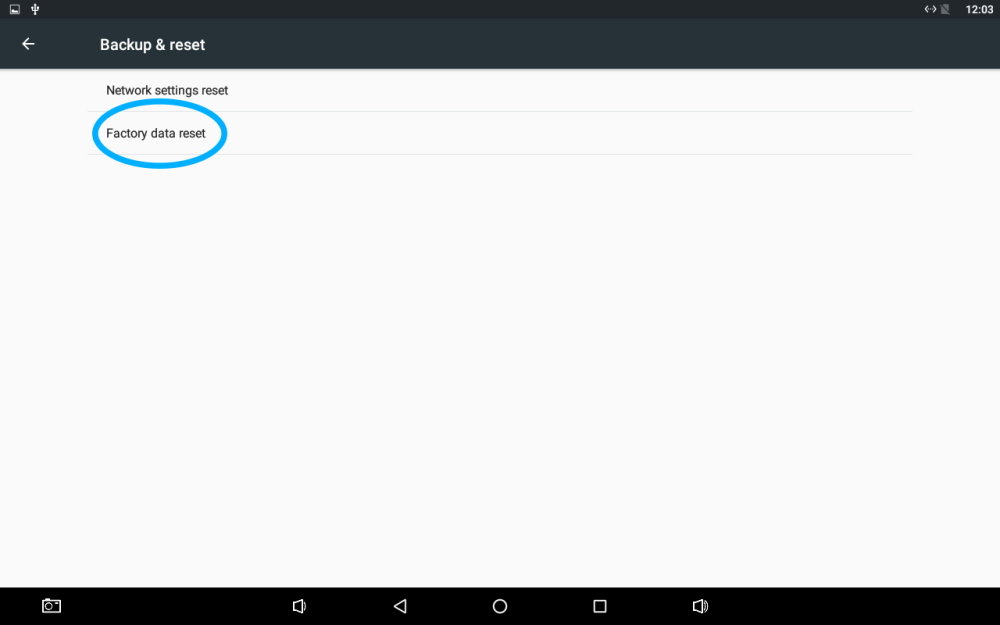
- Tap on ‘Factory data reset’ option
![]()
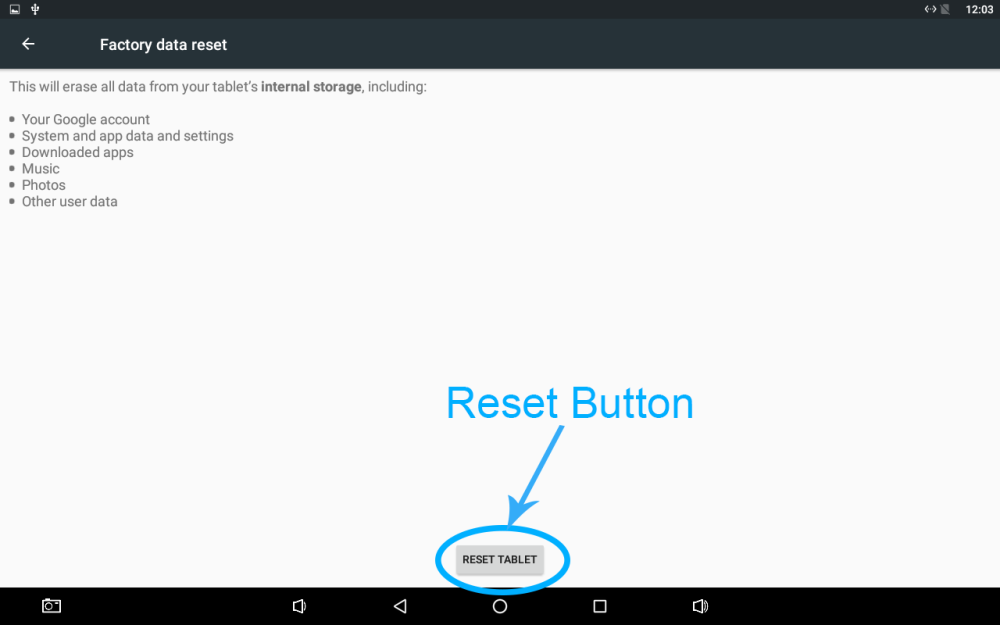
- Tap on ‘Reset Tablet’ button at the bottom of the page
![]()
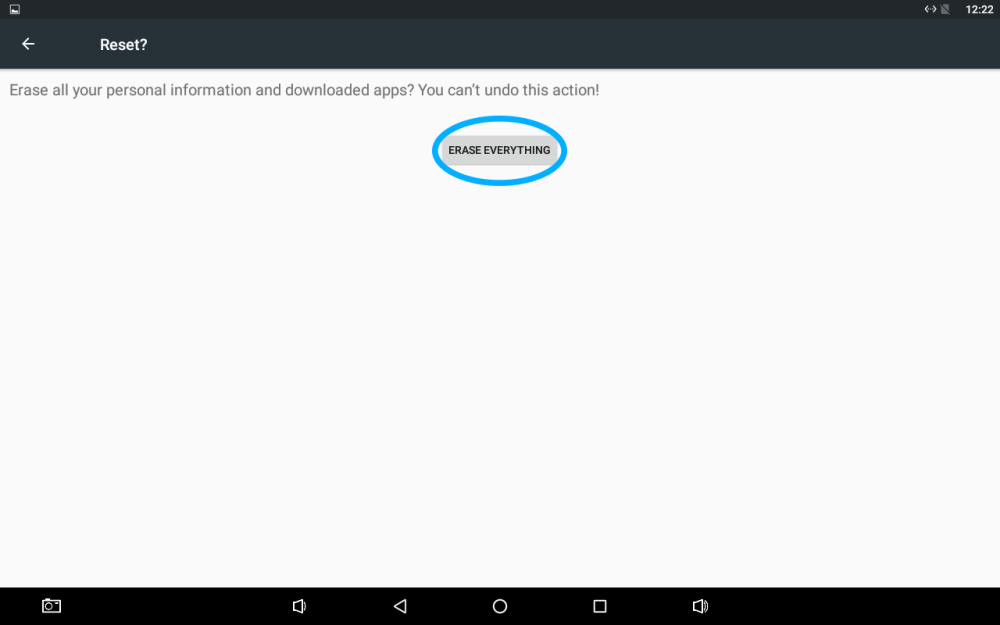
- Tap on ‘Erase Everything’ button
![]()
- This will begin the reset process
- Factory data reset will start
- The tablet will restart
- You will see the Android Droid pop-up and will erase all data
- Tablet will restart a couple more times
- The tablet will do a final reboot into the default application (either Kramer Control or Kronomeet)
- This will begin the reset process

Step 2. Download KramerAppUpdate apk file
Use the link below to download the .apk file to your computer. Kramer App Update
Step 3. Copy file onto USB Flash Drive
Copy the file ‘KRAMERAppUpdate.apk’ into the root directory folder of the USB Flash Drive that is connected to your computer.
Step 4. Insert USB Flash Drive into USB port of the KT-1010
Step 5. Install the KRAMERAppUpdate.apk onto the KT-1010
- Enter the Application Selection Page of the KT-1010 using one of the following methods
- Option 1 – Press the round ‘Menu’ button on the top back of the KT-1010 & enter password ‘Kramer’
![]()
- Select ‘Home Page’
- Select the ‘Applications’ button
![]()
- Option 2 – Swipe up from the bottom (if navigation bar is enabled) and press the circle icon
![]()
- Select the ‘Applications’ button
![]()
- Select the ‘Applications’ button
- Option 1 – Press the round ‘Menu’ button on the top back of the KT-1010 & enter password ‘Kramer’
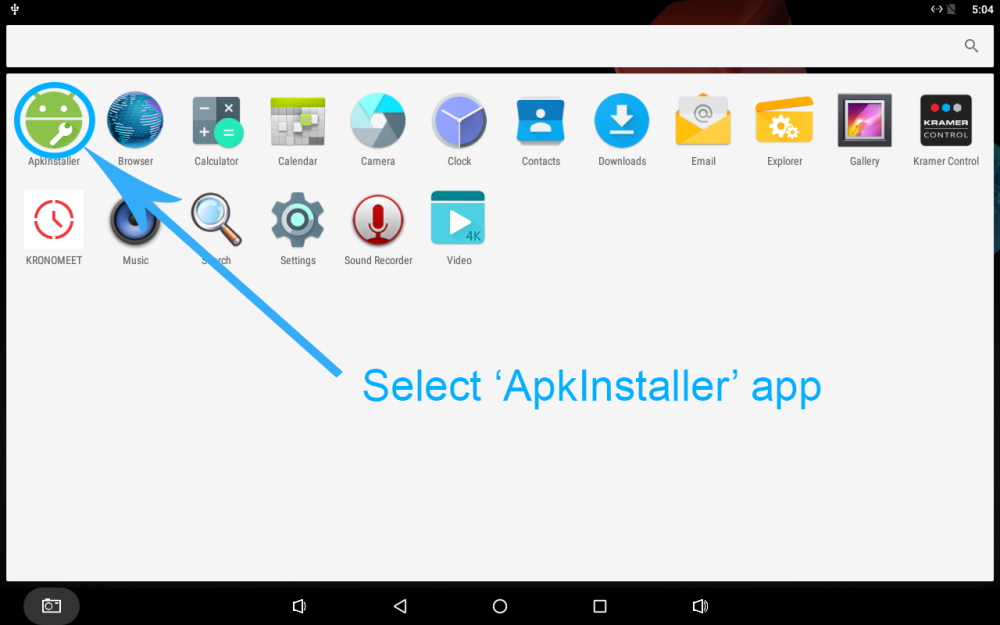
- Launch the ‘ApkInstaller’ app by selecting the highlighted icon
![]()
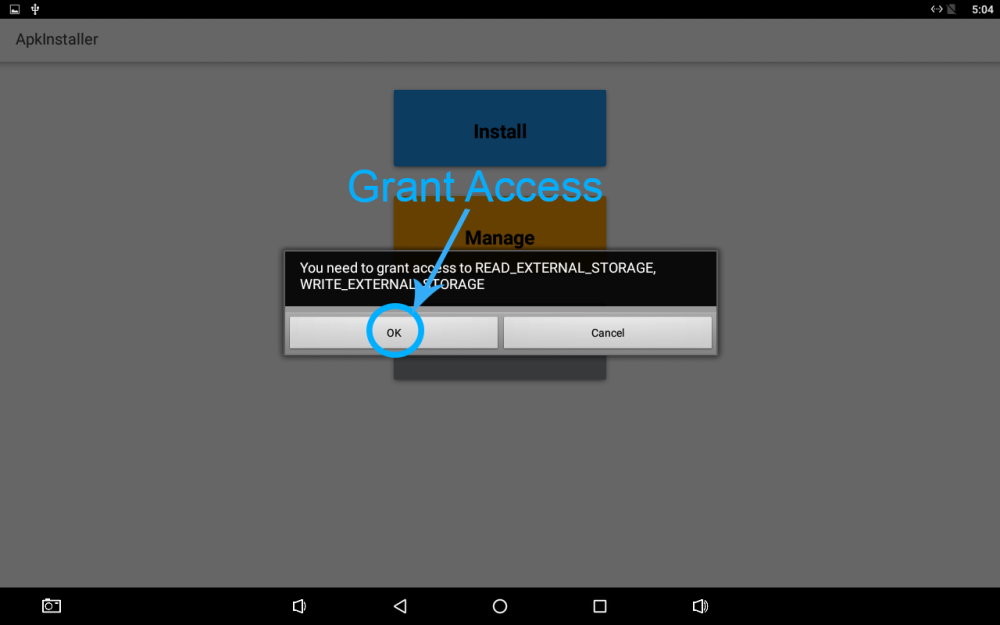
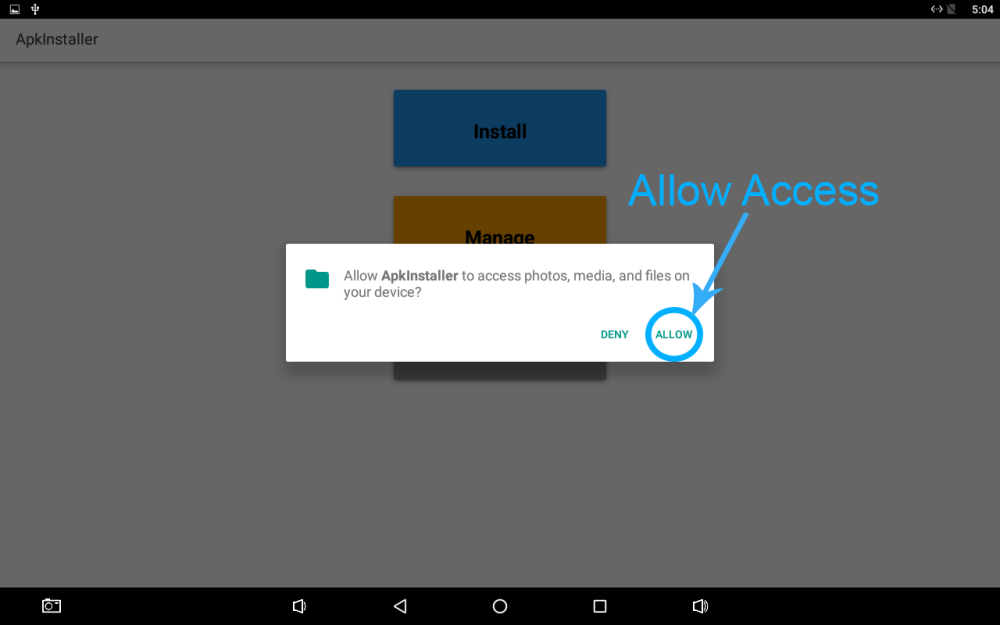
- Allow app access to the USB drive that was inserted in Step 4
![]()
![]()
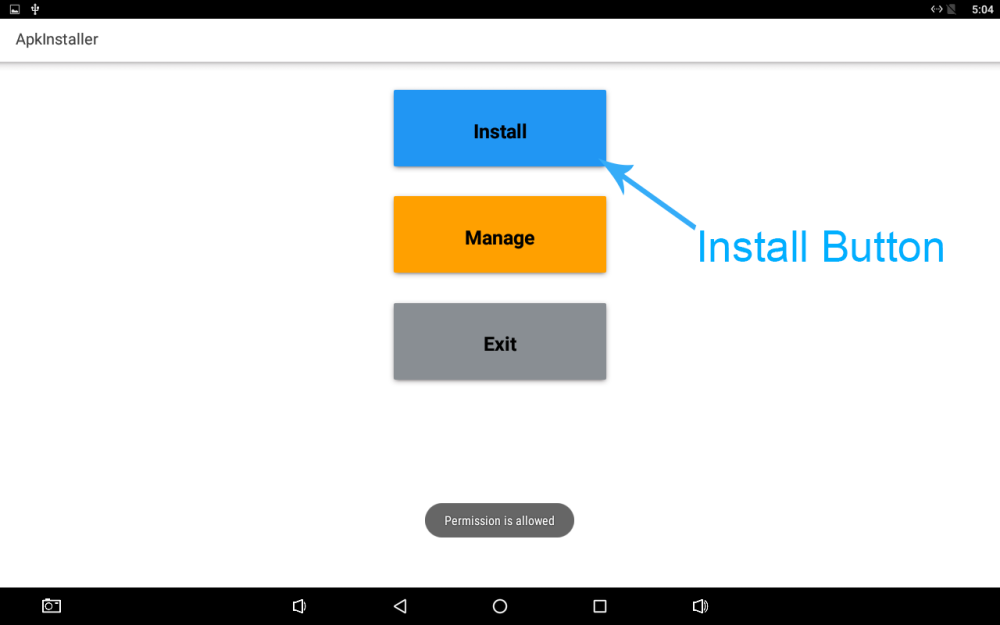
- Select ‘Install’ Option
![]()
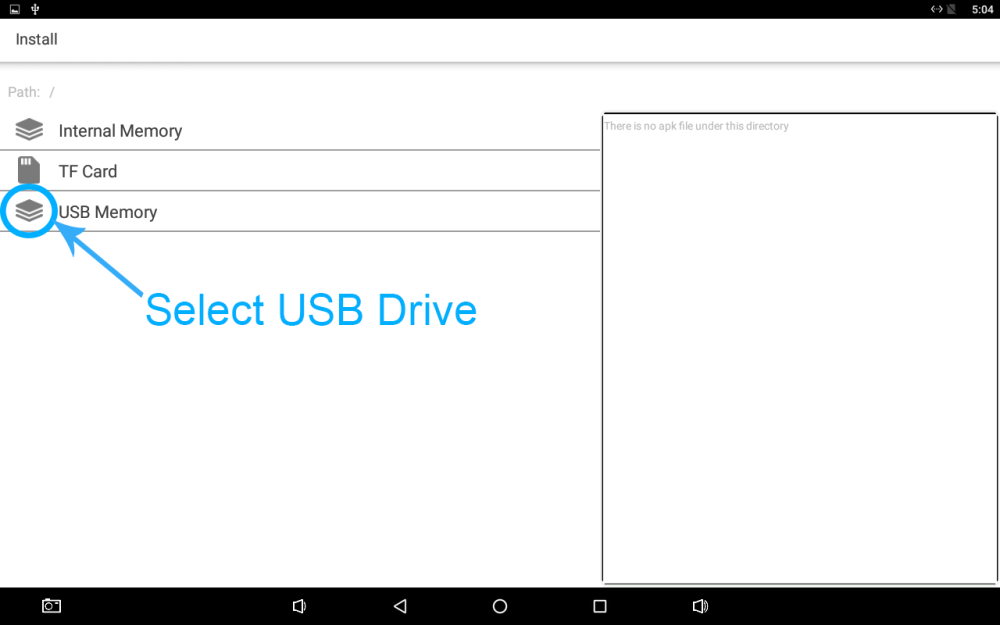
- Select ‘USB Memory’
![]()
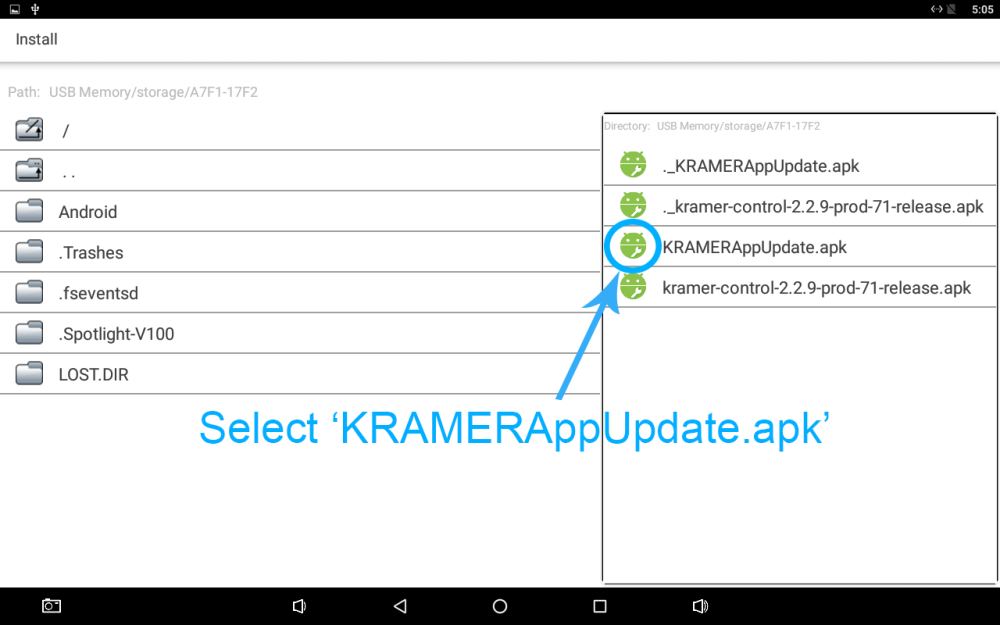
- Select ‘KRAMERAppUpdate.apk’ file (NOTE – Do not use _KRAMERAppUpdate.apk)
![]()
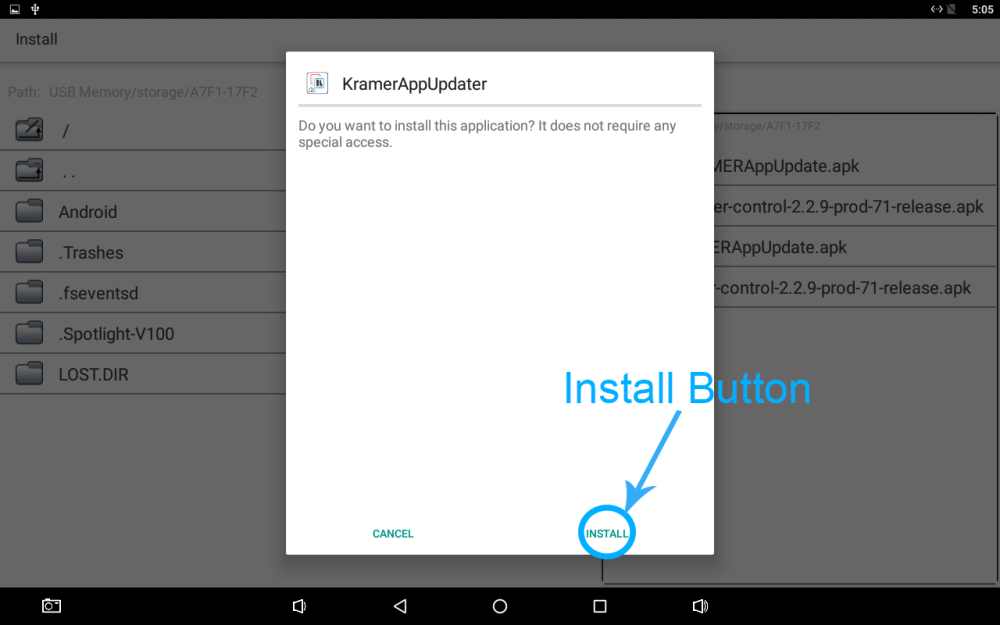
- Select ‘Install’
![]()
- Select ‘Done’
Step 6. Using the KramerAppUpdate application
When you initially launch the app, you will be asked to allow the app to access system services. Click ‘Allow’

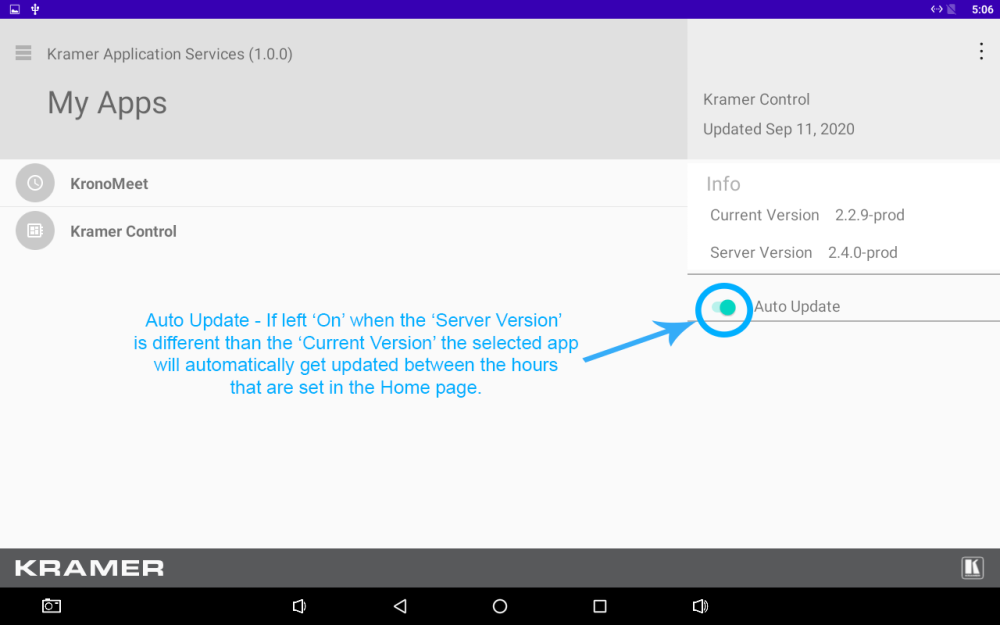
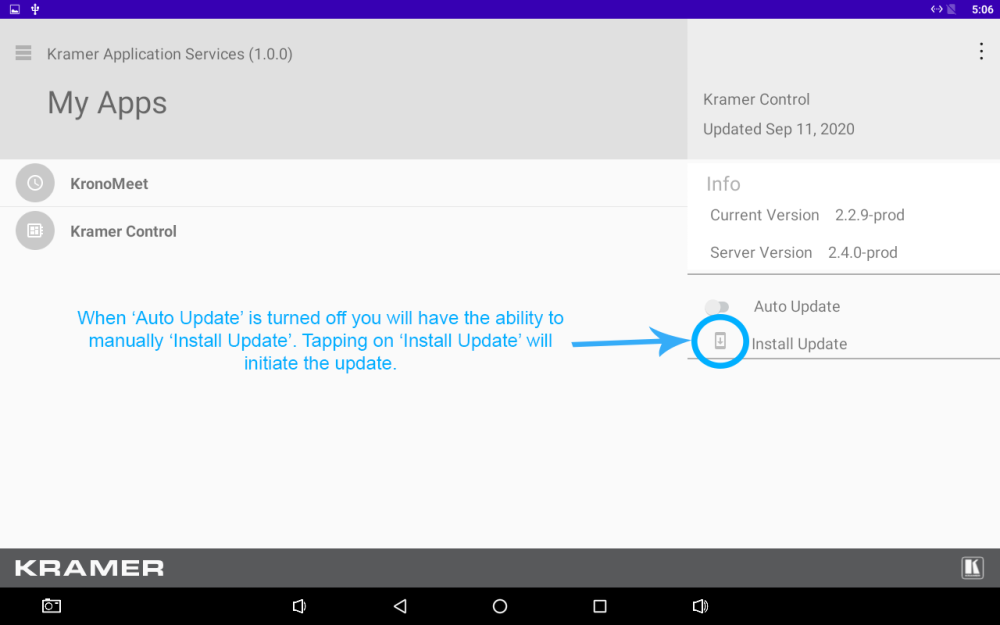
The apps that are available and installed will appear in the application list. Simply select an app to access the settings of that particular app.

Auto-Update Option
- When turned ‘On’ if a new version is found when the application performs its server check that new version will automatically get installed when it gets downloaded
- When turned ‘Off’ if a new version is found when the application performs its server check that new version will get downloaded however, it will not get installed until ‘Install Update’ is pressed
![]()
![]()
Server Check Interval
The server check interval is the time range each day that the KramerAppUpdate application will check the servers for new versions of the installed apps. You can click on the ‘Pencil’ icon to launch the pop-up to change the interval time.


Revision:
4
Last modified:
17 September 2020
Feedback
Copyright © 2025 Kramer
—
Powered by 
Post your comment on this topic.