This document will walk you through the steps necessary to flash the firmware on the KT-1010.
Required Downloads
These files should be downloaded as they will be used in the steps below to update the KT-1010
USB Driver – Rockchip USB Driver
Android Update Tool – Android Tool V2.65
Firmware Image – KT-1010 Firmware
Step 1 – Install & Test ‘Rockchip USB Driver’
Note – There’s no need to connect your device during this procedure.
- Unzip ‘RK_DriverAssistant.zip’.
- Double click on DriverInstall.exe in the RKDriverAssistant directory to start the utility. If you’ve previously tried to install the Rockchip USB drivers for any other Rockchip based devices make sure you click “Uninstall Driver” first.
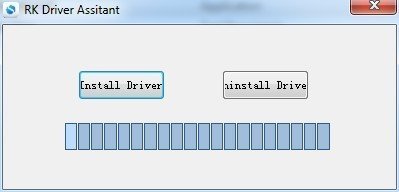
- Then click ‘Install Driver’ and when the driver has finished installing you can close out and connect the KT-1010 to your computer (via the micro-USB connector).
- Open ‘Device Manager’ on your computer and you should see the Rockchip device listed

Step 2 – Android Tool V2.65
- Unzip ‘AndroidToolRelease_v2.45.zip’
- Double click on ‘AndroidTool.exe’ to run the tool.
p(banner tip). If using Windows 7 or above, you need to select “Run As Administrator” or allow UAC when opening the tool - Select ‘Upgrade Firmware’ tab at the top of the tool
Step 3 – KT-1010 – Navigate to the ‘Home Page’
- Press ‘Menu’ button on the top of the KT-1010

- Enter passcode ‘Kramer’
- Select ‘Home Page’
Step 4 – Connect KT-1010 to computer (via the micro-USB connector)
Step 5 – Allow USB Debugging
- Tap on ‘Always allow from this computer’
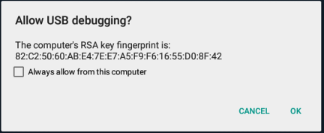
- Tap ‘OK’ to Allow USB Debugging
Step 6 – Click ‘Switch’ within ‘AndroidTool’
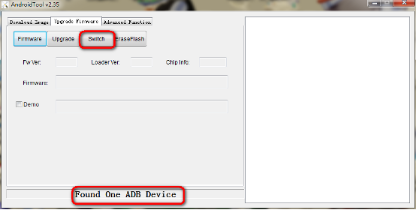
Step 7 – Unzip and select firmware file – KT-1010 Firmware
- Unzip the folder ‘KT-1010.AP6255_CA.Kramer.IVO_M101NWWB_R3.V1.0_0.10.11r.20200914’
- Open the folder and select ‘USB_Burn’
- Unzip the folder ‘USB_Burn’
- Select ‘Firmware’ button in the ‘AndroidTool’

- Open folder ‘KT-1010.AP6255_CA.Kramer.IVO_M101NWWB_R3.V1.0_0.10.11r.20200914’
- Open folder ‘USB_Burn’
- Open folder ‘USB_Burn’
- Select ‘update.img’
- Select ‘Open’

Upgrade Firmware
- Select ‘Upgrade’ button in the ‘AndroidTool’ to start burning the firmware.
- The firmware burn process will take approximately 5 minutes to complete
Enable ‘Navigation Bar’
- Navigate to the ‘Home Page’ of the KT-1010
- Press ‘Menu’ button on the top of the KT-1010

- Enter passcode ‘Kramer’
- Select ‘Home Page’
- Select ‘Settings’
- Select ‘Display’
- Turn ‘Hide Status Bar’ to Off
Launch ‘KramerAppUpdate’ app
- Navigate to the ‘Home Page’ of the KT-1010
- Press the ‘Circle’ button on the bottom navigation bar
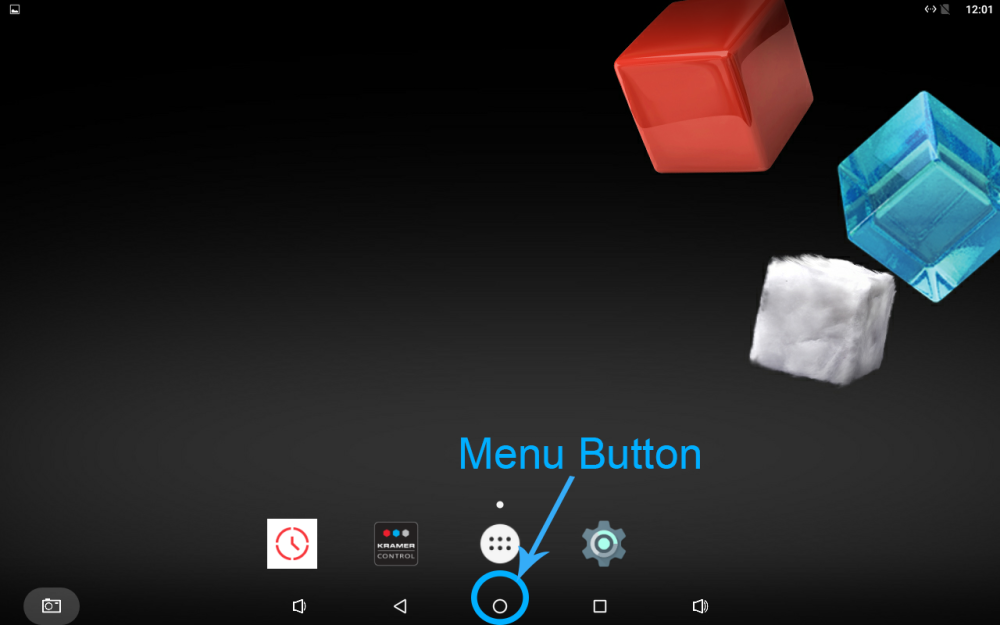
- Select ‘Applications’ button
- Launch ‘KramerAppUpdate’ app
Update ‘Kramer Control’ app
- Tap on ‘Kramer Control’
- Turn Off ‘Auto Update’ by tapping on the ‘Auto Update’ toggle switch
- Tap on ‘Install Update’
Update ‘Kronomeet’ app
- Tap on ‘Kronomeet’
- Turn Off ‘Auto Update’ by tapping on the ‘Auto Update’ toggle switch
- Tap on ‘Install Update’
- Turn ‘Auto Update’ back on by tapping on the ‘Auto Update’ toggle switch
Test Kramer Control app
- Launch ‘Kramer Control’ application and make sure that it launches successfully
- Press ‘Circle’ button on the bottom navigation bar
- Tap on ‘Kramer Control’ icon to open the Kramer Control app
- Make sure that the app goes into the Sign-in screen
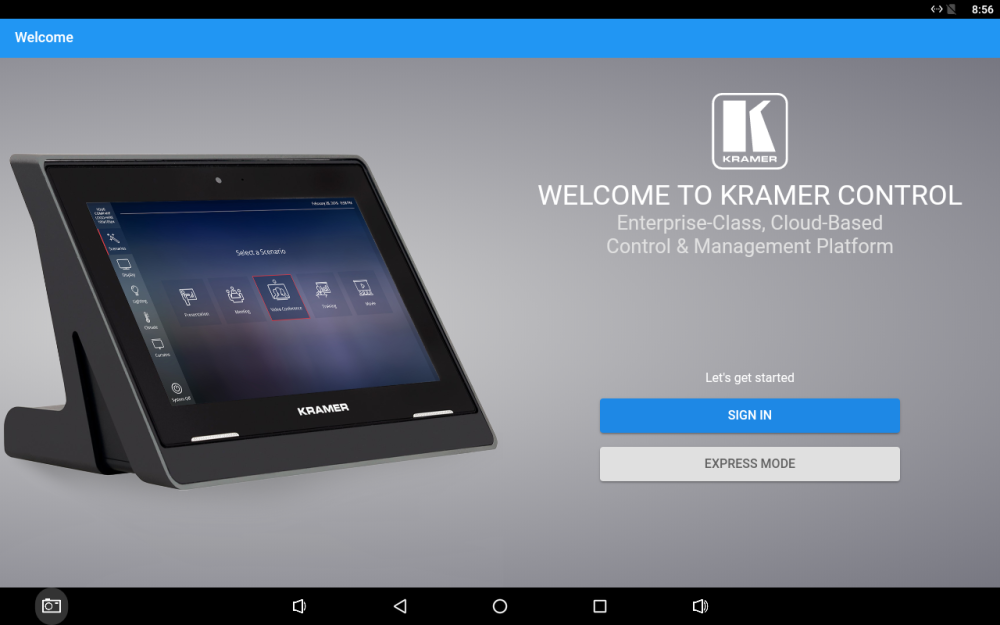
Test Kronomeet app and add to Home Page
- Add Kronomeet app to the Home Page
- Press ‘Circle’ button on the bottom navigation bar
- Select ‘Applications’ button
- Press & Hold on the Kronomeet Icon
- Drag Kronomeet Icon down and place it between the Kramer Control icon and the applications icon

- Launch ‘Kronomeet’ application and make sure that it launches successfully
- Press ‘Circle’ button on the bottom navigation bar
- Tap on ‘Kronomeet’ icon to open the Kronomeet app
- Make sure that the app goes to the Sign-in screen

Close all open apps
- Press ‘Square’ button on the bottom navigation bar
- Press the ‘X’ in the top right of each application window to close the application
Disable ‘Navigation Bar’
- Navigate to the ‘Home Page’ of the KT-1010
- Press ‘Menu’ button on the top of the KT-1010

- Enter passcode ‘Kramer’
- Select ‘Home Page’
- Select ‘Settings’
- Select ‘Display’
- Turn ‘Hide Status Bar’ to On
The KT-1010 is now ready for use or shipping
Revision:
5
Last modified:
17 September 2020


Post your comment on this topic.