
Meetings
Introduction:
Meetings, especially results meetings, are a milestone in the company’s learning process: understanding and sharing results, celebrating achievements, making accurate analyses and correcting course. In short, everyone is on the same page and engaged in projects and actions that are essential for the company’s future.
Procedures:
There are three ways to register a meeting. Through the Individual Dashboard, through My Tasks > Calendar or through Manage > Meetings.
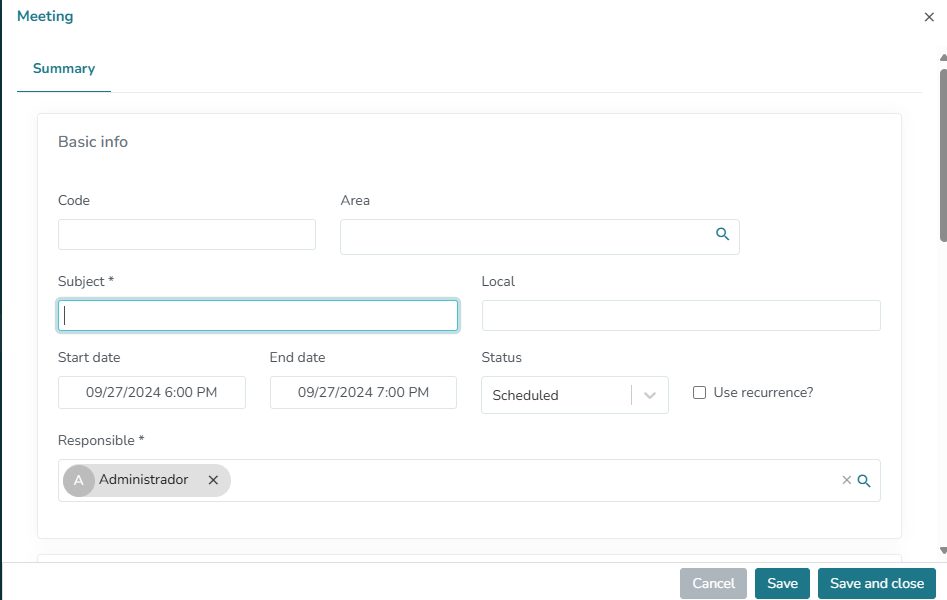
1. To register a meeting, access one of the menus mentioned above and click on + > Fill in the meeting code (if it is set to be automatic, there is no need to fill it in) > Select the area, subject, location, start and end date and time and save:
2. Then, enter the meeting participant(s).
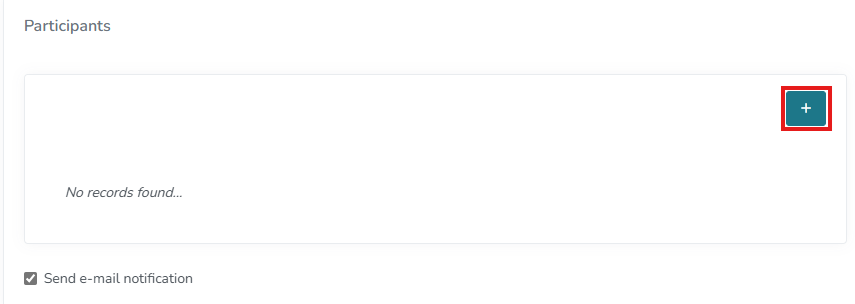
Attention: for the participant to receive the meeting invitation by email, he/she must have a registered email address, the option “Also send notification by email” must be checked and the email server configuration must be working.
To check if the email server is working, access the menu General Settings > Systems Tab > Email Server, and send a test email to a valid email.
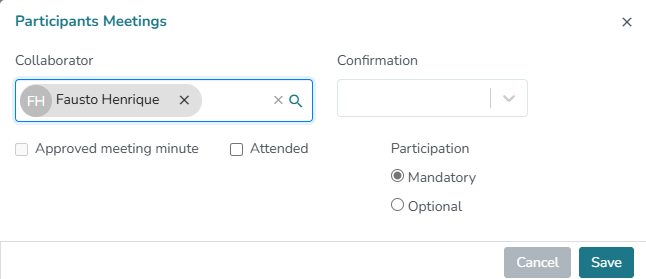
3. Fill in the meeting agenda and save. At this point, the participant will receive an email with the subject “Meeting confirmation”, where he/she must confirm or decline his/her participation in the meeting; to do so, the participant must be logged into the software. Upon confirmation, he/she will receive another email, now with the subject “Attendance confirmed”; This email will contain an invite.ics file attached, which can be added to your email calendar when clicked.
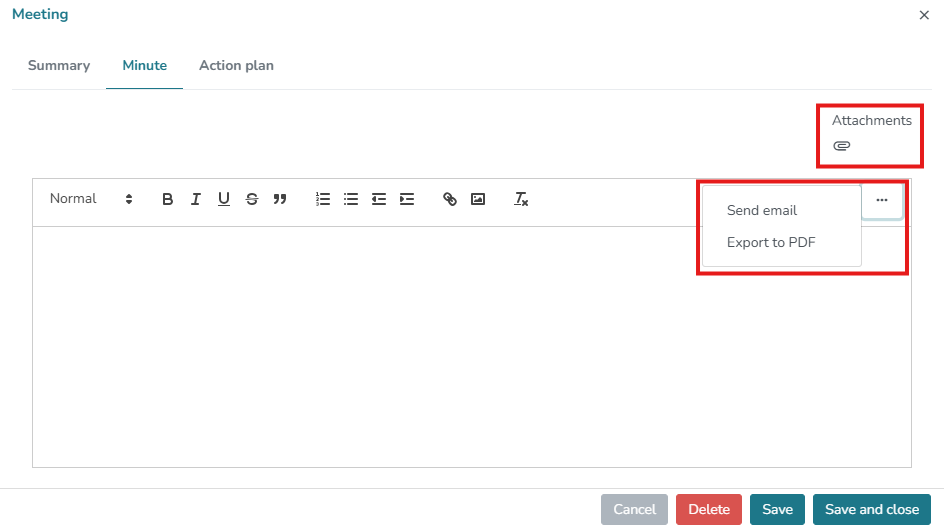
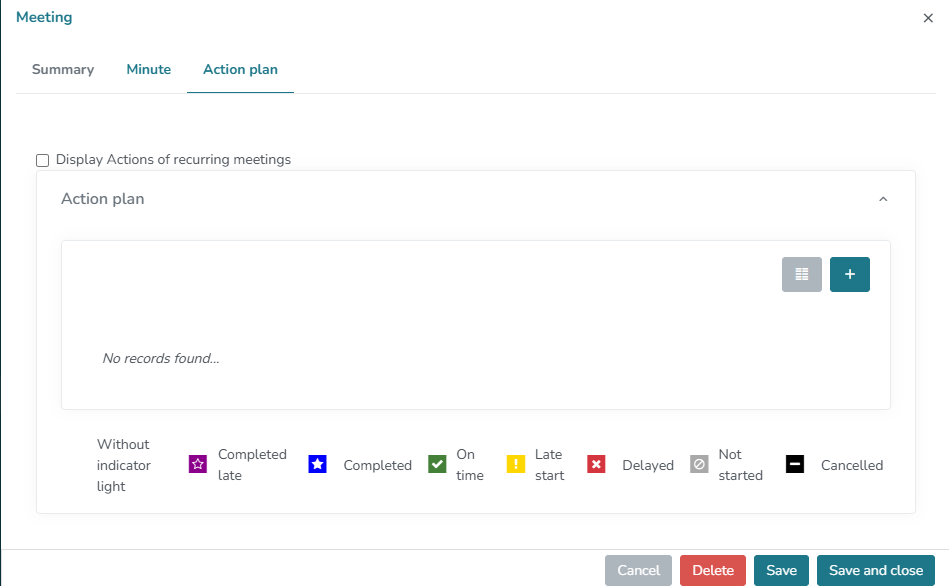
4. After the meeting is held, you can fill out the minutes and an action plan, if applicable. You can insert an attachment in the minutes, send them by email or export them as a PDF:
How to create a recurring meeting
Procedures:
1. Before saving the meeting, click on “Use recurrence?”. When you check this option, the fields Number of occurrences, Recurrences, Tolerance (Calendar days, Business days) will appear.
Let’s suppose you want to register a meeting that should take place monthly on every fifth business day. In this case, in the Recurrences field, select the Monthly frequency, in the Number of occurrences field, enter the number of times you want the meeting to take place. For example: let’s say you want this meeting to take place from April/2022 to December/2022, in this case, enter the number 8, which refers to the number of months in which the meeting should take place, not counting the first month.
Note: Currently, it is not possible to leave infinite occurrences, that is, it is not possible to leave the Number of occurrences field blank.
By entering the number 0 (zero), the meeting will only take place in that month.
In the Tolerance field, enter 5, which refers to the fifth day, and select the Business days option, which refers to the fifth business day of the month.
If you want the meeting to take place, without fail, on the 5th of each month (whether it is a business day or not), simply select the Calendar days option.
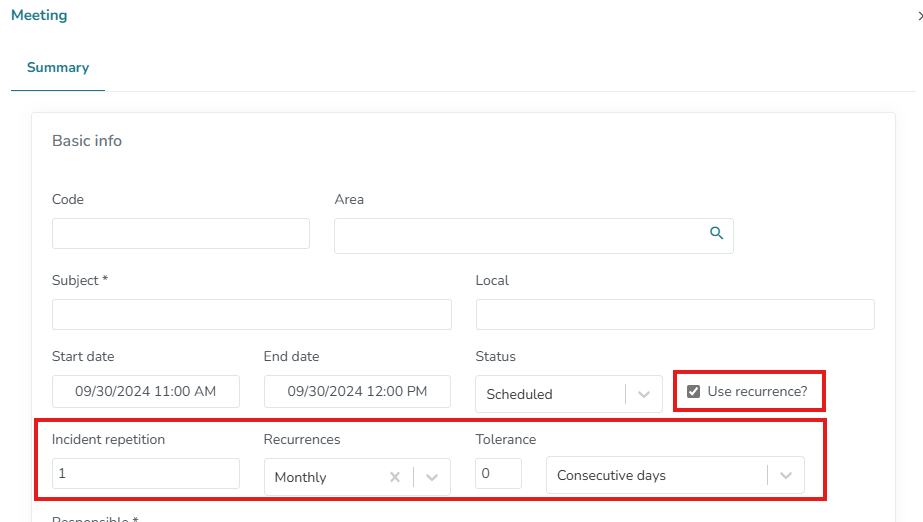
Important: Currently, recurring meetings are not linked to each other, that is, changing/deleting one meeting does not change/delete the others.
Rules:
- By default, only the person responsible for the meeting can change its minutes. In order for a participant to change the minutes, they must have permission in their profile to Edit minutes of meetings that are not under their responsibility.
- Only the person responsible for the meeting can insert an action plan in it.
- Only the person responsible for the meeting can delete it or change its registration data such as: subject, location, date, time, etc.
Conclusion:
This topic demonstrated how to register a meeting.