
Project
Introduction:
A project is a temporary effort undertaken to create a unique product, service, or result. Remember that being “temporary” means that projects must have a defined beginning and end; it does not mean that they are short-lived.
Procedures:
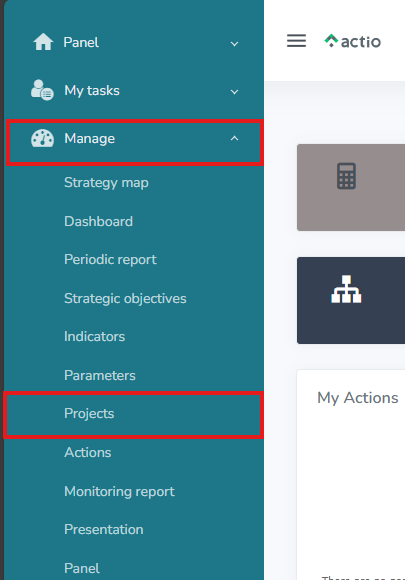
1. To insert a project, access the Manage > Projects menu:
2. Click on the  button to insert a project. Fill in the project information and save. Fields with an asterisk are mandatory:

Fields:
Name: you must enter the name of the project;
Import code: can be an automatic code or can be registered manually, this condition will depend on the settings previously adjusted in the system.
Area: you must select the area to which the project belongs, that is, in which area this project will affect performance.
Responsible: you must define who will be responsible for the project, that is, who will be able to make changes to it, such as registering actions.
Status: refers to the status of the project; it can be In Planning, Active, Completed, Suspended or Cancelled. Note: Suspended/completed/cancelled projects do not generate notifications.
Start Date and End Date: determine the expected period of the project, that is, from when to when you intend for it to be executed. This date is only an informative date, that is, it has no relation to the dates of the project actions.
Action Start Date, Action End Date, *Action Start Date, Action End Date: are automatically filled in with the dates of the project actions. Actions with the status “In planning” and “Cancelled” are not counted for this field; the system will always take the earliest start date and the latest end date.
% expected and % actual: can only be filled in when a project has no actions. If the project has actions, the system takes the percentage of actions for this field.
Expected investment and Investment made: are filled in according to the project’s actions; however, if the actions do not have the fields filled in, you will be able to fill them in directly in the project.
3. When saving, some tabs will be enabled. See below the meaning of each one:

Summary: displays the project’s registration data, such as: name, area, person in charge, etc.
Permissions: here you can allow or block access to this project for certain users. This permission overrides the profile and area permissions.
Settings: Here you can configure the project itself, such as: blocking notifications.
History: Here you can see all the changes made to the project registry, such as: changing the name, area, person in charge, etc. In addition, you can know when and which user made the change.
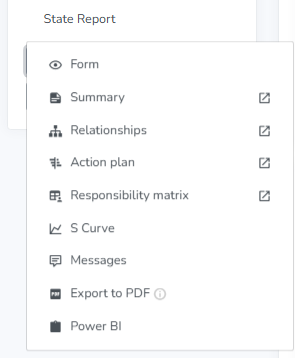
Status Report: This is a simple document that exists for the project manager, the client and the internal team to periodically update those involved regarding the project status, points of attention, deliveries that were made (or should have been made). And it is here in this tab that this document is created.
More: In this option you can access more details about the project, such as: action plan and S-curve:
Conclusion:
This topic demonstrated how to register a Project.