
- To create PDF’s, see Exporting PDF’s. Note that DXF/other formats can also be exported while creating a PDF!
- To export Pictures and voice notes, including measurement photos, see Export Pictures and Voicenotes
Flexijet Stone offers many options and formats for exporting files to other software and machinery. Please contact your CNC’s tech support for information about any special formats required, and contact Flexijet Support at 1-844-MY-FLEXI (1-844-693-5394) Ext 2 or helpdesk@flexijet.info for assistance.
General export information:
Export an individual folder:
- Right click on the folder to be exported and select ‘Export>Export’ from the drop down menu.
![]()
![R click menu Export>Export]()
- Specify the desired file type, filename, and save location in the Export Dialog window, and click ‘Save’.
![]()
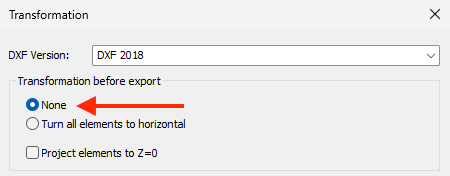
- Now, the Transformations window will open. Select any desired transformations and click ‘OK’ to proceed’. Your file will now be saved at the specified location.


Export a group of folders (subfolders) as a single 2D DXF/DWG:
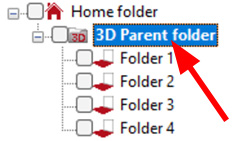
- Right-click on the parent 3D folder of the group to be exported and select ‘Export>Export’ from the drop-down menu. (Home folder can also be a 3D parent folder)
![3D Parent folder highlighted in Project Explorer]()
![R click menu Export>Export]()
- Specify the desired file type, filename, and save location in the Export Dialog window, and click ‘Save’.
![]()
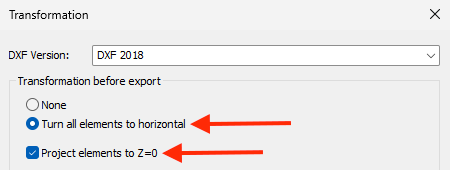
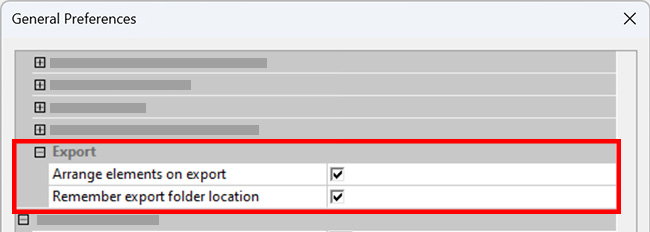
- Now, the Transformations window will open. Ensure that ‘Turn elements to horizontal’ and ‘Project elements to Z=0’ are selected’, and that ‘Arrange elements on export’ is selected in ‘General preferences’, and click ‘OK’ to proceed’. Your file will now be saved at the specified location, with all elements of the sub-folders
Export a group of folders (subfolders) as individual 2D DXF/DWG files:
- Right-click on the parent 3D folder of the group to be exported and select ‘Export>Export sub folder individual’ from the drop-down menu. (Home folder can also be a 3D parent folder)
![3D Parent folder highlighted in Project Explorer]()
![]()
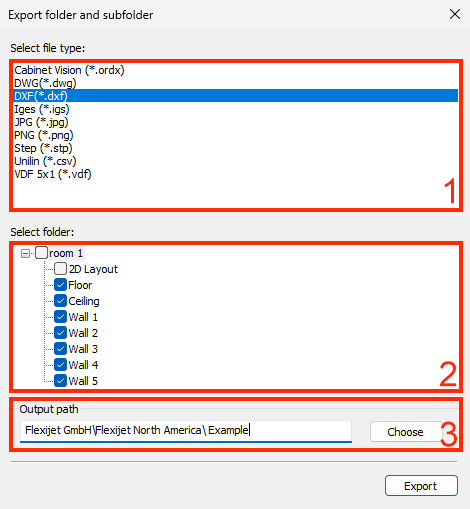
- Specify the desired file type and filename, save the location in the Export Dialog window, and click ‘Save’.
![]()
- On the window that will pop up, it can specify the following:
- 1: The file type.
- 2: The folders that would be exported.
- 3: The location in which the file will be saved.
![]()
- Now, the Transformations window will open. Ensure that ‘Turn elements to horizontal’ and ‘Project elements to Z=0’ are selected’, and that ‘Arrange elements on export’ is selected in ‘General preferences’, and click ‘OK’ to proceed’. Your file will now be saved at the specified location, with all elements of the sub-folders

To export only selected objects (selected on-screen):
- Navigate to the ‘File’ menu, and select ‘Export (Select Objects)’.
![]()
- Select the objects to be exported, and click ‘Confirm’ or ‘Enter’ to confirm the selection
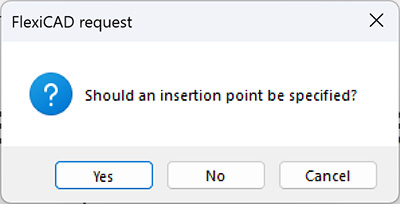
- Prompt to select insertion point will appear. Click ‘Yes’ to specify the insertion point by clicking or entering coordinates.
![Export Select Objects dialog box insertion point be specified]()
- Specify the desired file type, filename, and save location in the Export Dialog window, and click ‘Save’
![]()
- Now, the Transformations window will open. Select any desired transformations and click ‘OK’ to proceed.’

To export the entire project (including ‘Home’ folder and all sub-folders) as a single file:
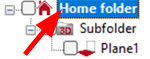
- Select the ‘Home’ folder from the project explorer by clicking on its name.
![Project explorer with Home folder highlighted]()
- Navigate to the ‘File’ menu, and select ‘Export’.
![]()
- Specify the desired filetype, filename, and save location in the Export Dialog window, and click ‘Save.’
![]()
- Now, the Transformations window will open. For a 3D Export, turn off ‘Turn elements to horizontal’ and ‘Project to Z=0’. Select any desired transformations and click ‘OK’ to proceed.’ Your file will now be saved at the specified location.

Exporting in 2D vs 3D:
- 3D: Export a 3D folder by right-clicking and choosing Export>Export, or from File>Export. Turn off the transformations on the ‘Transformations’ window, and the 3D elements will be exported in 3D.
![]()
- 2D: If both ‘Turn all elements to horizontal’ and ‘Project elements to Z=0’ are selected on the Transformations window, all vertical and free plane folders will be rotated to lay flat on horizontal, their elements projected to Z=0, and they will be tiled out horizontally (not overlapping) on the resulting export file.
![]()
Transformations during export
![]()
| 1. File Version |
|
| 2. Layers |
|
| 3. Explode |
|
| 4. Transformation before export |
|
| 5. PDF |
|
| 6. Export measurement and photo points |
|
Note: If both ‘Turn all elements to horizontal’ and ‘Project elements to Z=0’ are selected on the ‘Transformations’ window, all vertical and free plane folders will be rotated to lay flat on horizontal, their elements projected to Z=0, and they will be tiled out horizontally (not overlapping) on the resulting export file if the option for ‘Arrange elements during export’ is selected in ‘General Preferences’.
GIF: Exporting an individual folder

GIF: Exporting the entire project
Feedback
Copyright © 2025 Flexijet GmbH
—
Powered by 
Post your comment on this topic.