
- Safety and care instructions
- Setting up Flexijet 3D
- Tilt monitoring
- The shock sensor
- Connecting to Flexijet 3D
- Measuring a Countertop
- Adding Backsplash
- Drawing a Stove Opening
- Measuring Full-Height Backsplash
- Measuring a Waterfall
- Measuring a Wall
- Flexijet Smart Remote app
- Xbox Controller
- Auto-fillet
- Exporting files
- Drawing/Drafting
- Flexijet on-screen Controls
Using Flexijet’s Built-in camera as an on-screen viewscope.
The Flexijet 3D’s 5mp can be used as a view scope (riflescope) when measuring. This view is available from the Flexijet while a function is active. To activate the camera viewscope:
- Click (depress) the Scroll wheel on the right side of the Flexijet, located on the top of the Flexijet
- Adjust the brightness, zoom, and invert colors from the on-screen buttons.
- Note that the crosshairs are visible when Flexijet is registering a proper laser measurement.
![Flexijet top view showing scroll wheel]()

Overview of Flexijet 3D
![Flexijet parts and buttons]()
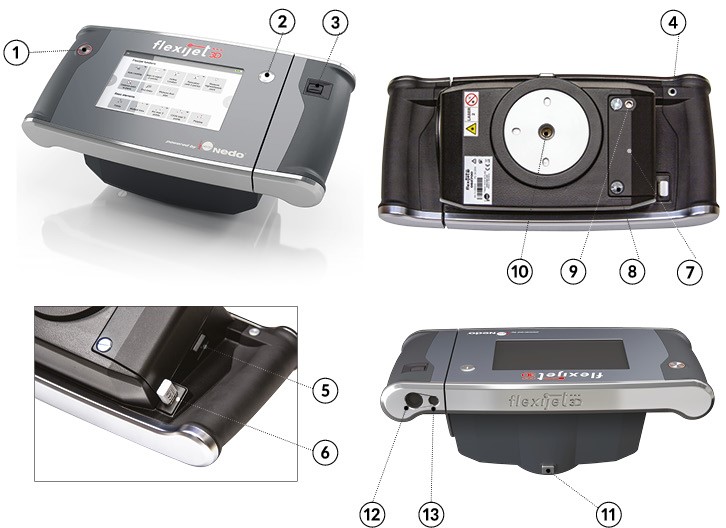
| 1 | Measurement button | 8 | Battery compartment closing screw |
| 2 | On/Off button | 9 | Charging socket |
| 3 | Scroll wheel | 10 | 5/8” connection thread |
| 4 | Escape/Cancel button | 11 | Locking button |
| 5 | Main On/Off switch | 12 | Camera |
| 6 | W-LAN dongle | 13 | Laser rangefinder |
| 7 | Battery compartment |
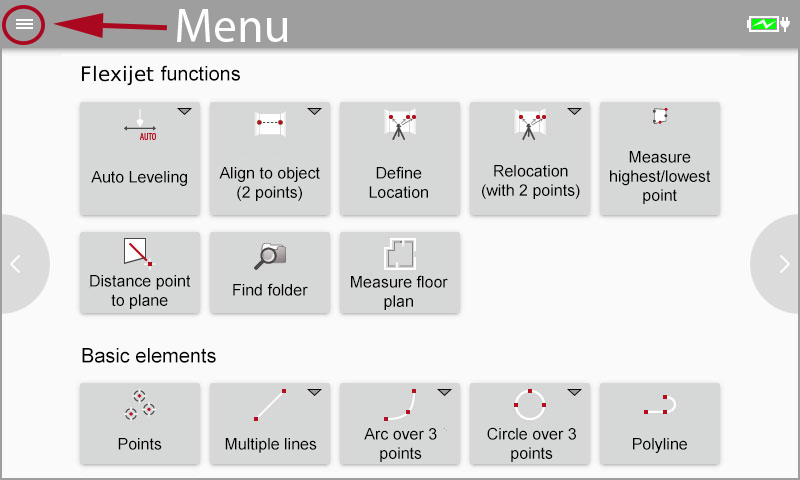
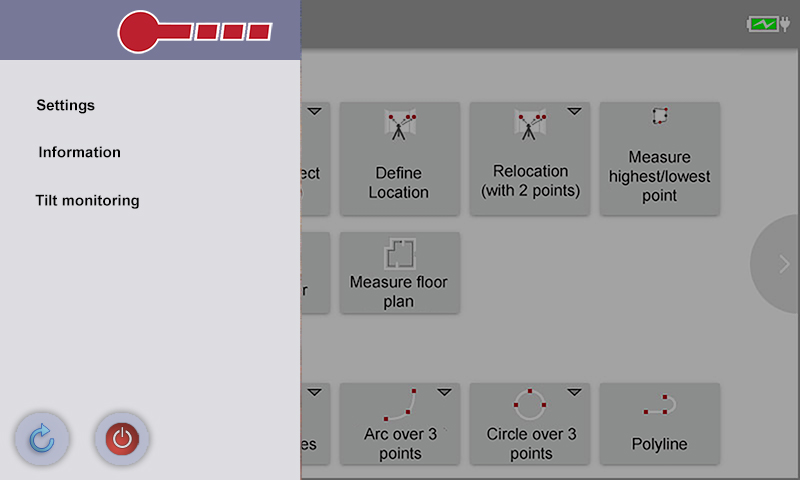
Adjusting Flexijet Settings
Settings can be adjusted by clicking the menu button on the top left hand corner of the Flexijet’s screen, which opens the side panel. From here, you may access Settings, Information, and open Tilt Monitoring to make adjustments.
To change the language, see this section on Changing the language of the Flexijet 3D 2 user interface.
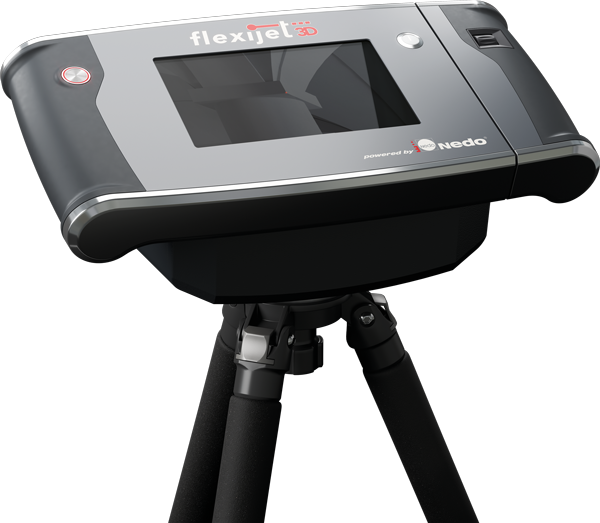
Power Supply and Charging Flexijet 3D
![Flexijet 3D device on top of tripod]()
The Flexijet 3D has a built-in rechargeable Li-ion battery with a nominal voltage of 14.8V and a capacity of 5200 mAH. Battery life may be between 8 + hours depending on use (E.G. using internal motors may drain battery quicker than aiming manually)
To Charge the battery, the Flexijet’s main switch (on left side, underneath) must be set to ON. Only the power supply unit supplied may be used for charging. Use of a different power supply unit can lead to damage of the Flexijet 3D and personal injuries.
To start the charging process, the power supply unit must be connected to the power supply and the charging plug must be plugged into the charging socket (bottom left side). The LED ring of the measurement trigger indicates the state:
| LED Colour | LED Display | Meaning |
|---|---|---|
| Green | Lights up regularly for a short time | Charging in progress |
| Green | Lights up continuously | Charging Finished |
| Red | Lights up regularly for a short time | Charging process cancelled with an error |
After the charging process has finished, the power supply unit can be removed.
The Flexijet 3D can be used during the charging process, and the charging time may increase if Flexijet is used during charging.
Possible causes of charging errors:
- Charging outside of the approved temperature range (0°C to 55°C)
- Defective power supply unit and/or defective battery
- Power supply issues
In case of a charging error, disconnect the power supply unit from the Flexijet 3D, remedy the cause of the error and restart the charging process.
Post your comment on this topic.