
FlexiCAD and Flexijet Stone PDF tool creates a custom PDF version of the measurements and data created.
- The content of this PDF can be customized to your specifications.
- To simply Print/plot to PDF the contents of a folder, see Print/Plot below.
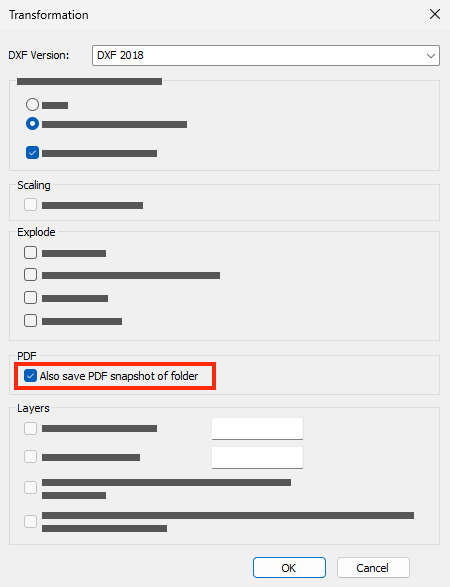
PDF Snapshot:
A PDF Snapshot of an individual folder can be created during the export of that folder. Simply select the ‘Also save PDF snapshot of Folder’ option on the ‘Transformations’ window.
PDF Tool
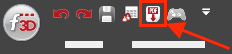
- To export a PDF, click on the PDF logo at the top of the FlexiCAD window to open the PDF export dialog. You can also access this function in the File menu as ‘Create PDF’.
![]()
- The PDF Job Data window will now appear.
- On the Printouts tab
- (1) Select the checkboxes of the folders you wish to include in the PDF output.
- (2) Add a Title to the page
- (3) You may add additional notes to each individual folder or apply the current notes to all pages using the ‘Apply notes to all pages’ button.
- (4) Select the appropriate title block
- (5) Click ‘Edit’ to fill the user-defined fields.
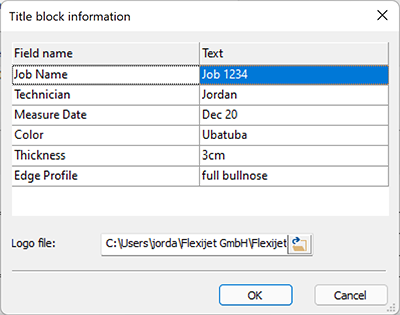
![]()
![PDF Tool - Edit user-defined fields in titleblock window]()

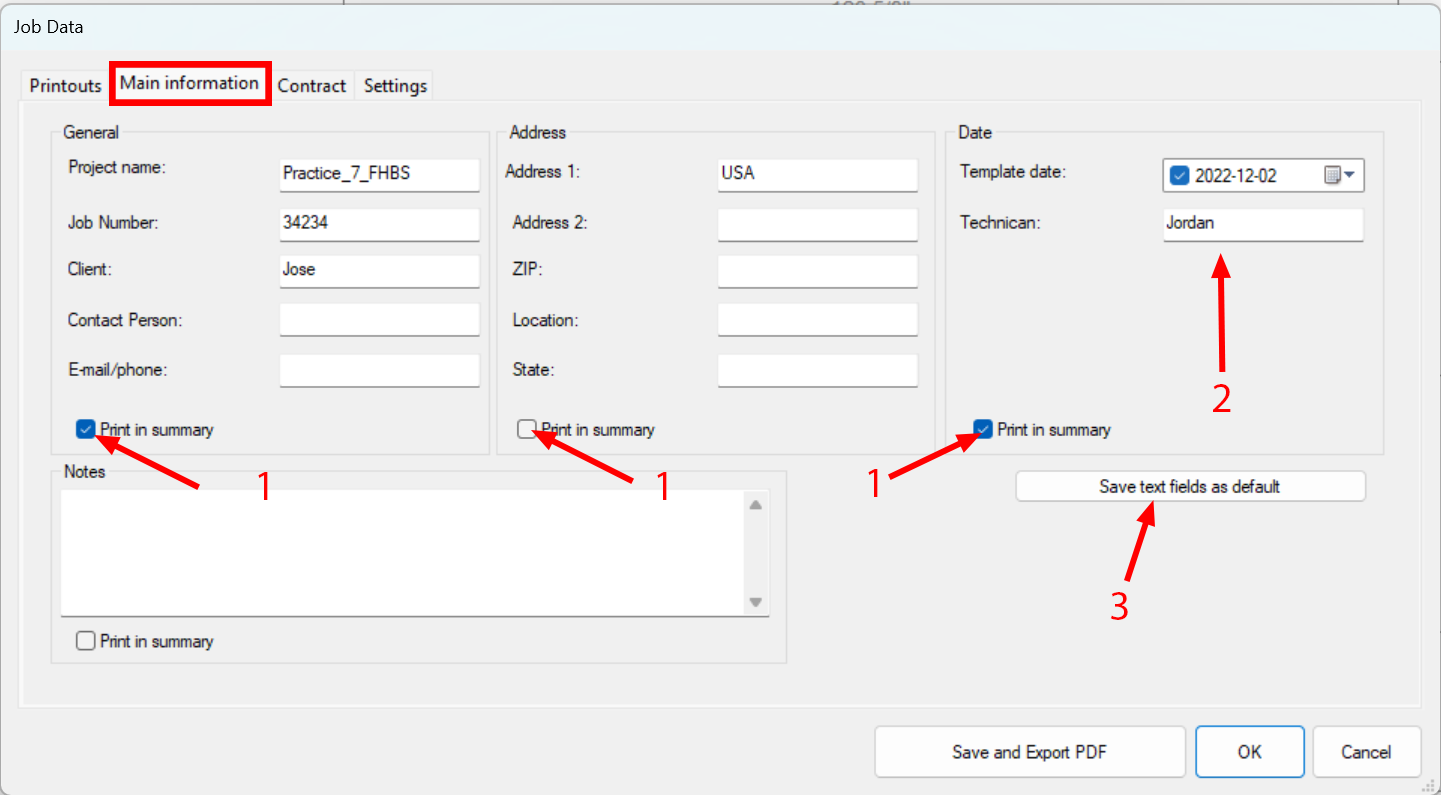
- From the Main Information tab,
- (1) You may enter the job and customer’s information, including address, etc. Select ‘Print in summary’ to include this information in the summary page.
- (2) Add the template date and the technician who templated this project.
- (3) Note that these fields can be included in the customizable titleblocks using the appropriate fields.
![]()
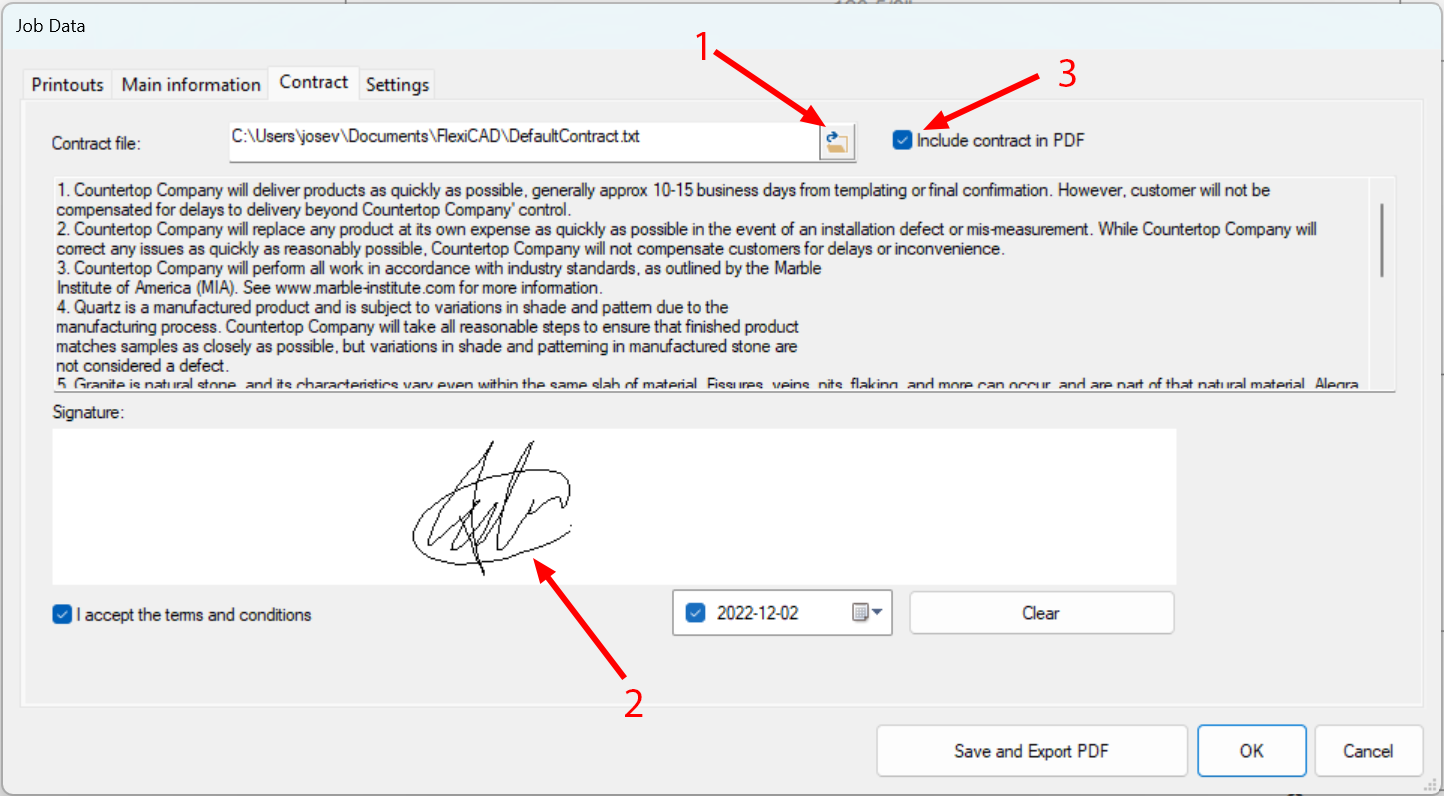
- On the Contract tab
- (1) You may review your contract term, you can also insert your own contract file if you have one.
- (2) Collect a signature.
- (3) You may select if you wish to print your signature and contract on the PDF document output.
![]()
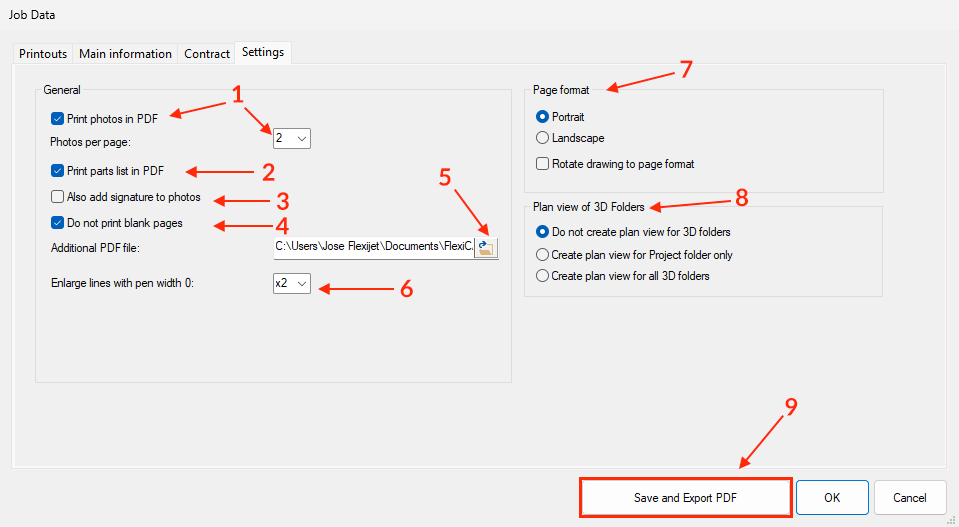
- The Settings tab allows you to select some options.
- (1) Include job site/webcam pictures in the PDF output; you can select up to 4 pictures per page.
- (2) Generate and print a part list in PDF.
- (3) Add a signature to photos.
- (4) Optionally omit blank pages from the PDF output.
- (5) Add an additional PDF file to the resulting PDF (such as a checklist).
- (6) Enlarge Lines with pen width up to 4 times.
- (7) Select the format (Portrait or Landscape) of the resulting PDF. Optionally, select whether to auto-rotate the pages to match the selected page format best.
- (8) You can select whether to create a plan view for all 3D folders, for project folders only, or do not create a plan view for 3D folders.
- (9) Finally, you can save it and export the PDF.
![]()
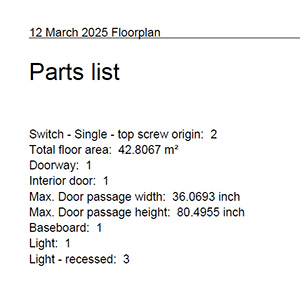
- Pdf part list example:
![]()
- When creating your PDF, click ‘Save and Export PDF’. If the ‘Export selected folders as DXF/other’ option was also selected, you will be prompted to choose the file format for your DXF export and any applicable transformations.
PDF title blocks can be customized! Click here to learn about customizing the PDF Titleblock
Print/Plot
The Print/plot function will plot the selected area of the canvas.
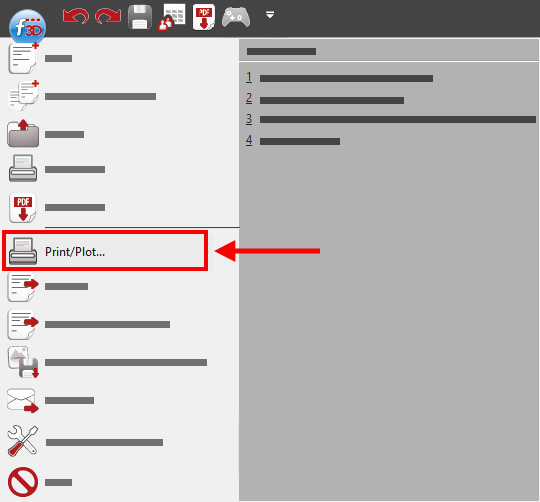
- With the desired folder and elements active and visible, Select ‘Print/Plot’ from the ‘File’ menu.
![]()
- The Print/Plot Dialog window will now appear.
![Print/Plot Dialog Window]()

- To print to PDF, select ‘Microsoft Print to PDF’. To print directly to a printer, select the appropriate printer. As needed, adjust and set print parameters in the ‘Properties’ window, including paper size.
![Print setup window]()

- By default, all elements on the active canvas will be selected. To select a particular window, select ‘Window’ and draw a box around the desired elements.
![Print/Plot window Print area section]()

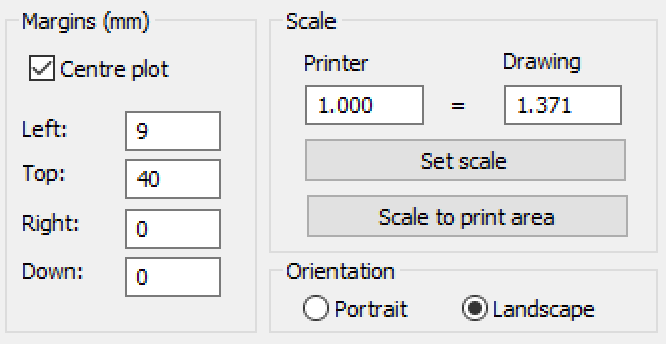
- Set the margins and scale as required. Choose between Landscape and Portrait mode.
![Print_Plot Margins and Scale]()
- To see a preview, select ‘Preview’. A preview of the printed area will appear. Press ‘X’ to exit the Print Preview and return to the print dialog
- When ready, click ‘Print’ to print to the selected printer. If printing to PDF, a file dialog window will appear to name and choose a location for your PDF file.
Feedback
Copyright © 2025 Flexijet GmbH
—
Powered by 
Post your comment on this topic.