
Once action items are initiated, assigned owners receive a new task in their Pending Tasks folder, prompting them to execute the required action.

Clicking either the subject in the Pending Tasks folder or the button in the email opens the Execute Independent Action Item form, where users can review action details and proceed with implementation. To support this process, the form includes two key sections—Action Item Result and Checklist Result—which are explained in detail below.
- Form Submission Requirements
To submit this form, users must complete the following fields:
- Actual RTO: Enter the actual Recovery Time Objective (RTO) in hours.
- Actual RPO: Enter the actual Recovery Point Objective (RPO) in hours.
- Result: Describe the outcome of the action.
- Lessons Learned: Document key insights or takeaways from executing the action.
- Actual RTO: Enter the actual Recovery Time Objective (RTO) in hours.
- Action Item Result
This section allows users to document the results of the executed action item.
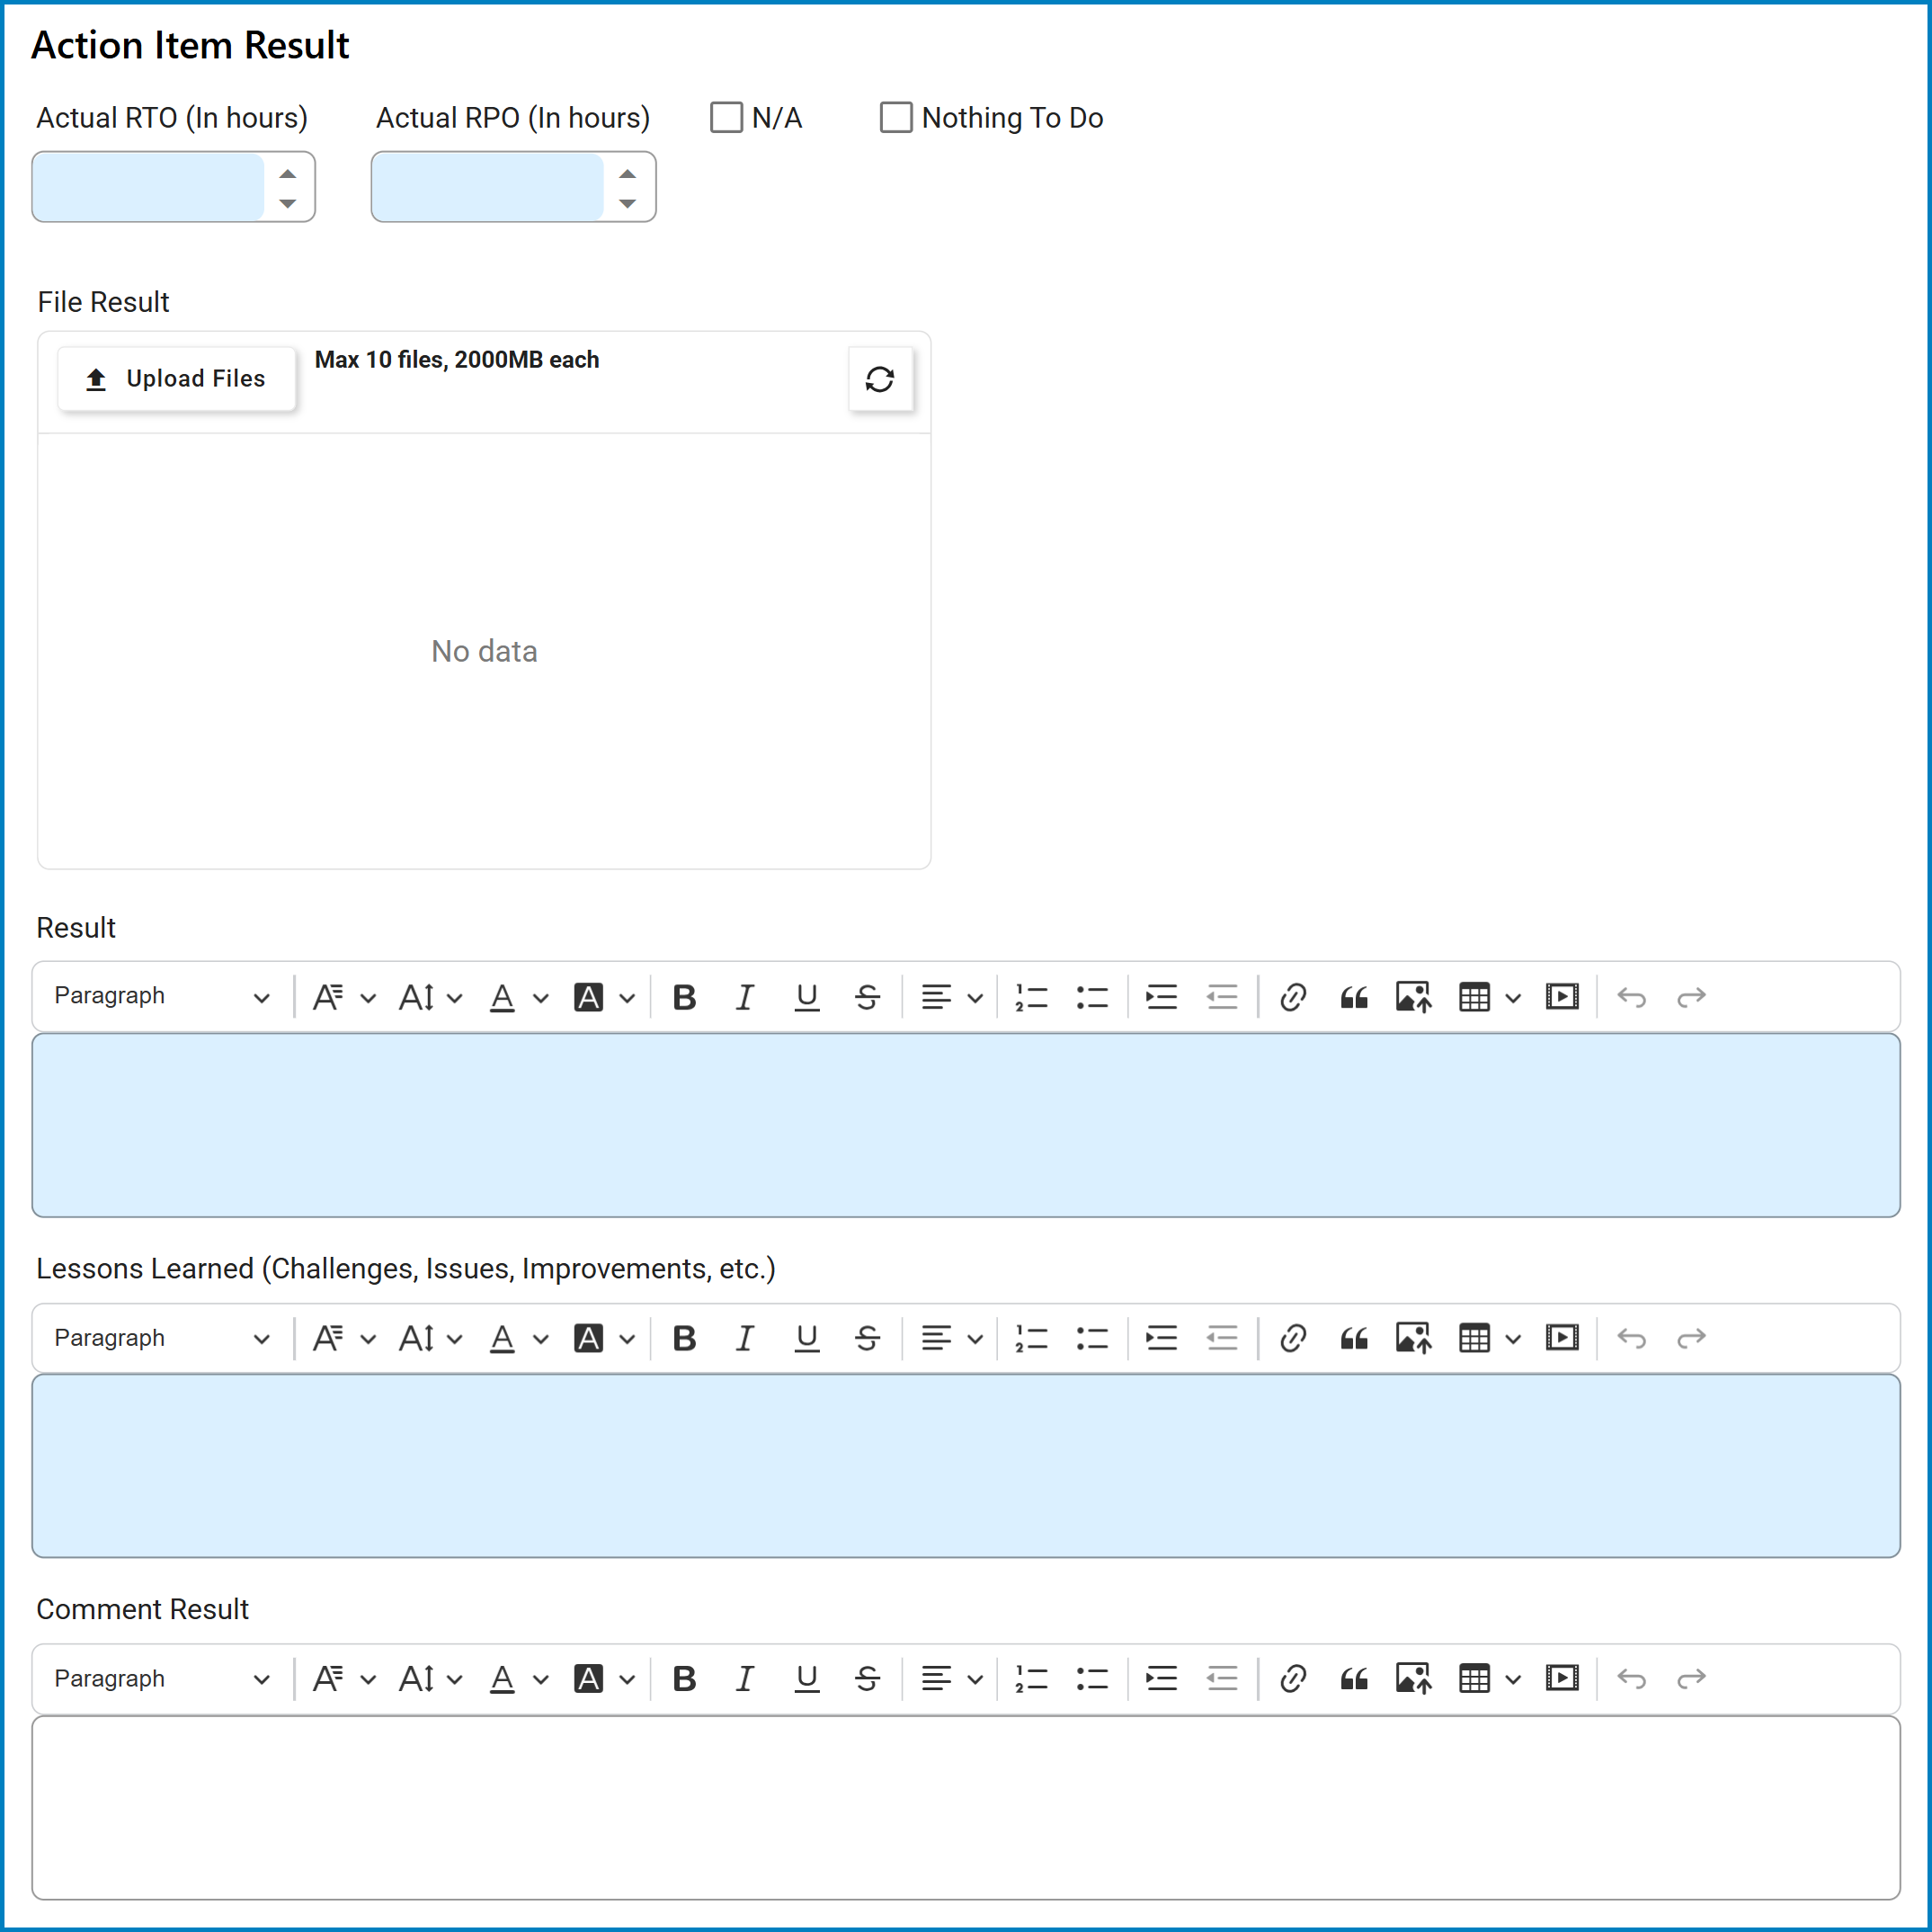
- Actual RTO (In Hours): A numeric field for recording the actual Recovery Time Objective (RTO) in hours.
- Actual RPO (In Hours): A numeric field for recording the actual Recovery Point Objective (RPO) in hours.
- N/A: A checkbox to indicate that the action item does not require RTO or RPO values.
- Nothing To Do: A checkbox to mark the action as unnecessary or already addressed.
- File Result: A file attachment field for uploading supporting documents related to the action.
- Result: A rich text field for detailing the action outcome.
- Lessons Learned: A rich text field for capturing insights and takeaways from the action execution.
- Comment Result: A rich text field for adding additional comments.
- Check List Result
This section allows users to review the action checklist and provide the final status for each item.
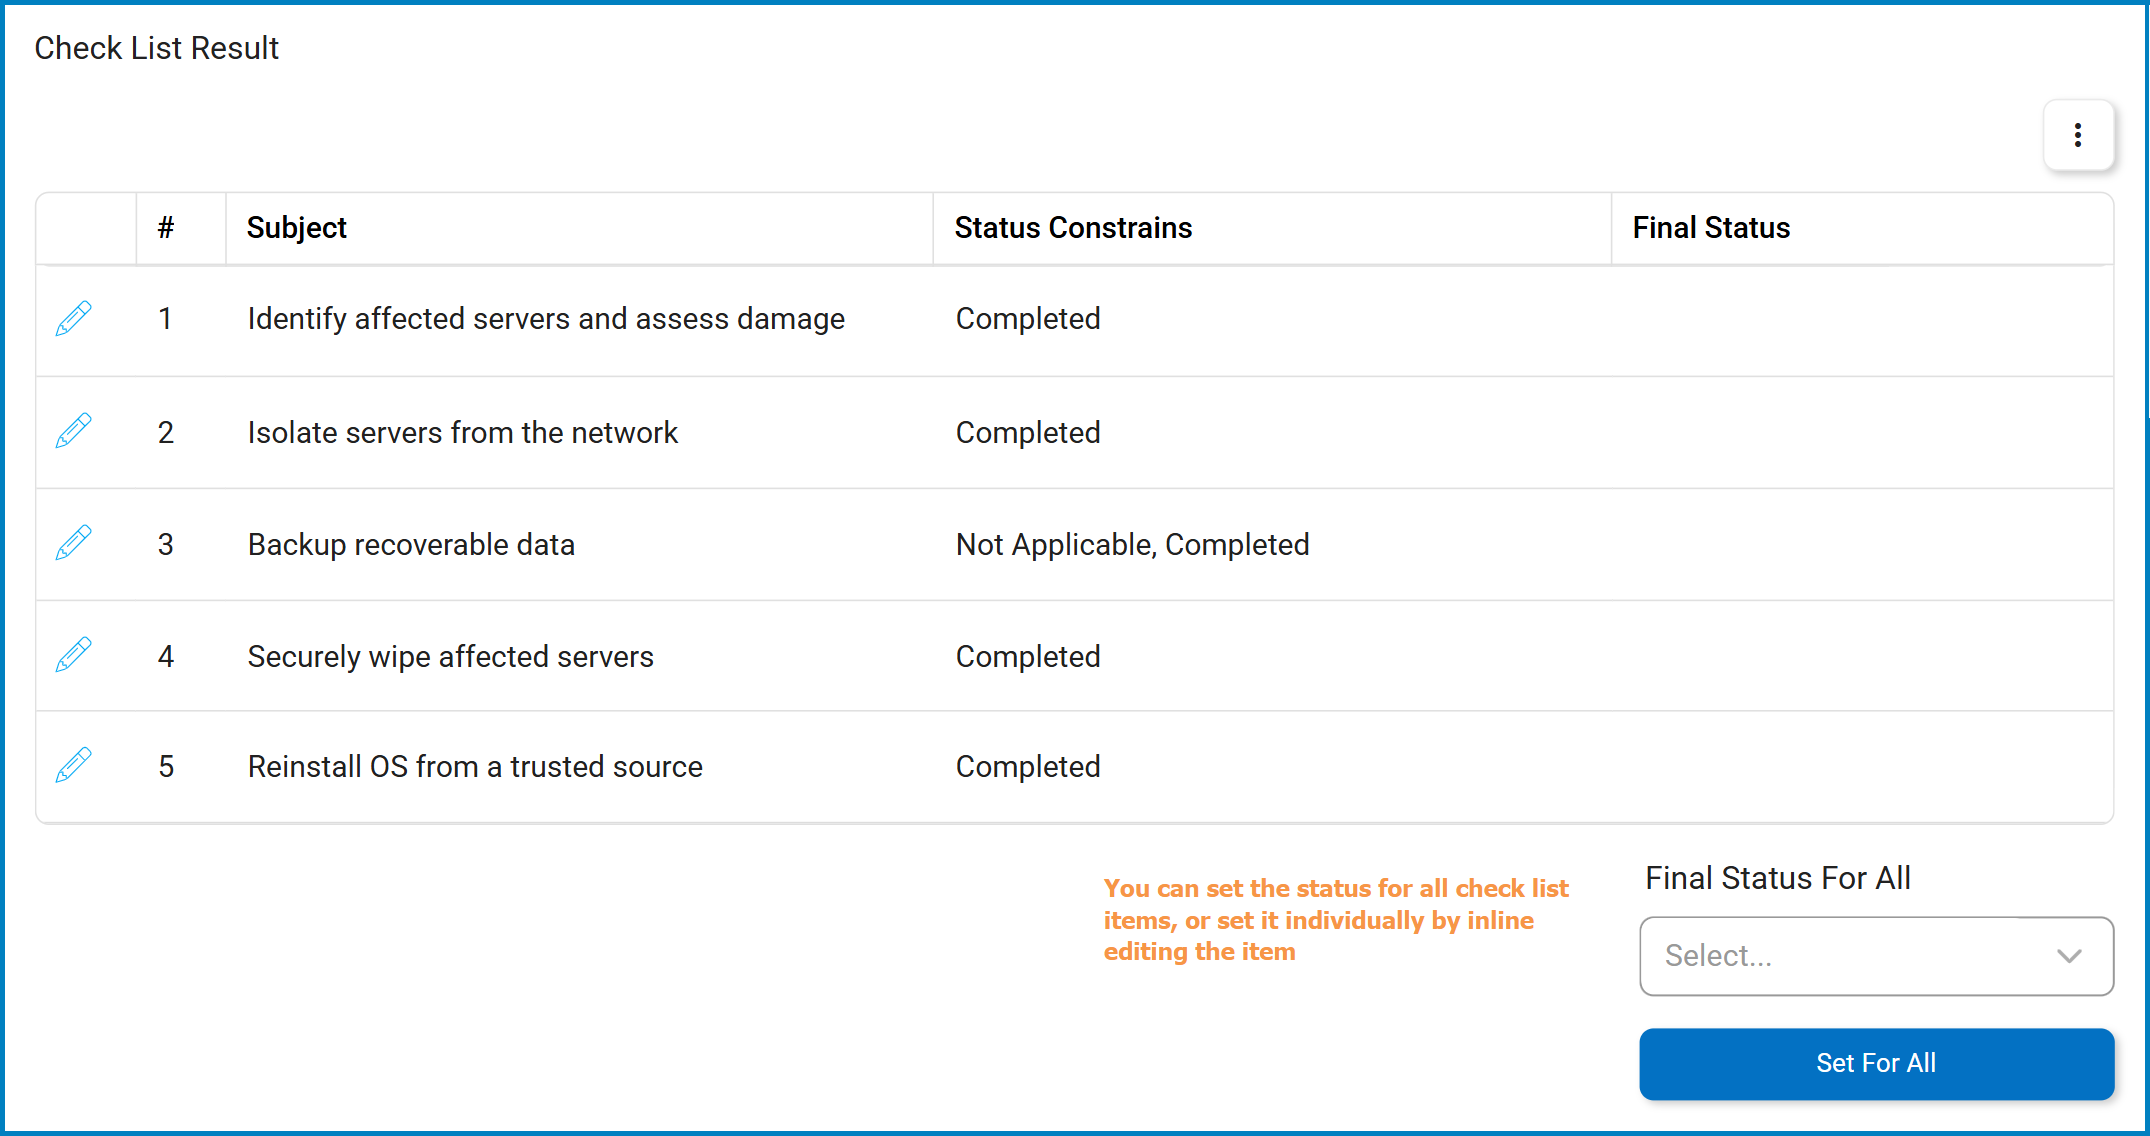
- Edit (
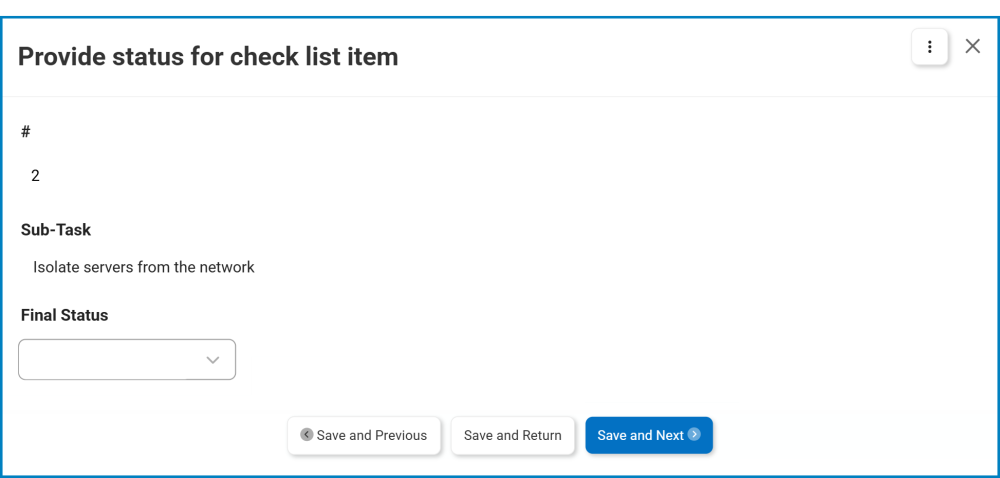
![]() ): A button to edit the final status of a checklist item.
): A button to edit the final status of a checklist item.- When selected, it opens the Provide Status for Checklist Item form.
![]()
- Final Status: A single-select dropdown for selecting the final status of the checklist item. It dynamically loads active checklist statuses in the system.
- Save and Previous: A button to save the status and navigate to the previous item in the grid.
- Save and Return: A button to save the status and return to the main form.
- Save and Next: A button to save the status and navigate to the next item in the grid.
- When selected, it opens the Provide Status for Checklist Item form.
- Final Status For All: A single-select dropdown for selecting a final status applicable to all checklist items.
- Set for All: A button to apply the selected final status to all checklist items.
- Submitting the Action
At the bottom of the Execute form, users will find the following option:

- Action Completed: A button to submit the completed action.
- Upon submission, the assigned reviewer will be tasked with verifying the action’s completion.
Post your comment on this topic.