
Microsoft’s recommendation to use an “App Registration”
Microsoft Entra certificate-based authentication enables you to authenticate with X.509 certificates against Microsoft Entra ID. This enables you to adopt a phishing resistant authentication and authenticate with an X.509 certificate against your Enterprise Public Key Infrastructure (PKI).
3 Step guide
- Create a self signed certificate in PowerShell
- Create an “App Registration” and link it to your certificate.
- Configure SharePoint Online permissions for the “App Registration”
| “Step 1” – Create a self signed certificate using PowerShell. |
|---|
|
# Create certificate
$mycert = New-SelfSignedCertificate -DnsName "MyDomain.com" -CertStoreLocation "cert:\LocalMachine\My" -NotAfter (Get-Date).AddYears(5) -KeySpec KeyExchange -KeyFriendlyName MyKeyName -FriendlyName MyFriendlyName

# Export certificate to .pfx file
$mycert | Export-PfxCertificate -FilePath c:\dev\MyCert.pfx -Password $(ConvertTo-SecureString -String "MyPassword" -AsPlainText -Force)

# Export certificate to .cer file
$mycert | Export-Certificate -FilePath c:\dev\MyCert.cerYou can install the cert on the computer. However that may complicate things.
| “Step 2” – Create an “App Registration” |
|---|
|
|
|
|
|
|
|
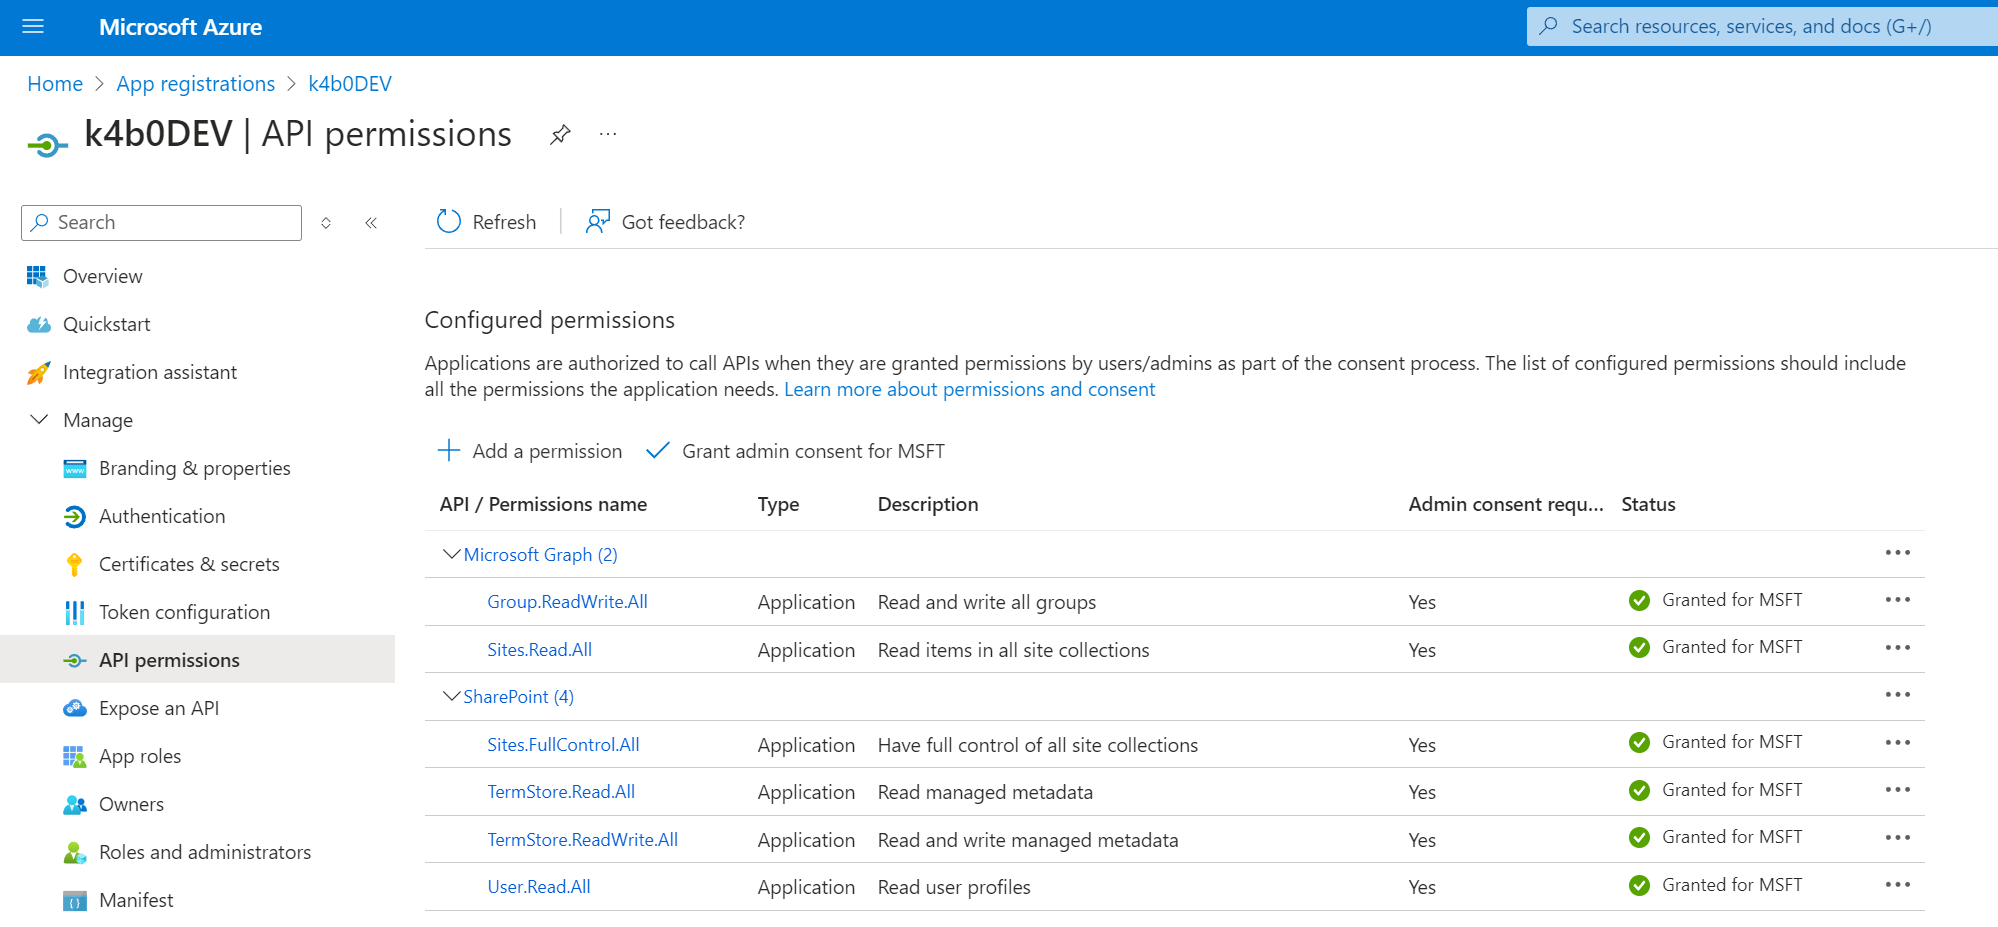
| “Step 3” – Set permissions for the “App Registration” |
|---|
|
|
|
|
|
Advanced configuration if you need.
Restricted API permissions
You can use Sites.Selected in both the Graph and the SharePoint section to make a much more restricted access. Sites.Selected Permissions what is it, and how do I use it
The “Microsoft Graph” permissions are required for :
- Access files larger than > 2 GB
- Read users and groups in the tenant for easier visual mapping of users.
Read AD user names etc.
You can access M365 user information in AD (such as display name, department, etc.) using the virtual list Tenant users. Filters: When using the = operator or the IN operator, a server-side filter is applied, optimizing performance for tenants with many users (>3000). Other filters, such as BeginsWith or Contains, are evaluated client-side.
To use the virtual list Tenant users, ensure that you have the necessary App Registration with Graph API permissions: either User.Read.All or User.ReadBasic.All, depending on the specific columns you need to access.