1 – Creating an appointment
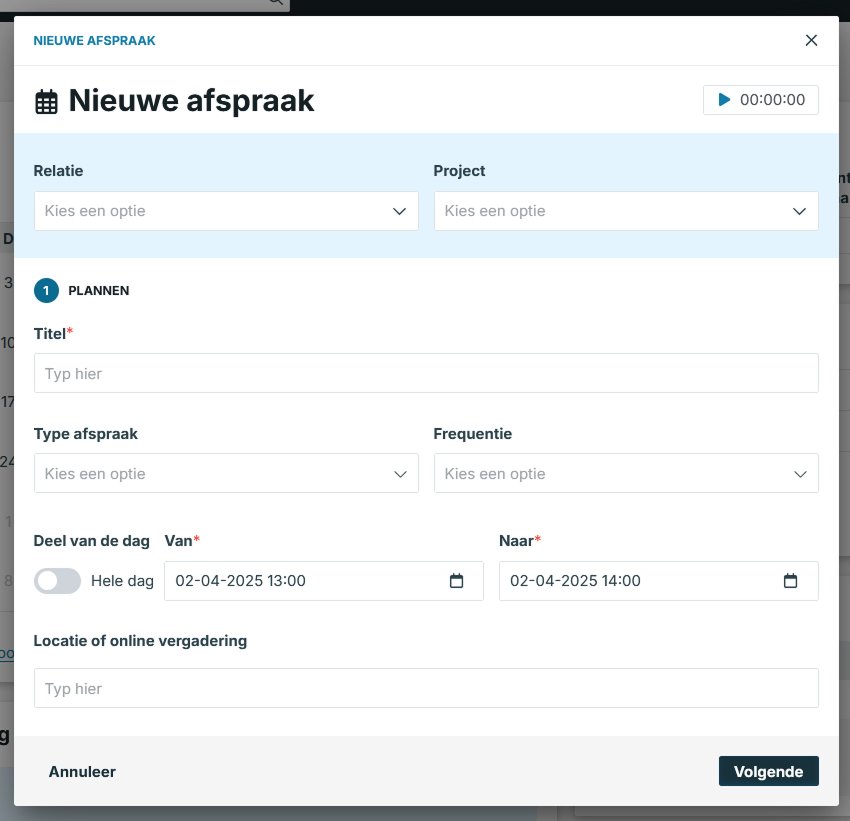
When you create an appointment, a modal pops up:

2 – The fields explained
- Relation: Link the relation here.
- Project: Link a project here.
- Title: Give the appointment a name. This is a mandatory field.
- Appointment type: Select an appointment type. These can be created via
Company settings ➤ Agenda ➤ Agenda types
- Date from/to: Enter the duration of the appointment here. This is a mandatory field.
- Repeats: Choose whether you want the appointment to repeat and how frequently it should repeat.
- All day: When you check this, the appointment will only appear at the top of the day itself so that your entire day is not blocked.
- Location: Via
Company settings ➤ Agenda ➤ Default location fillingyou can optionally set that a location is filled in by default from the relationship or Agenda type.
- Employee: Link the employee for whom the appointment is. It’s automatically filled in with the current user.
- Participants group appointment: Here you can add participants you wish to invite to this appointment.
- Details: Add details relevant to the appointment. You may also attach documents from the Archive.
Press *Next *and you will see a few more fields that help with correctly archiving the appointment:
- Status: Select a status. These can be created via
Company settings ➤ Agenda ➤ Agenda statuses
- Access: Set the access permissions for this appointment.
- Pop-up alerts: Decide when/if to receive pop-up alerts before the appointment inside BaseNet.
- SMS reminder: If you turn the switch on, you can choose who should receive an SMS, what it should say and when it should be sent.
Click on Save.
3 – Editing an appointment
Open the appointment in the Calendar or on the project/relation page by clicking on it ➤ click on Edit ➤ adjust as needed ➤ Save
4 – Cancel an appointment
View the appointment and click on Delete.


