
In this chapter we explain how to create a relation.
6.1.1 Creating an individual
Go to Relations ➤ Individuals
Click on +Create individual, after which the screen below will appear:
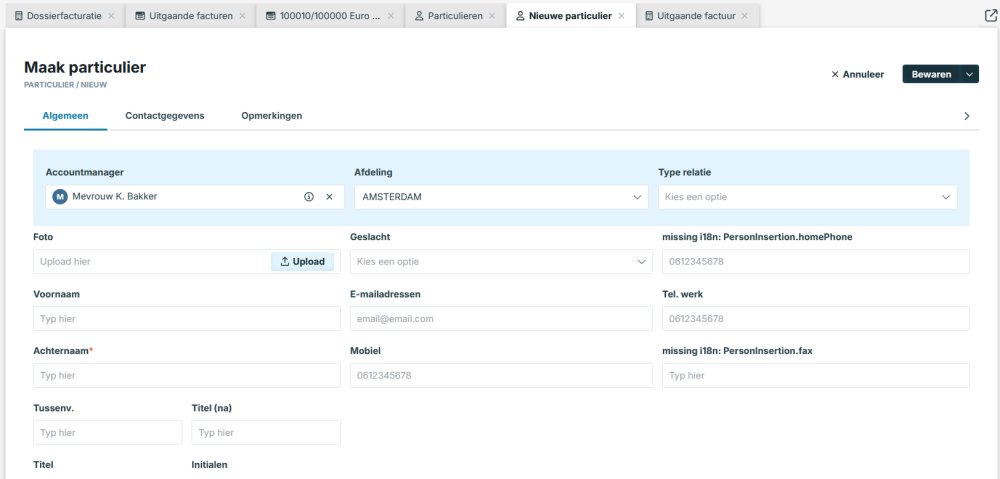
Fill in the details as extensively as possible to make the best possible use of BaseNet.
If the company details of the individual have already been entered in BaseNet, you can copy the relevant company address by linking the company and the individual to each other.
In the ‘Contact details’ tab under “Personal details” it is possible to fill in the personal details of the private individual such as BSN number, date of birth, nationality, etc.
In the ‘General’ tab if you scroll down, you can see a button “Add partner”. Click it and you can link a partner of the individual. You can also create a new individual here, if the partner has not yet been entered in BaseNet. Then click on Link new partner.
6.1.2 Create a company
Go to Relations ➤ Companies
Click on +Create company. The screen below will appear.

You can use our connection with KVK ot search for the company and we fill in some details for you, or you can enter the details manually.
Then you will see this screen:
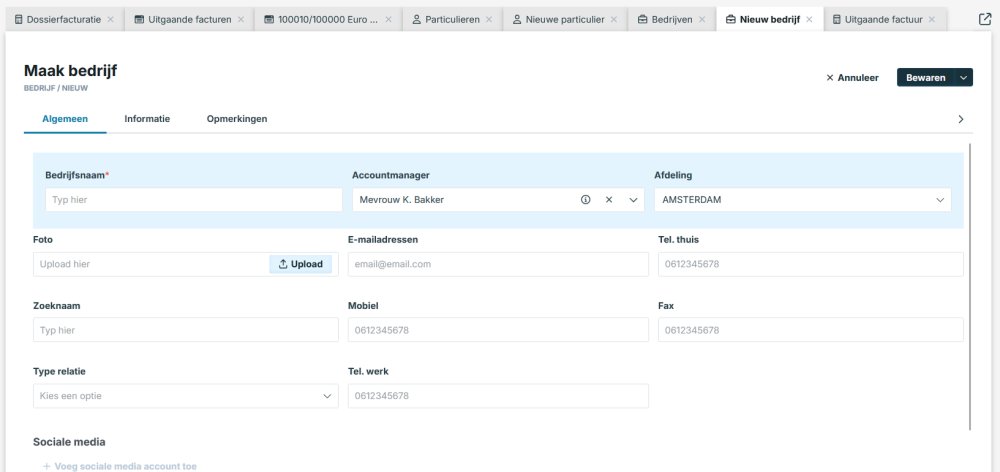
Fill in all the details. Don’t forget to take a look under the Information tab to add the address and other details (such as the SBI code or mailing options). Click on Save to create the relation.
Once you save the company, you can also add Contacts if necessary.
6.1.3. Add contact
Relations ➤ Contacts
There are several ways to enter contacts. You can create contacts via the Contacts category page or directly under a company (as described a little further up). In this manual, we will discuss how to create a contact person via the Contacts category page.
6.1.4. Creating a contact
Go to Relations ➤ Contacts
Click on +Create contact. The screen below will appear.
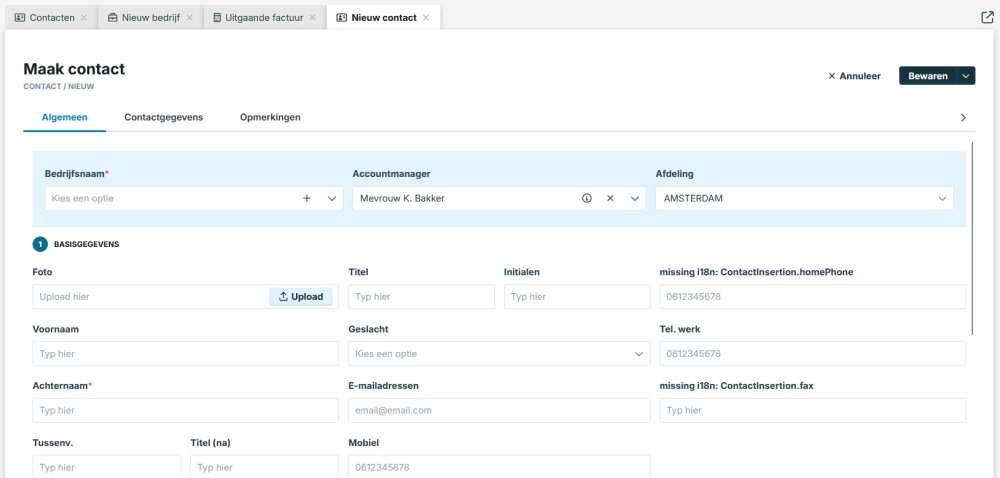
The field named “Company” is where you indicate which organization the person works for. It is a mandatory field, you must either choose a company that was already created in the system for this contact, or create a company by clicking the + button on the field.
Enter all the name and address details in this screen. You can use the Title (before) and Title (after) fields to enter titles such as mr. drs. or (MBA), for example. These titles are included in email/SMS/letter mailings, for example.
Don’t forget to fill in the postal address field. This address is used when sending letters or mailings to the contact person, for example.
You can save the relation with the Save button in the top right. The relation has now been entered.