
Empower Pulse Release Notes – v3.0.1
3. Features
3.1 Expense Reports in Pulse
Expense reports in Pulse are accessed via the ‘My Expenses’ tab in Empower Pulse. This tab can be hidden using standard Pulse configuration at deployment, which applies settings to all users.
Within the ‘My Expenses’ tab, there are two subtabs:
- Expense Report
- Expenses
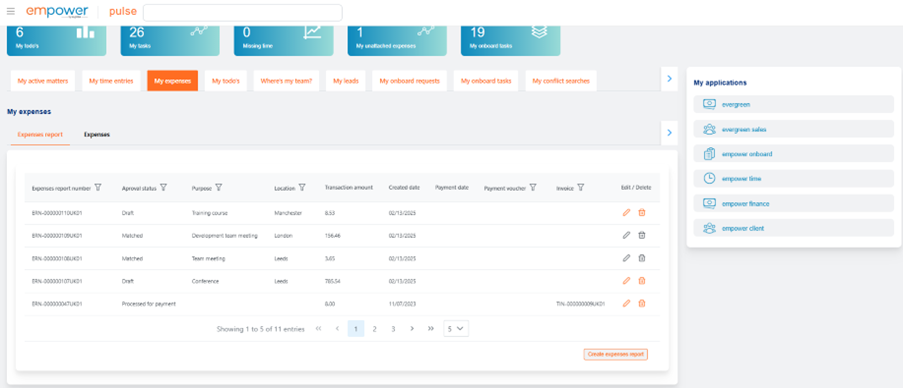
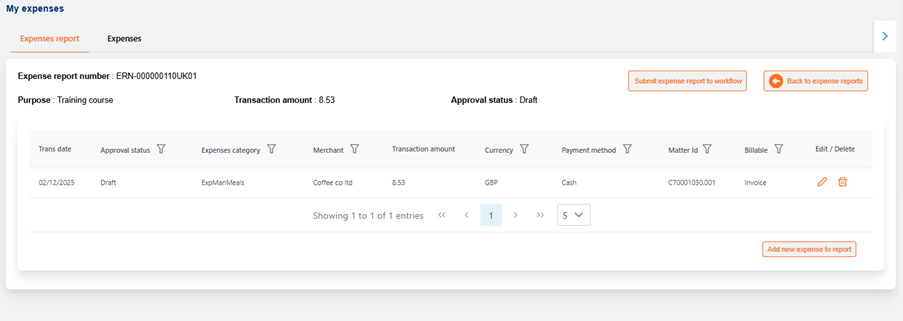
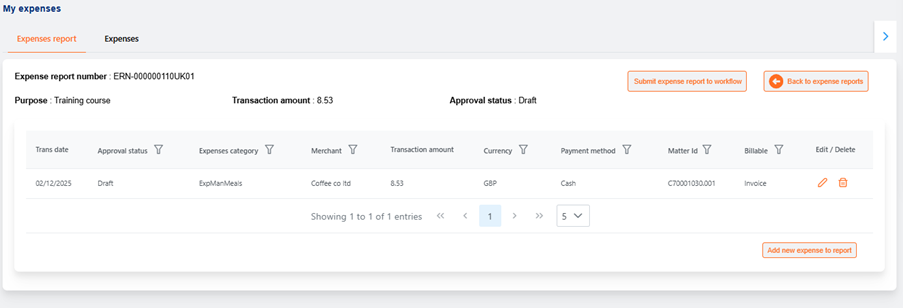
3.1.1 View Expense Reports
The Expense Report tab is the default when opening ‘My Expenses’. It displays a table of the user’s expense reports. The following columns can be filtered via column header filters:
- Expense Report Number
- Approval Status
- Purpose
- Location
Edit and delete icons are available per row but only enabled when the expense report is in Draft status.
3.1.2 Create an Expense Report
Click the Create Expense Report button at the bottom right of the tab to open the creation dialog.

3.1.3 View Expense Lines for an Expense Report
Selecting a row from the Expense Report table shows its associated expense lines. Filterable columns include:
- Approval Status
- Expense Category
- Merchant
- Currency
- Payment Method
- Project / Matter ID
- Billable
Edit/delete options are enabled only when the expense is in draft status.

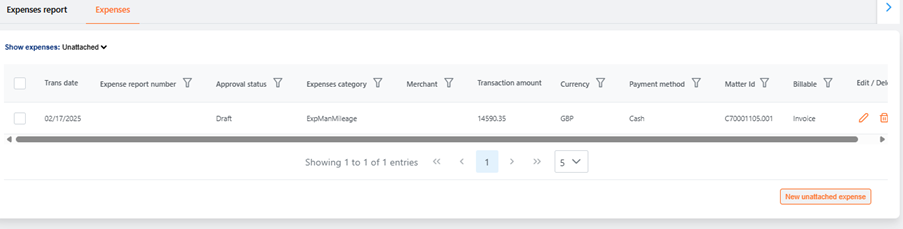
3.1.4 View Unattached Expenses
The Expenses tab shows a table of user expenses, both attached and unattached to a report. By default, it filters to show unattached expenses. Filterable columns include:
- Approval Status
- Expense Category
- Merchant
- Currency
- Payment Method
- Project/ Matter ID
- Billable
Edit/delete options are enabled only when the expense is in draft status.
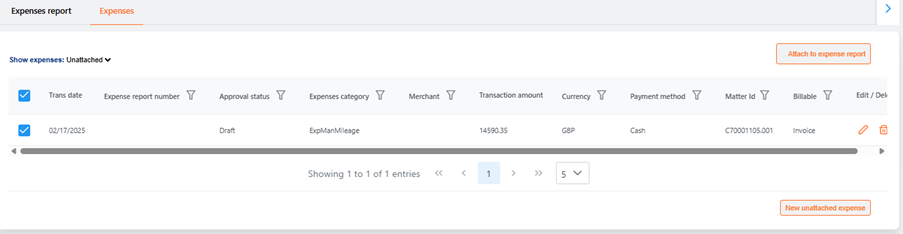
3.1.5 Attach an Expense to an Expense Report
Checkboxes allow selecting one or more draft expenses. Once selected, the Attach to Expense Report button appears. This opens a dialog to choose the target report.
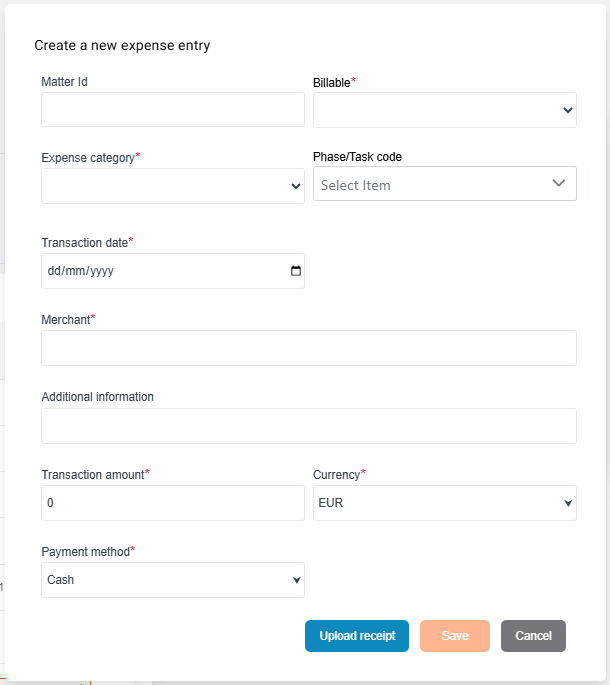
3.1.6 Create an Expense
There are two ways to create an expense:
- Using the New Expense button in the top right – creates an unattached expense.
- Via an open expense report – use the Add New Expense to Report button to create and directly attach it.
3.1.7 View Expense Line
Clicking a row opens the detailed expense line view, editable only in draft status. Sections vary by expense type and may include:
- Receipts: Manage uploaded receipts
- Itemizations: Itemize the expense
- Guests: Guest management (see 3.2)
3.1.8 Submit Expense Report
From within an open expense report, click Submit Expense Report to Workflow (above the expense lines) to submit it for approval.
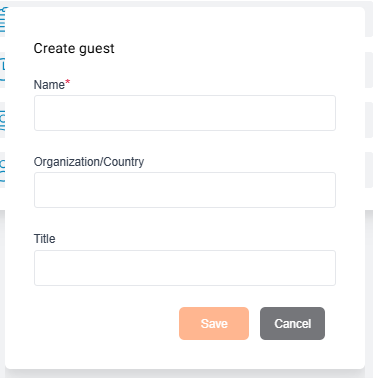
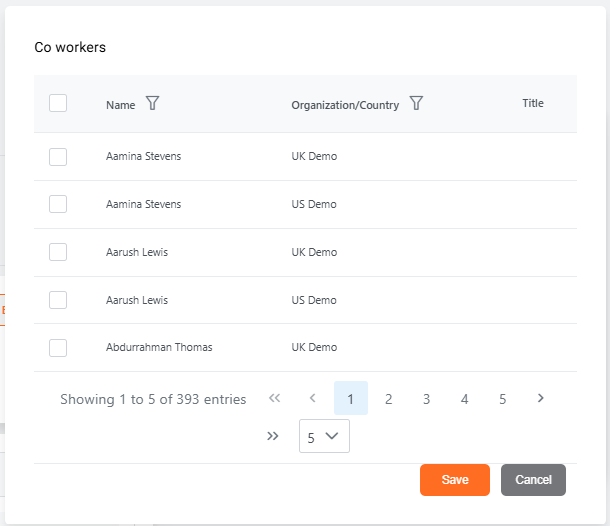
3.2 Guests Options for Meals and Lodgings
Certain expense types are configured to include guest management. If applicable, the Guests section appears on the expense line screen. Users can:
- Add New Guest
- Add Coworker
Guests can be edited or deleted using row icons, enabled only when in draft status.

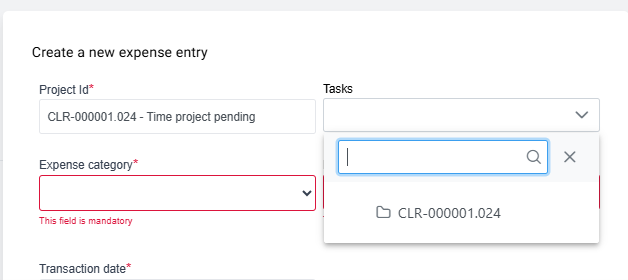
3.3 Project/Matter/Task on the Expense Form
The task selection dropdown can be configured to use either:
- A flat list of tasks (default)
- A tree view showing hierarchical project structure
Tree view supports folder (phase) and document (task) icons. Only task nodes (documents) are selectable. The tree view includes a filter input and is configurable via pulse Admin settings.
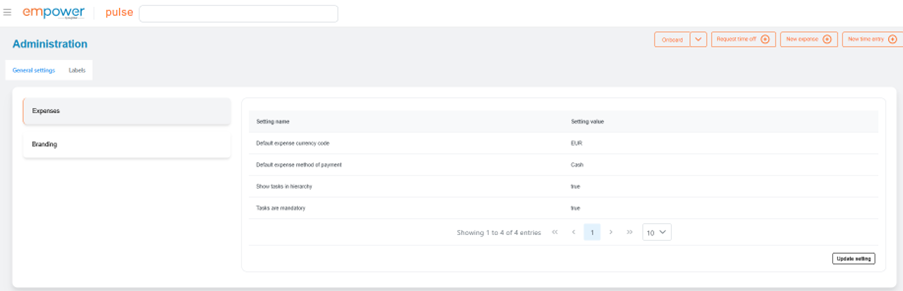
3.4 Default Currency on the Expense Form
pulse Admin users can configure the default currency shown when opening the expense form.
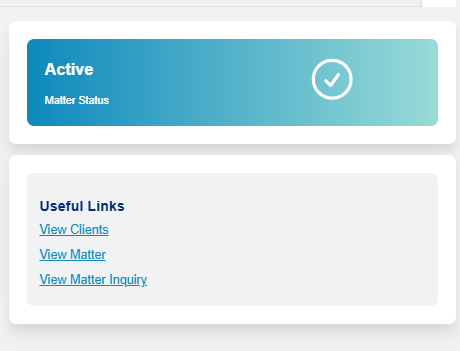
3.5 Project / Matter Summary Tab Links
In the legal version of Pulse, the Matter page now correctly displays working links to:
- Client
- Matter
- Matter Inquiry
These links now populate the hostname correctly, resolving a previous issue.
4. Known Issues in this Release
4.1 Issues
The following known issues are present in v3.0.1 and will be addressed in future releases:
- Detailed expense policy messages are not returned from evergreen.
- Selecting an expense line row both opens it and checks the selection box, requiring users to navigate back manually.
- empower Pulse is currently not available on mobile devices. This is in the future roadmap.
Post your comment on this topic.