
When the user clicks the Register Now link, he/she will be taken to Directory Registration page. Your film office can also add a link to this page from their website. Registration is a simple 4-step process.
.

Step 1: Login Account
The registrant can select his/her own Login ID and Password which will allow them to update their profile. The Terms of Service and Privacy Policy are legal agreements that protect the rights of both the film office and the registrant by clearly defining the how the registrant’s data can be used. The Listing Type can be selected by the registrant from a drop-down menu.
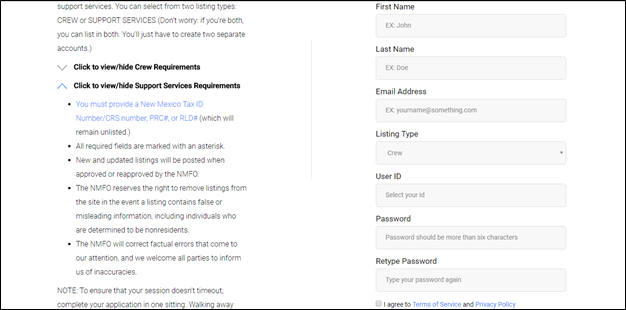
When the registrant has entered an available Listing Type, Login ID, Password, and has accepted the Privacy Policy and Terms of Service, they can click the Sign Me Up button to continue their registration.

Step 2: Contact Info
Registrants must begin the contact page by entering the name of the company that they are employed by and their title. These are required fields.
The following fields are also required to be entered on the Contact Info page
- Address
- Phone 1 number
- Mobile Phone number
Optional blocks exist for additional phone numbers, a Fax Number, and up to two Email addresses.

The registrant can elect to keep elements of their contact information confidential by clicking the checkbox(es) next to the “lock” symbols. Only Film office staff can view data that the registrant has chosen to keep confidential. The user can log in and change these settings at any time.
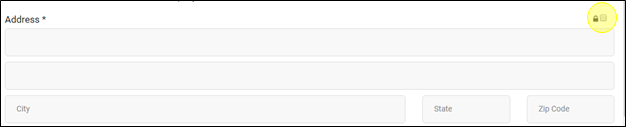
When the registrant has finished entering their contact information, they can click the Save button at the bottom of the page to continue.

Step 3: Skills & Affiliations
The Skills& Affiliations section is where the registrant can list their professional guild/organization memberships, identify themselves with special designations, provide links to their websites, and record their licensing information. The registrant can select any of the Unions & Affiliations that apply to them by clicking on the checkboxes. Unions & Affiliations is a required field; if the registrants guild or organization is not listed, they must select Other. Individuals who do not belong to any professional organization must click No Affiliation.
The Special Designations field consists of checkboxes by which registrants can identify themselves by categories that can be of interest to film producers.

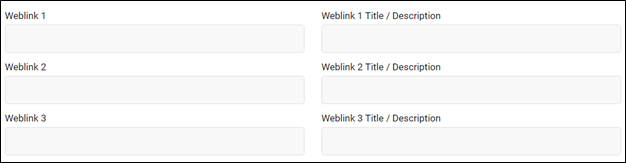
Up to three weblinks can be added to the registrant’s profile. There is no need to enter “http://” in front of the web address; RS10 will automatically format the address into a usable browser format. The registrant should be sure to include a title or description of each website in the boxes provided.
A Local #/Other Affiliations field is included so that registrants can record additional union/guild membership information, or can identify which professional bodies they are members of if Other was selected in the Unions & Affiliations field.

A Special Skills & Experience block is provided for registrants to highlight their expertise and background. Special Skills & Experience is a free-text field that can accommodate up to 4000 characters.

Licensing information can be added at the bottom of the Skills and Affiliations page.

When all of the Skills and Affiliations information has been added, the registrant can click the Save button at the bottom of the Skills and Affiliations page to continue.

Step 4: Categories & Credits
The Categories & Credits section of the registration process allows the registrant to list roles and categories of roles they have filled. At least one Category is required for the registration to be recorded in the RS10 system. When the Role/Category field is clicked, a drop-down menu of roles appears. Categories are separated from the main roles by a hyphen. As an alternative to scrolling users can enter the first letter of the category they are interested in, and the menu of options will jump to items beginning with that letter.
When a Role/Cagtegory has been chosen, the user can add it to their Categories & Credits profile by selecting the plus (+) sign.

Within each Role/Category that the user selects, Project Name/Project Title credits can be listed. To add a Project Name/Project Title credit, the user must click on the Role/Category that they added to their list. A drop-down menu box allows the year of the production to be selected, and checkboxes are provided for the registrant to indicate that they were officially credited for their work in that project.
One the user has entered the credit information, the plus sign can be selected to save it under the Role/Category that has been chosen.

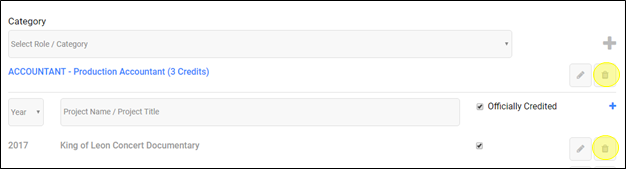
The registrant can review their work by opening by clicking on each Role/Category to view the credits that have been entered. The credit list can be collapsed by clicking on the Role/Category again. The number of credits per Role/Category appears in parenthesis next to those roles.
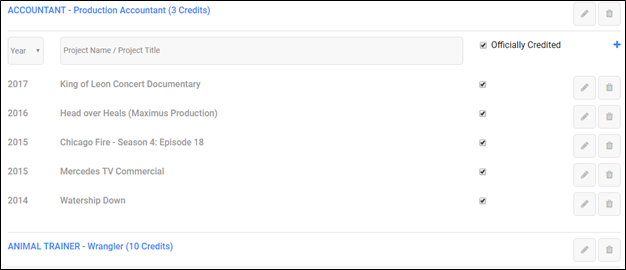
Roles and categories, as well as credits, can be deleted by the user at any time by selecting the Delete (trashcan) icon.
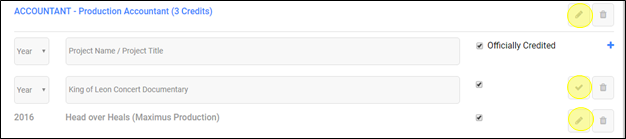
Previously entered credit Role/Category or credit information can be changed by clicking the Edit (pencil) icon. When clicked, the pencil button changes to a checkmark; the user will select the checkmark button to save the edited information.

Contact Reel-Scout
If you experience any problems or errors, please fill out this form. We will get back to you shortly.
Post your comment on this topic.