
With Reel-Scout™ version 10, you do not have to use external photo editing software. RS10 features built-in photo editing tools that you can use to modify the images in your location library.
Here’s a quick video tutorial on How to Add and Edit A Location Photo in Reel-Scout:
1. Find The Location
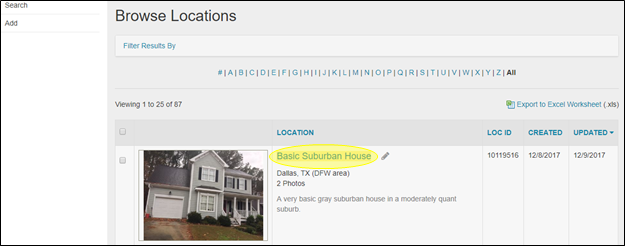
To edit your location photo(s), begin by finding the location whose photos you wish to edit. For more information, see Browsing Locations and Finding a Specific Location.
2. Choose The Photo To Be Edited
Once you have found the location you want to work on, click on the location title to go to the Location Details page.
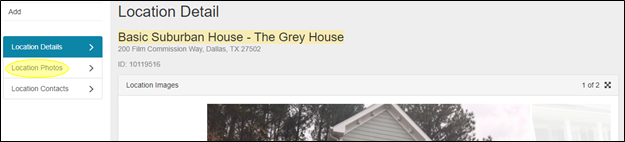
On the Location Details page, select Location Photos from the Locations sub-menu.
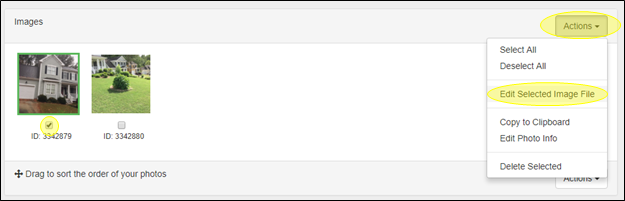
On the Location Photos page, select the photo(s) you wish to edit by clicking the checkbox below the photo(s). Selected images will be bordered in green to show that they have been picked. Go to Action button on the left-hand side of the Images field and select Edit Selected Image File from the drop-down menu.
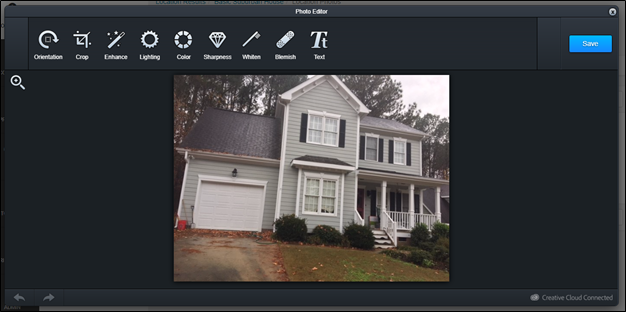
A Photo Editor window will open, which will allow you to access RS10’s powerful image editing tools.
3. Begin Editing
The Photo Editor screen features a number of user-friendly tools that can be used to improve the look of your images. Included in the Photo Editor are tools that can:
- Change the Orientation of your image
- Crop your photo
- Enhance your image
- Adjust the Lighting in your photo
- Change various Color effects in your image
- Adjust the Sharpness of your image
- Whiten your picture
- Hide Blemish marks
- Add Text to your photo

You can experiment with each tool to improve your image by clicking on the tool. Use the Apply button to save the changes you’ve made temporarily and to return to the main Photo Editor toolbar.

To undo an effect, click the Cancel button.

4. Save Your Edits
Once you have made all the changes that you desire to your image, click Save on the main Photo Editor toolbar. Changes are not final until you select Save.

If you wish to exit the Photo Editor without saving your changes, you can click the “X” in the upper right-hand corner of the Photo Editor window.


Contact Reel-Scout
If you experience any problems or errors, please fill out this form. We will get back to you shortly.
Post your comment on this topic.