
Appendix /
Auto-Configuration Procedure |
ConveyLinx ERSC ✅ | ConveyLinx-Ai 24V ✅ | ConveyLinx-Ai 48V ✅ |
 |
 |
 |
|
| ConveyLinx-ECO ✅ | ZPA Mode ✅ | PLC I/O Mode ✅ | |
 |
 |
 |
The Auto-Configuration procedure is initiated from the Auto-Configuration Module. Because of its physical location on the conveyor path and physical location in the Ethernet connection chain; the Auto-Configuration Module will automatically connect to all downstream modules and set their I.P. address for communication. Please note that a temporary pause to your system will take place during this procedure, be cautious. Once complete auto config will have the topology of your system drawn, set sequential IP Addresses starting from the most upstream module, and all of the settings which have been configured previously will be accessible to the EasyRoll+ software (sensor placement, order of modules, and more).
The below tutorial video walks you through the auto configure process.
Before You Begin
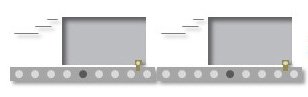
- All sensors should be clear. Auto-Configuration assumes that state of the sensor is the “zone empty” state
- Make sure you have no more than 221 ConveyLinx modules connected. Auto-Configuration will not configure past 221 ConveyLinx modules in one network
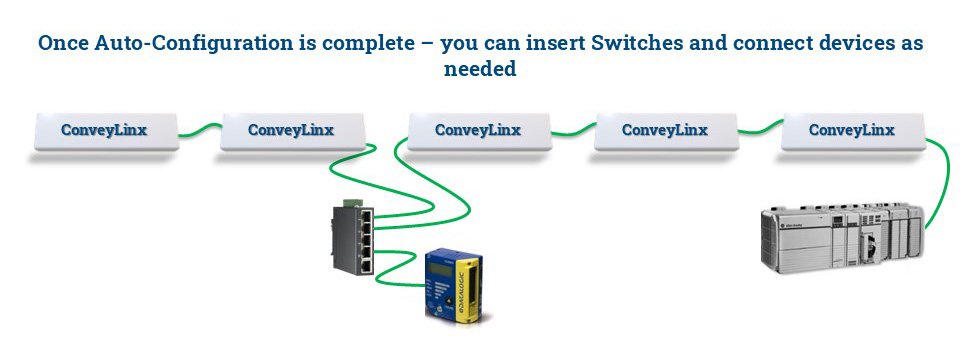
- Make sure that there are no other Ethernet devices or switches connected in your string of ConveyLinx modules. After Auto-Configuration is complete and successful, you can interrupt the Ethernet string with other devices and/or switches
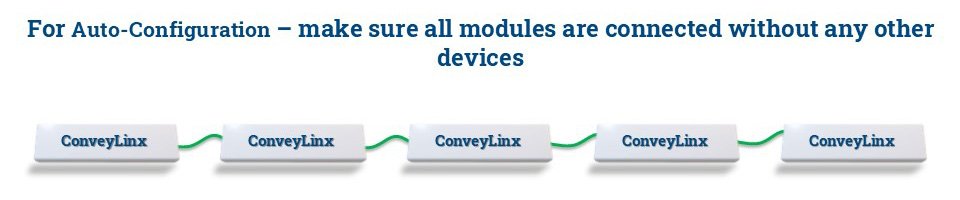
The direction of flow of the conveyor dictates where to begin the Auto-Configuration Procedure. The ConveyLinx module located at the most upstream or in-feed end of the conveyor is the module where the procedure must be initiated.. Because of its physical location on the conveyor path and physical location in the Ethernet connection chain; the most upstream ConveyLinx module will automatically connect to all downstream ConveyLinx modules and set their I.P. address for communication. Then the routine automatically sets the direction of flow.
Auto-Configuration Procedure
| Start EasyRoll+. In the left panel select Online System and click Discover Modules |  |
| After a few seconds, the discovered Modules appear in the module table, click the AutoConfig button | 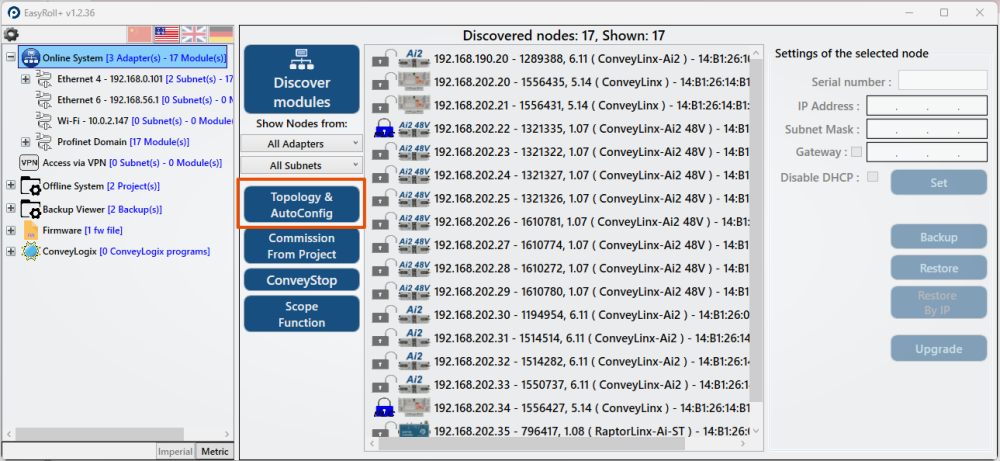 |
| Clicking the Topology & Auto Config button will prompt this message. Please read it before continuing | 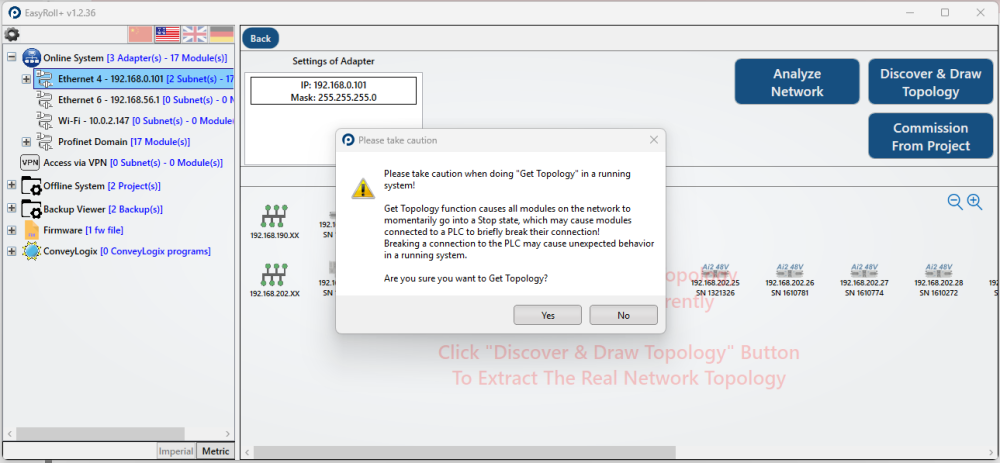 |
| After a few seconds each Module is shown in physical topology order from the PC |  |
| If the most upstream module is the one closest to the PC, select it, then right click and select AutoConfig from Here. This will start the procedure. | 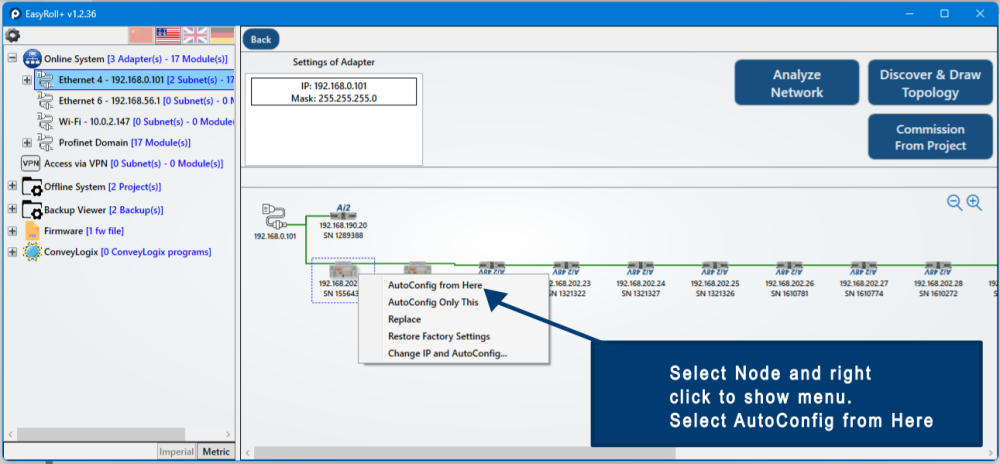 |
| When the procedure is done, you will see the text go from red to black and you will notice that the I.P. addresses have updated per the direction of flow | 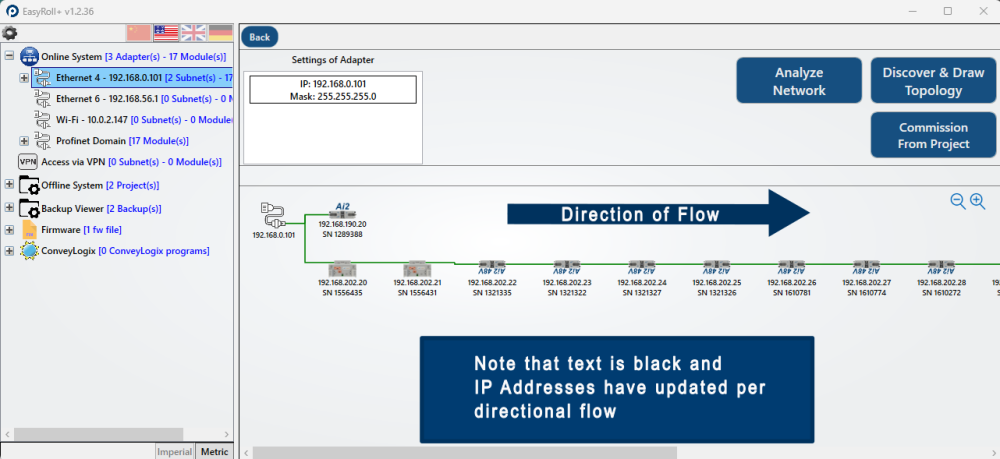 |
To Change the Direction of Flow – Select the Module at the Opposite End of the Network
| If the most upstream module is the one farthest from the PC, select it, then right click and select AutoConfig from Here. This will start the procedure. | 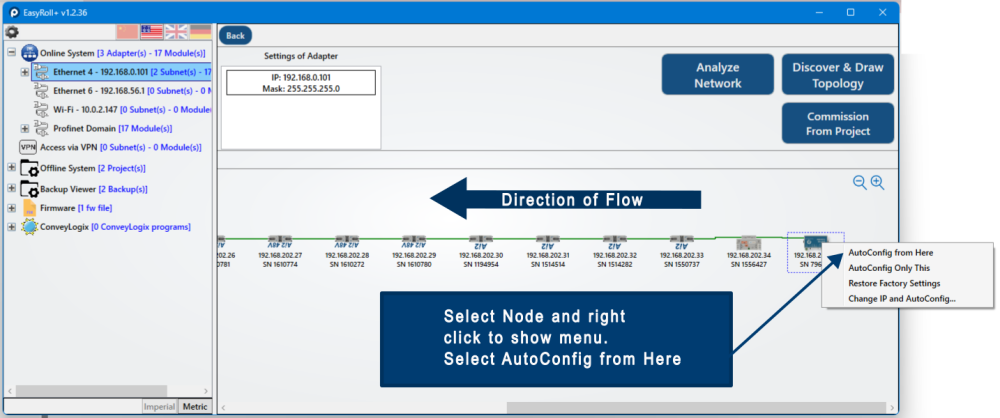 |
| Once again a message will be triggered, please read it and check your system, them proceed. When the procedure is done, you will see the text go from red to black and you will notice that the I.P. addresses have updated the direction of flow |  |
Post your comment on this topic.