
This feature enables organizations to inject custom property information into Word documents, making document management in EPC much more efficient. By embedding custom data, such as User-Defined Attributes (UDAs), approval status, creation date, or version number, directly into documents, the system ensures that critical metadata is always up to date.
All UDAs associated with a document are automatically injected, streamlining the process and eliminating the need for manual setup. These injected properties are dynamically linked, meaning they update automatically whenever the document is created, saved, or updated in EPC. This ensures that key information remains current and accurate, simplifying document management as documents progress through drafting, approval, and publishing stages.
Injected UDAs are labeled with a uda_ prefix for clarity, ensuring they are easily identifiable and distinguishable from other properties or fields in the document.
In this topic, you will find a comprehensive step-by-step guide for using this feature and a list of the custom properties available.
Step-by-Step Guide
To view custom properties and inject specific UDAs as custom properties in your Word document, follow these steps:
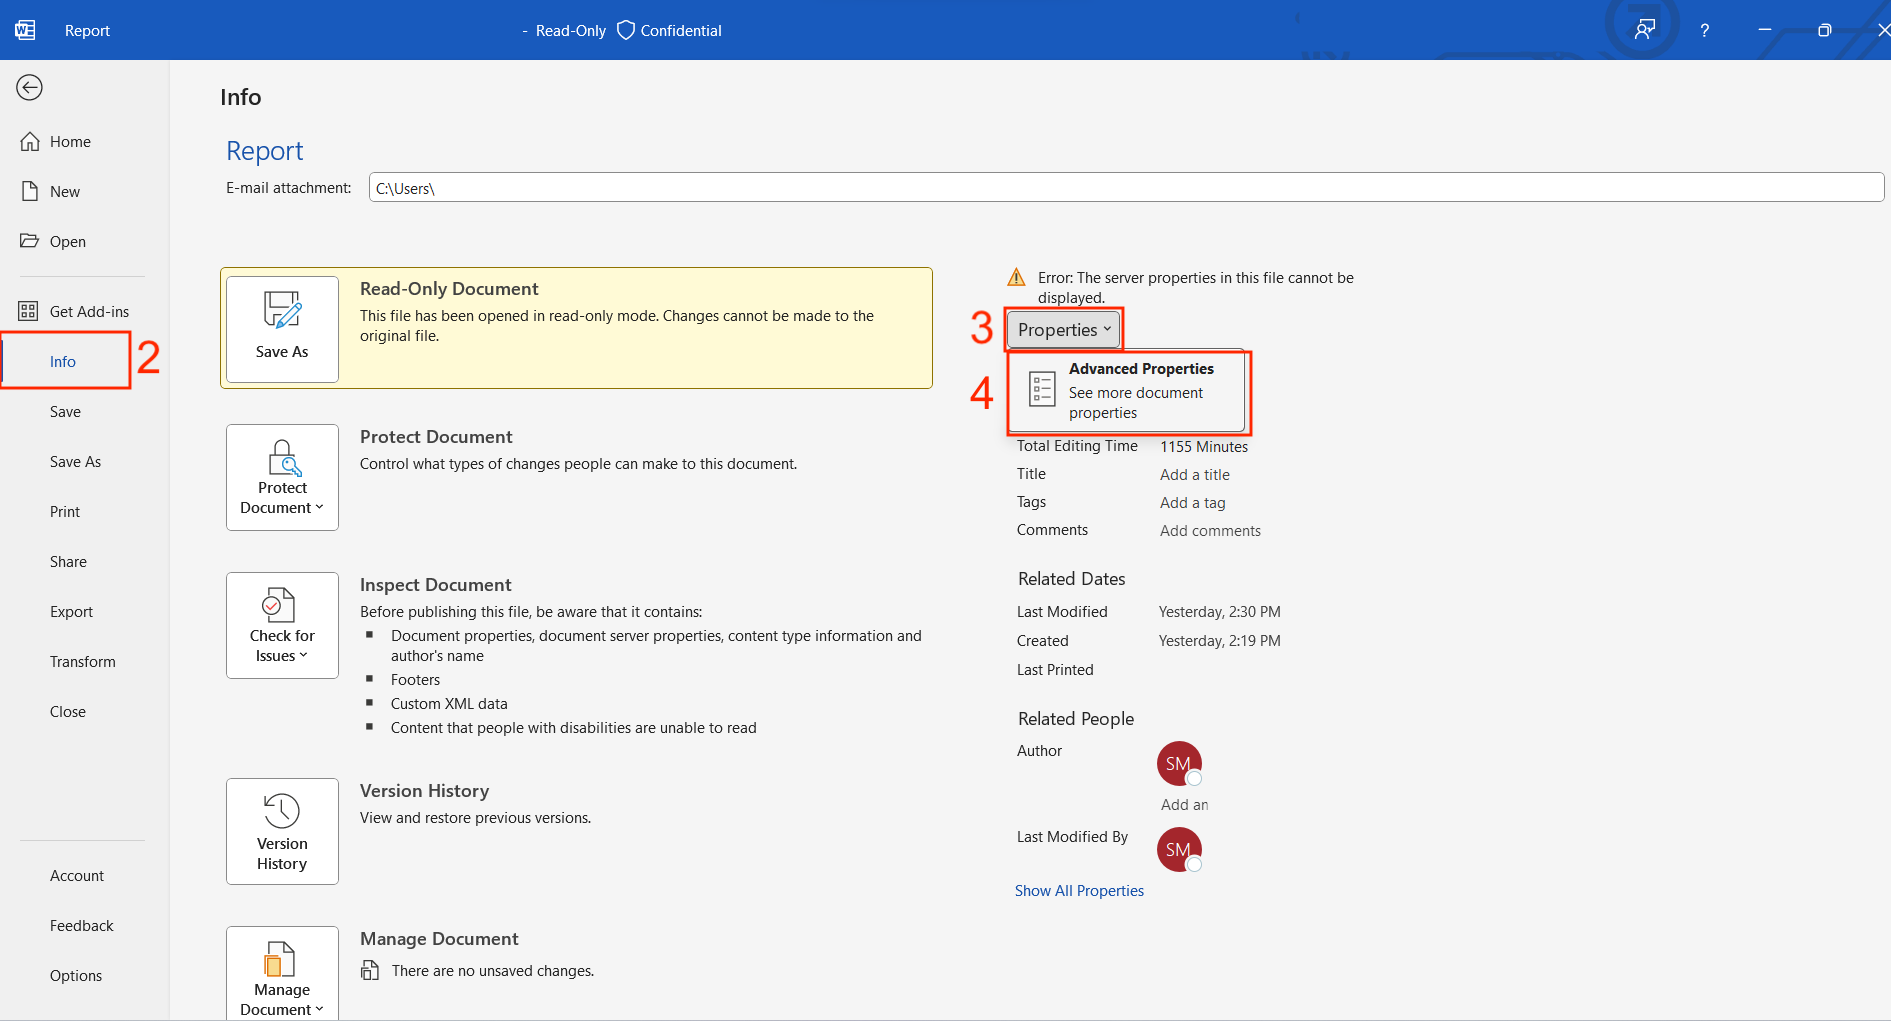
- Open the ‘File’ tab in your Word document.
- Navigate to ‘Info’.
- Click on ‘Properties’ at the top.
- Select ‘Advanced Properties’.
![]()
- Select the ‘Custom’ tab.
- To add UDAs as custom properties:
- In the ‘Name’ box, type uda_[YourUdaName] (e.g., uda_date, uda_delay, etc.).
- In the ‘Value’ field, type a space. This field needs to be populated in order to move on to the next step, but what is written will not impact the result.
- Click ‘Add’.
- Click ‘OK’ to save your custom property settings.
![]()

To incorporate the custom properties into your Word document’s body, follow these steps:
- In the desired part of your Word document, go to the ‘Insert’ tab.
- Select ‘Quick Parts.’
- Choose ‘Field’.
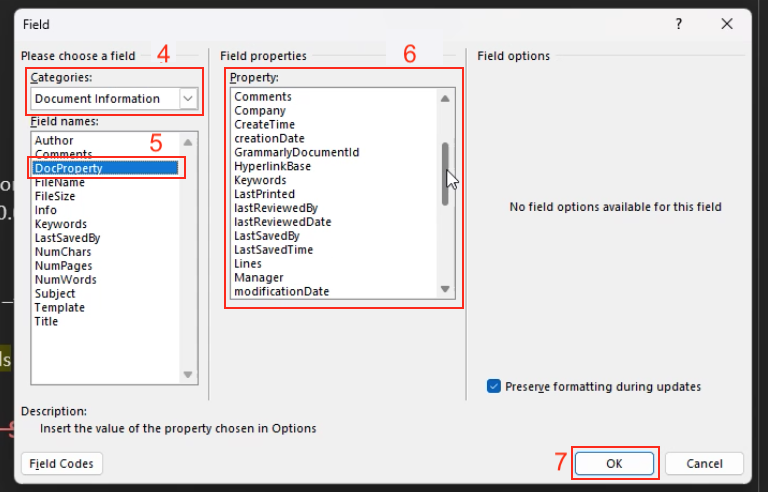
- In the ‘Categories’ field, select ‘Document information’.
- In the ‘Field names:’ field, choose ‘DocProperty’
- Select the desired custom property in the ‘Field Properties’ section.
- Click ‘OK’ to add it to your document.
![]()
Configuring in EPC:
- Change The Advanced Setting in EPC:
- In EPC’s Advanced settings, change the DOCUMENT_INJECT_CUSTOM_PROPERTIES setting from ‘false’ to ‘true’.
- Upload the Document to EPC:
- If the document is not already in EPC, upload it to the desired location.
- Automatic Updating:
- EPC automatically populates correct values when you upload, approve, publish, or review documents.
Custom Properties Available
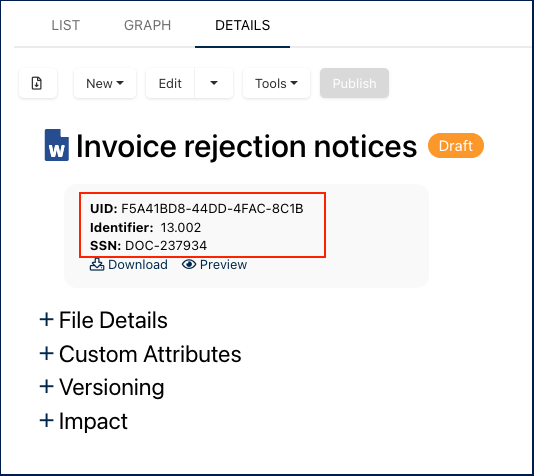
approvalStatus: Status of the document’s approval cycle (approved, pending, rejected)approvedBy: Name of the approvercomment: Comment left by the approver when approving or rejecting the documentcreationDate: Date when the document was created in EPClastReviewedBy: Reviewer of the document’s last review cyclelastReviewedDate: Date of the document’s last reviewmodificationDate: Last date the document was editedmodifiedBy: Name of the editorname: Name of the documentnodeId: UIDreferenceNumber: IdentifiersystemSerialNumber: SSN
![]()
status: Status of the document (published, in progress, approved, etc)version: Current version of the document in EPC
UDAs are now included as part of the injected properties with the uda_ prefix, allowing for comprehensive customization and integration of metadata into Word documents.
Haben Sie noch weitere Fragen?
Visit the Support Portal