Tagging Data
Use of manual tagging is an important step while creating or editing a template. It will define how objects, together with their properties and attributes will be treated in the next parsing while using the newly crafted template.
Tagging a document
- Select the text that needs to be tagged:
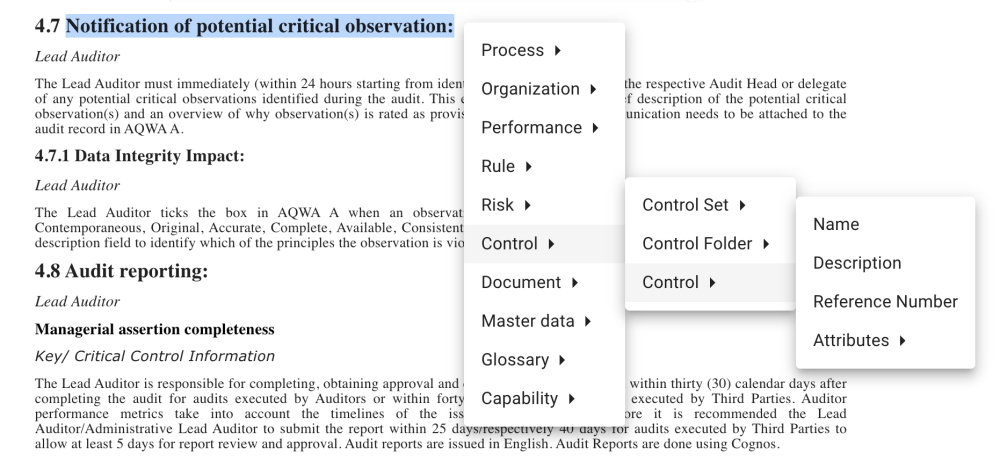
- Once selected, a contextual menu will appear on the screen, which will list the available object types available for tagging, for example:
- From the context menu, select the specific type and property or attribute to assign the correct tag against the object being tagged
- Repeat the tagging of each property and attribute for each different object types, which shows the Parser how to recognize e to each property or attribute
Table tagging
When a user wants to tag a table in the Parser, there are three approaches available:
- No cells in the Table are tagged as Headings within the Table.
- Tagging a Table with Headings in the first row, i.e. each Column in this row contains the heading for the values in each of the rows below in this column.
- Tagging a Table with Heading in the first column, i.e. each Row in this Column contains the heading for the values in the next column with each cell of each row.

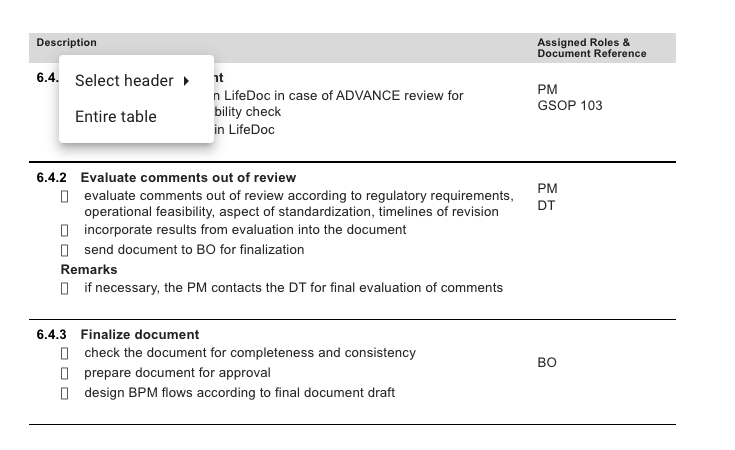
By clicking on the “ + “ two options will appear

- Creates associations of a table, row by row and an object on a different row cannot be associated.
- Parse a table by text style and column number, allowing text in the same style and in the same column to be tagged together.- Entire Table : will allow user to tag the whole table as an object that can be found later in rich text in EPC data

- Select header : will allow the user to define what type of header is the table “ Columns header or Rows Header”.

Once this first step is done, user will tag cells as individual objects.

When the table tagging is completed, when parsed, all the tables with the same structure will be tagged accordingly to the initial tagging.
Haben Sie noch weitere Fragen?
Visit the Support Portal


