
Projects can be created and maintained from the project screen. From within a project hours can be clocked and billed and rates can be set, and much more.
Go to Hours/ Projects -> Projects. Click on ‘New’ in order to create a new project. The next screen will appear:
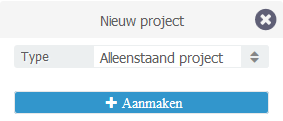
Select single project, the following window will appear:
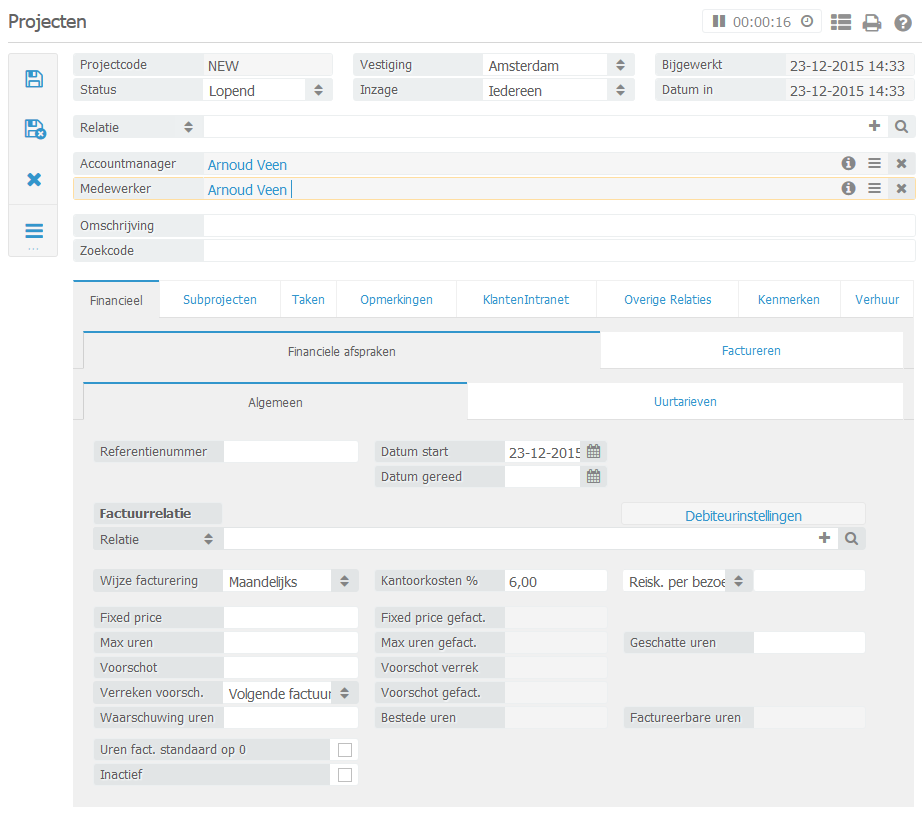
The account manager and employee will be auto completed along with the user who created the project. This can be modified if necessary.
Contact: Select contact at the top of the Project’s contact screen. The contact may have not yet been filled in. In that case first select the contact type and then click on the “+”. The contact can now be entered. When this is completed click on ‘Save/ Quit’ after which the contact will be linked to the project.
Description: Enter the project’s descripton, the description’s search code will be automatically applied. Change this if necessary. Click on ‘Save’ to save the project.
Go to the ‘Project Info’ tab’
Quotation/Reference number: If applicable enter the customer’s quotation number or the reference number.
Start date: The start date is automatically set to the present day. This can be changed if necessary.
Contact: If the invoice’s contact differs from the project’s contact, then add the invoice rule.
[Tip] Tip
Make use of this function as well: If you wish to bill to contact B of company X, while the client is contact A of company X this is seen as two separate contacts in BaseNet.
Specify the agreed rates under invoice contact field.
Method of billing: Here you can choose between monthly, quarterly or annually if applicable/ billable. This is solely meant as a search tool for project billing. The next paragraph will elaborate on project billing.
Warning in case of hours greater than (..): If you wish to receive a warning notice when reaching a certain amount of hours, this can be set here.
Estimated hours: Here when specifying the amount of hours, a status per project will appear in the search screen of the estimated hours.
Office expenditures: Enter the percentage of office expenditures which you wish to be taken into account when clocking hours.
Fixed price: When the same rate applies to all activities, specify this here. Continual expenses or separate invoice fields will be billed.
Maximum hours: Specify the maximum amount of hours which you wish to bill. When exceeding the amount of hours, those additional hours will not be billed, even when adding them to the clocked hours/ invoice.
Retainer: If you wish to initially bill your client a retainer, this can be specified here. When billing the summary will first be created which only contains the retainer. The hours and/ or additional expenses will be ignored when billing the retainer invoice.
Deduct retainer: Here you can specify whether you wish to deduct the billed retainer in the following invoice or when the project status is changed to ‘Ready’.
Travel expenses: Here you can choose between travel expenses per visit or per distance. Now enter the desired amount. When clocking hours you can now specify whether this should be billed.
3.2. Billing from within a project
Go to the ‘Financial’ tab
In the Hours/ Rates tab you can set the project’s default rate. You can also specify a modified hourly rate per employee.
The default rate for all projects can be set through Manage -> Company Settings -> Billing -> Invoice Settings.
In the “Invoice Fields” tab separate invoice fields can be created which should be billed towards the client.
Product/ Art: Select which product you which to bill.
Enter the amount of hours.
Description: The project’s description will be automatically added here. If necessary this can be edited.
Price: Specify the amount.
[Tip] Tip
The rate/ price per product is displayed by default excluding tax. If you wish to enter the price including tax, please contact your account manager at BaseNet.
Click on ‘Add’ to add an invoice field to the project, in order to prepare it for billing.
To create the actual invoice go to the ‘Invoice’ tab. Click on Billing, the invoice will now be created.
The field which appears in the screen is the invoice. If at this stage you wish to modify it, double click on the field. The invoice will now appear in a new window.
You can open the invoice in Word for the purpose of a print out by clicking “Print invoice”. You can also open the project directly from the invoice by clicking the ‘Print’ button.
Modifications to the invoice should only be made from within BaseNet and not Word!
3.3. Task management from within the project
Tasks can be created and managed from the ‘Task’ tab. Click on ‘New’ in order to create a task. Go to ‘Create Task’. Here you will find further explanation on how to create a task.
After one or more tasks have been created, the following screen will appear, when a task is ready to be performed.
The tasks are ready to be performed. The ‘Status’ column shows the task’s colour.
Green: Both the due date as well as the ready date have not yet been reached, the task does not yet have to be performed.
Orange: The due date has been exceeded, the ready date has not yet been reached. The task should be performed within this time span.
Red: The due date and ready date have been exceeded. The task should have been performed by now.
After completing a task, the status can be changed to Ready.
3.4. Remarks
In the “Remarks” field, two kinds of remarks can be added.
Remarks: In this field you can add default remarks appertaining to the project. These remarks will only be accessible from this screen.
Alert notice: When creating an Alert notice, a yellow icon with an exclamation mark will appear in the project. This icon will also be displayed in search results in which the project might appear. The purpose of the Alert notice is to have it be visible at all times, when a project is being searched. When holding the cursor above the icon, the contents of the Alert notice will appear.