
Through the “Matter billing” screen you can send invoices appertaining to matters. Matters are only shown in this search screen when billing an item is applicable. It is important to note that your matters should have the genuine status so that they are easily referable. Pay good attention which status(es) you search for in this search screen.
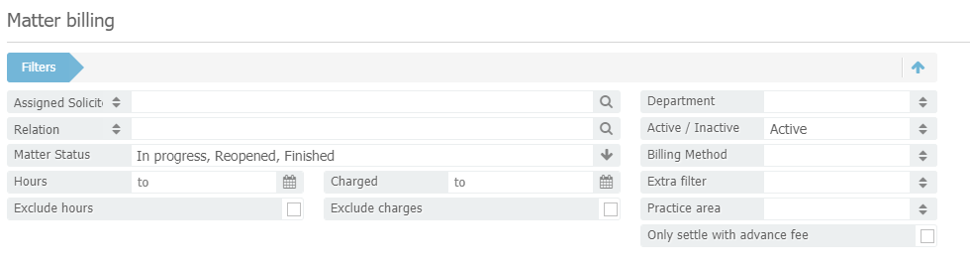
Through the “Hours until.” field and “Additional costs until.” you can easily filter based on hours and additional costs until the desired date/ time span. This could be useful when, for example, you wish to send invoices appertaining to hours and additional expenses spanning until a certain period or date.
p(banner tip. When there are additional expenditures present and you wish to only include hours in an invoice, you can check the “Exclude additional costs” box. This way, the additional costs are not included. Of course this option is also possible the other way round, when you only wish to invoice additional costs.
Click on  to see a list of billable matters which can be invoiced. In the list you will find what has not yet been completed in regards to hours, additional costs, retainers, fixed rates and additions.
If you wish to make adjustments to the hours, you can easily do this by way of clicking “open hours” from the list. A new window opens listing the hours which are ready for billing/ invoice. At this point, you still have the option to make adjustments to descriptions, etc. If you would like to make adjustments related to other matters such as retainers, fixed prices, additional costs or additions, you can double click on the matter.
At this point the invoices are still individually adjustable. This can be done by clicking the “Open invoice” link:” followed by the created invoice number. A new window will appear as shown below:
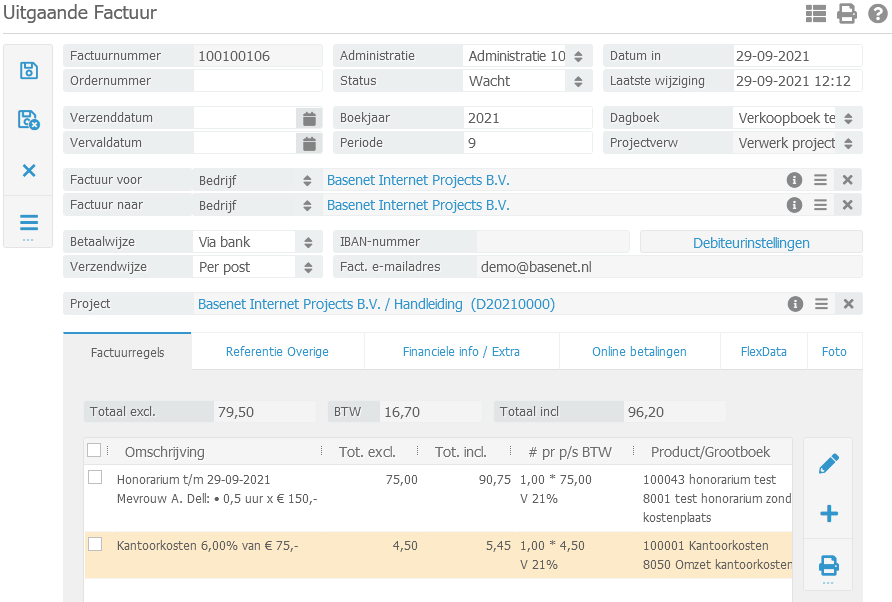
The invoice is still manually amendable in this screen. Additional values can also be added.
After proof reading you can create the invoices. This can be done by checking the box next to the concerning matters from the list and subsequently clicking the  invoices button.
The invoices will now be created and after completion a new window will appear saying that a X amount of invoices have been created. This window only serves as a confirmation and to check your actions.
To print the invoices after it has been created, click on the  button. The screen below will be shown subsequently.
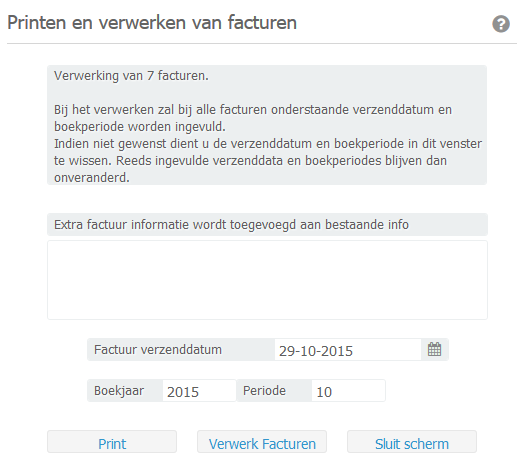
The text field provides the option to specify a text which will be added to all printouts. The information that has been entered in ‘Invoice send date’, ‘Billing year’ and ‘Period, will be applied in the invoice during the processing.
Click on to print out the invoices.
If all invoices are correct, it is time to process the invoices. By doing so the invoices which have just been created will receive “Billed” status and will be laid through to your administration.
For this purpose, you should once again check and mark all the matters and click the button to process the invoices.
// This process is NOT reversible.
To make incidental revisions to an invoice, the invoice has to be credited.
You have now created the invoices. The matters will no longer be listed unless hours or costs have been billed towards it.